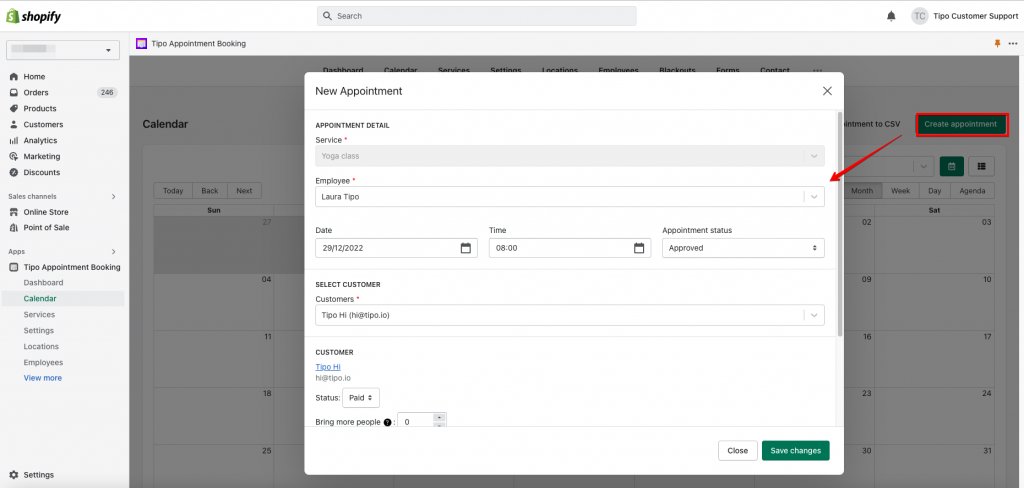
Create an appointment
This feature allows you to manually make an appointment with your customers in the app back end. Your customers should have registered an account in your Shopify store already.
Steps to manage
- From the app admin page > click Calendar > click Create appointment
- First, fill the customer email in the Customers field
- Then select option to complete other fields Please note that there are 2 required fields you need to fill out: Customers and Service
- Tick to the checkbox Send email notification to the customers if you want to inform your customer about the new appointment you have created
- Click Save to finish
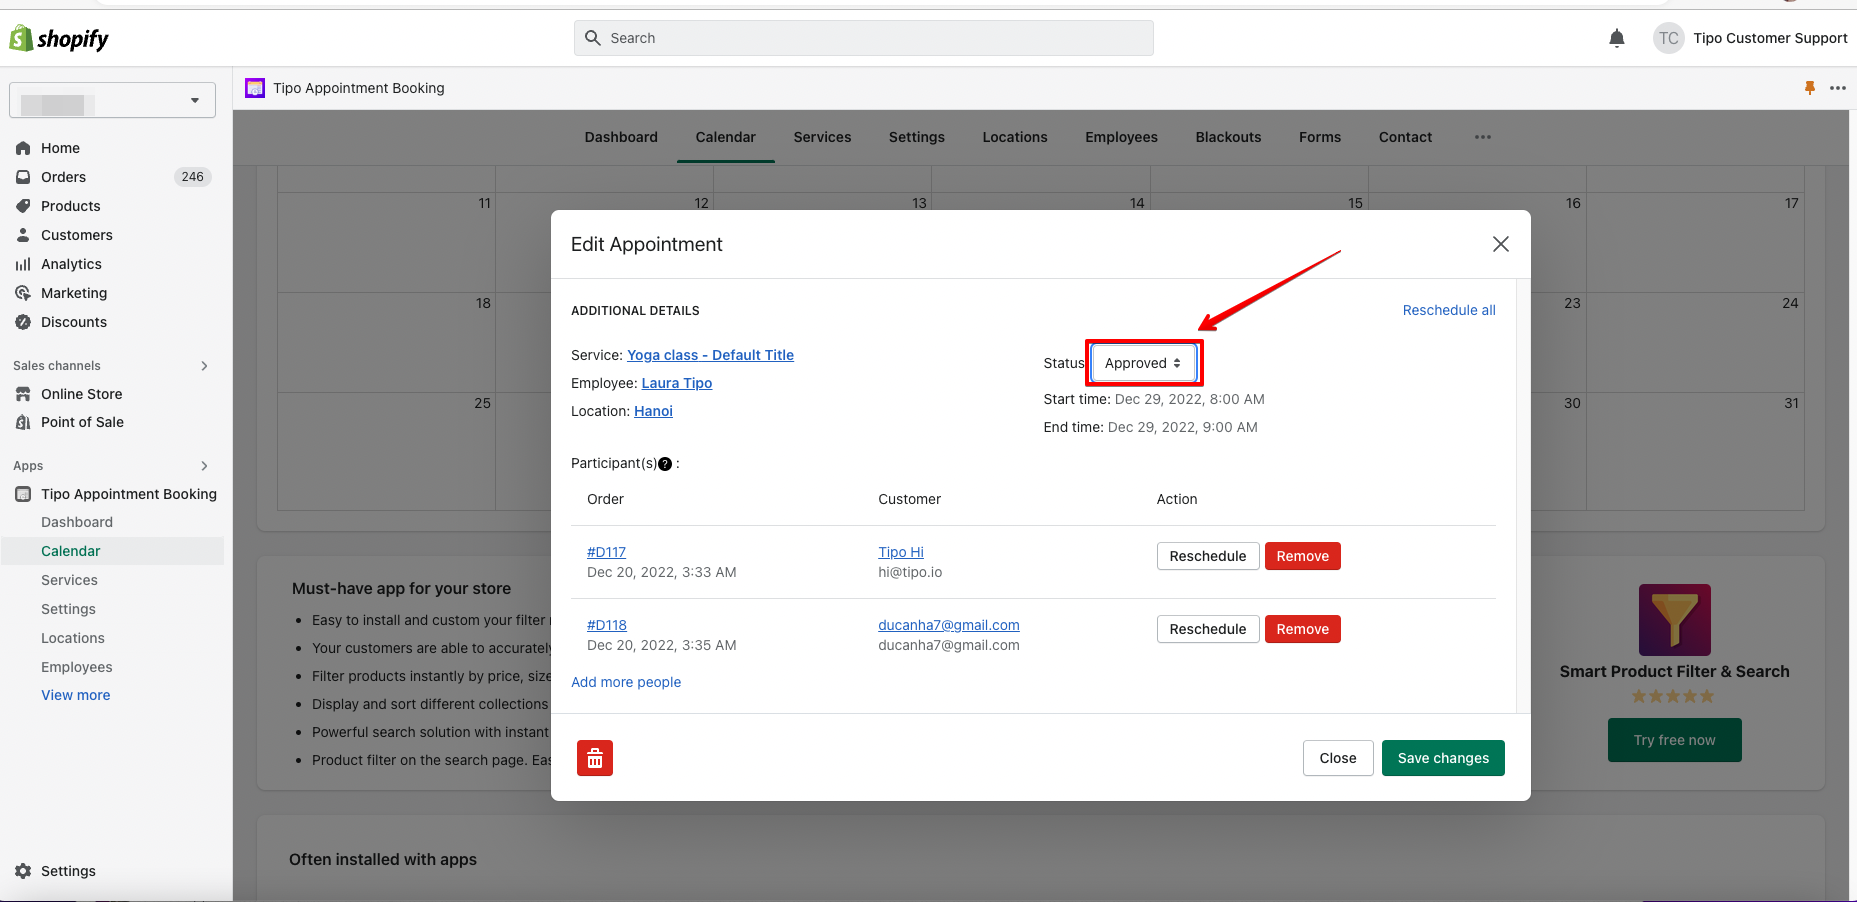
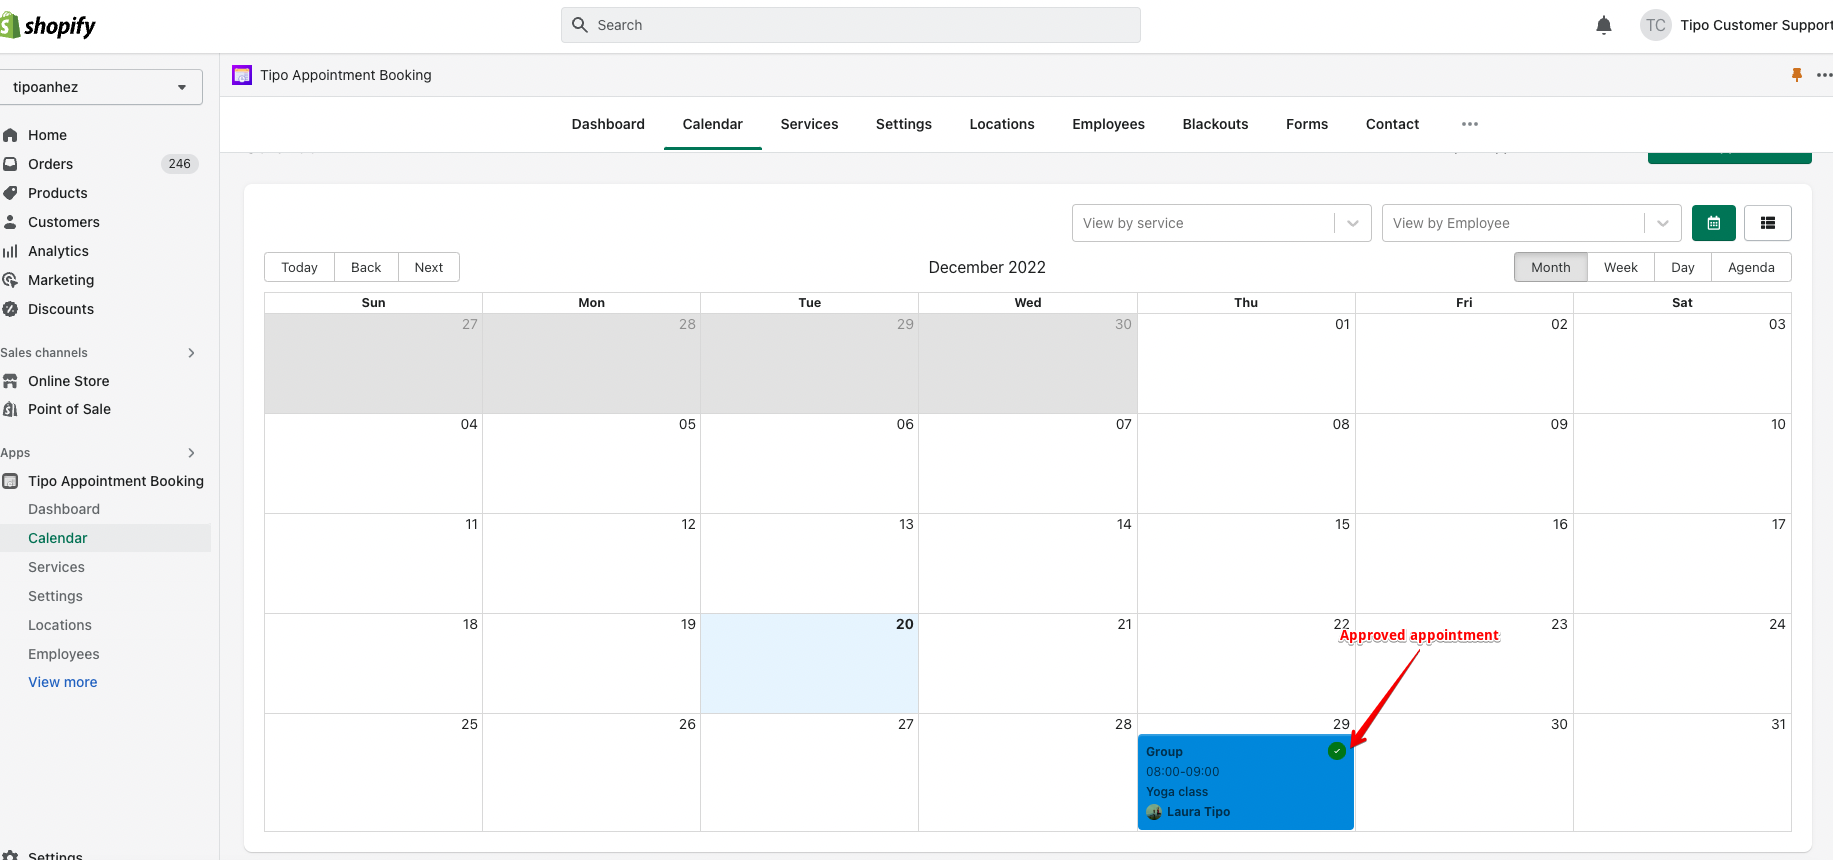
Approve an appointment
- From Dashboard or Calendar, click on the pending appointment you want to approve
- From Edit Appointment window > Appointment status
- Select Approved
- Click Save
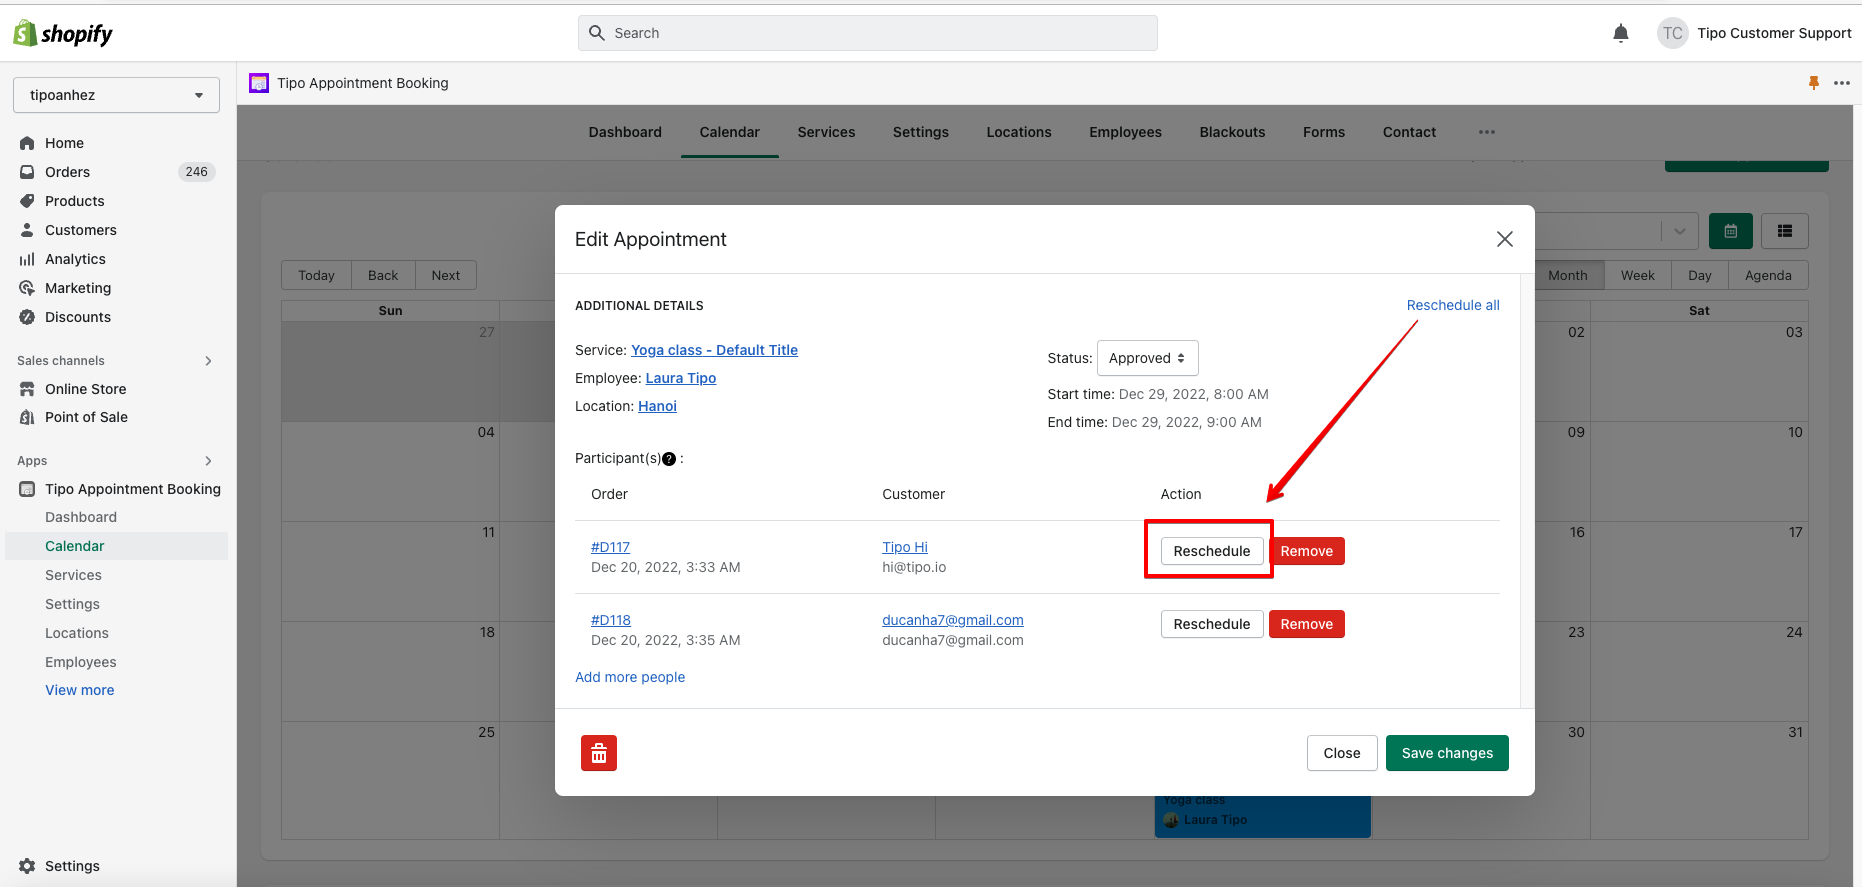
Reschedule an appointment for a customer
- From Dashboard or Calendar, click on the appointment you want to reschedule
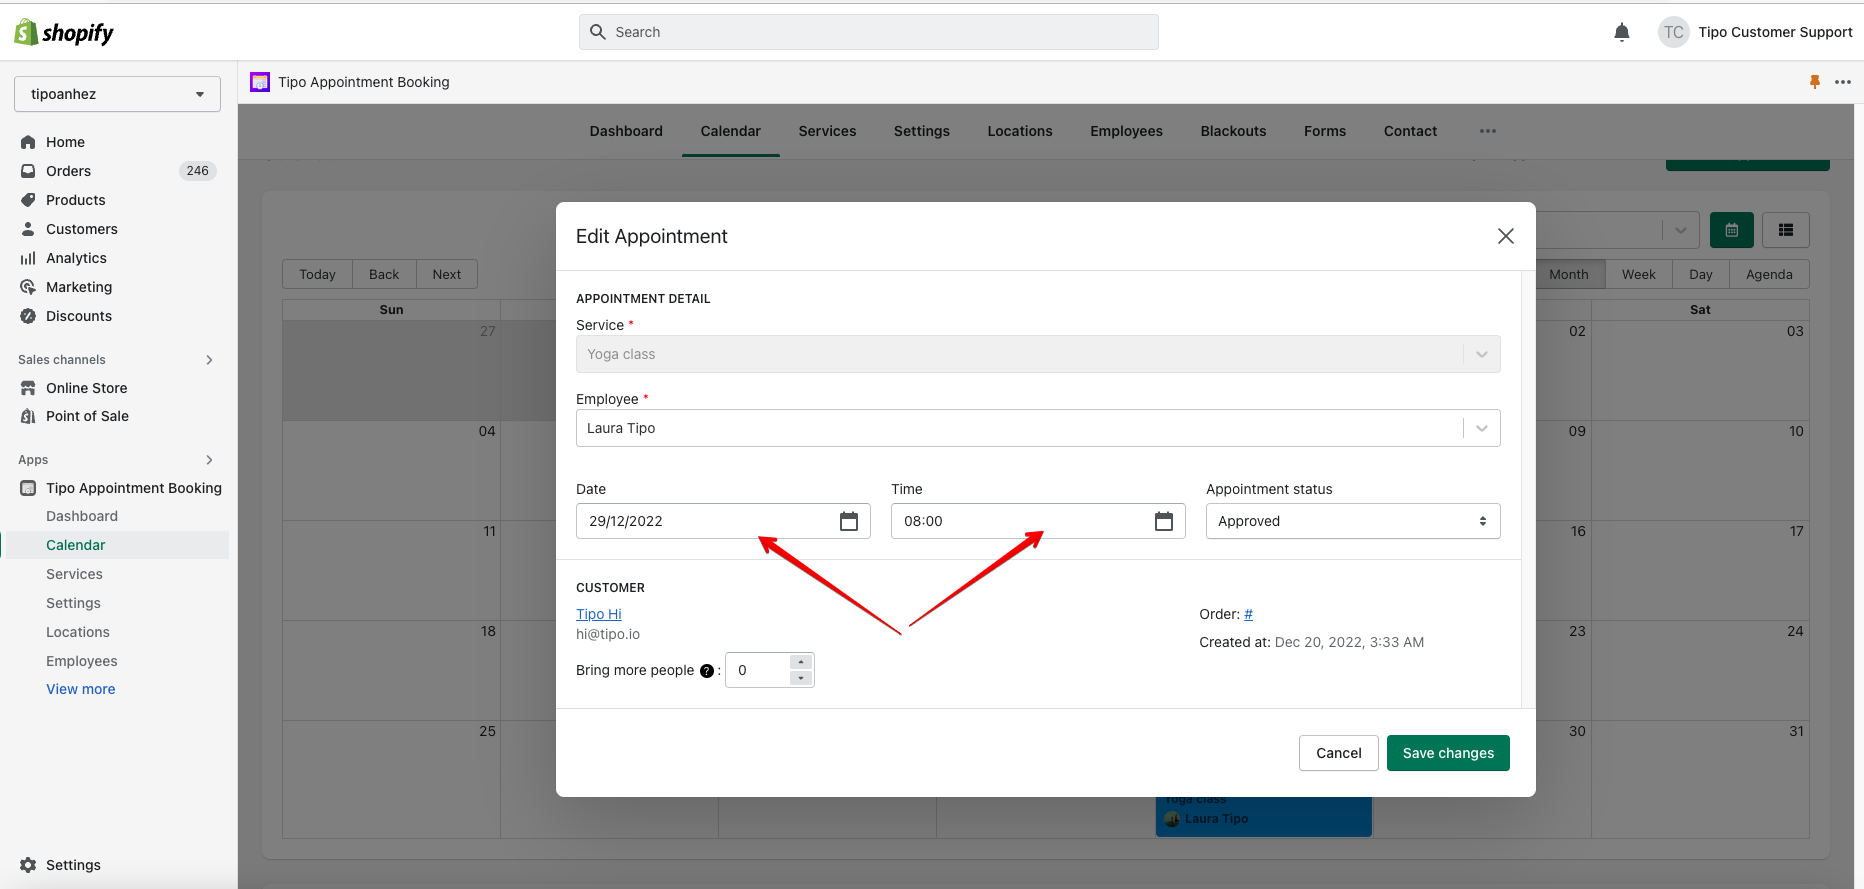
- From Edit Appointment window > select another Date and Time
- Put a tick on Send email notification to the customers
- Click Save
Reject an appointment
- From Dashboard or Calendar > click on the appointment you want to reject
- From Edit Appointment window > Appointment status
- Select Reject& Not refund
- Click Save

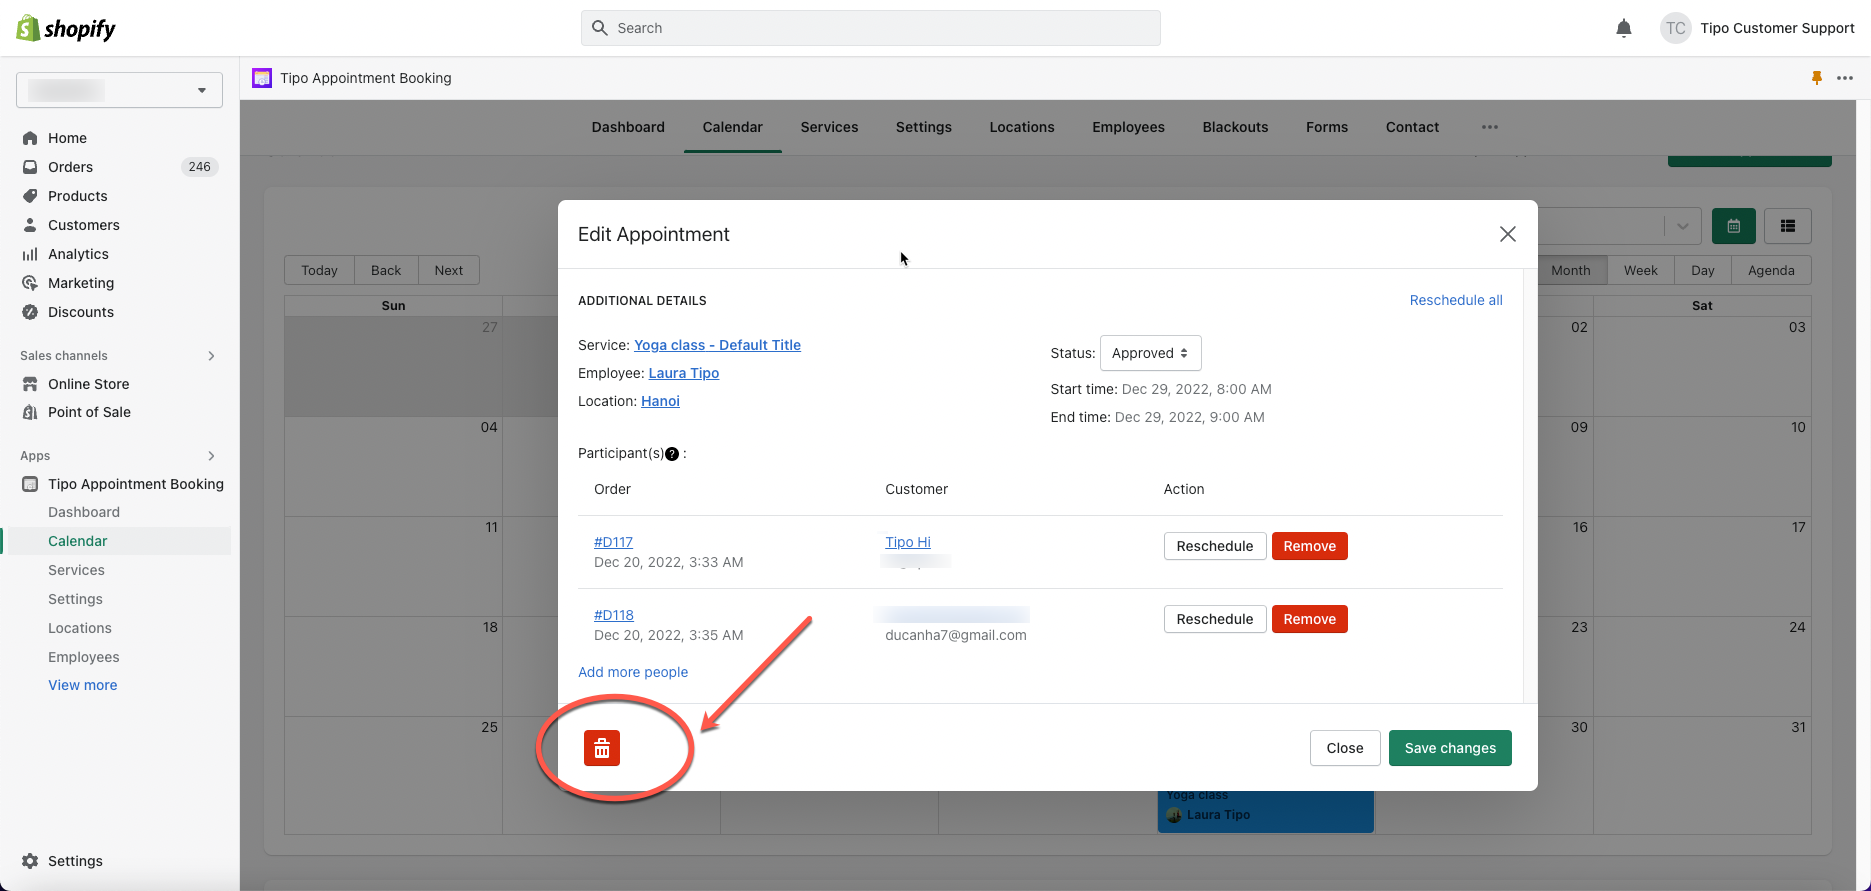
Delete a appointment
- From Dashboard or Calendar > click on the appointment you want to remove
- From Edit Appointment window, click Delete icon at the bottom
- Confirm to delete it
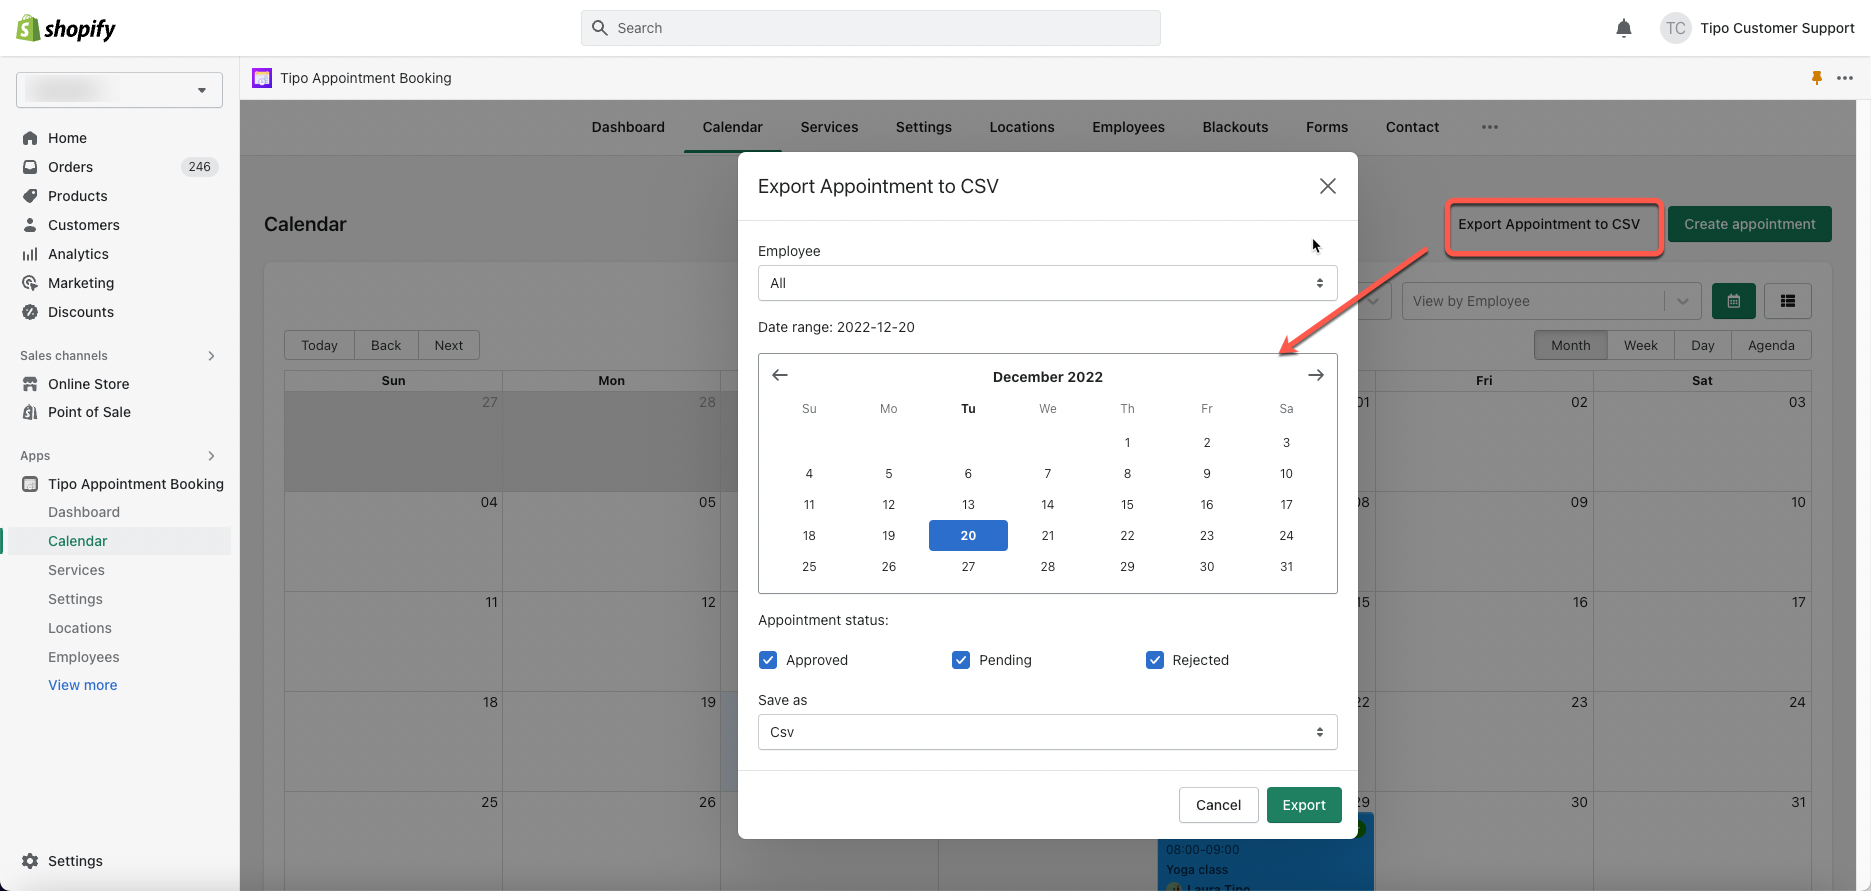
Export Appointments to CSV
1. From the app admin page > click Calendar > Export Appointment to CSV
2. A dialog will show up, here you can:
- Filter appointments to export by employee
- Select the date range of the appointments you want to export
- Select the appointment status you want to export
3. Choose Save as CSV or Excel
4. Click Export