Right after the app is installed, a “default location” and “any employee” will automatically be generated according to your store attributes.
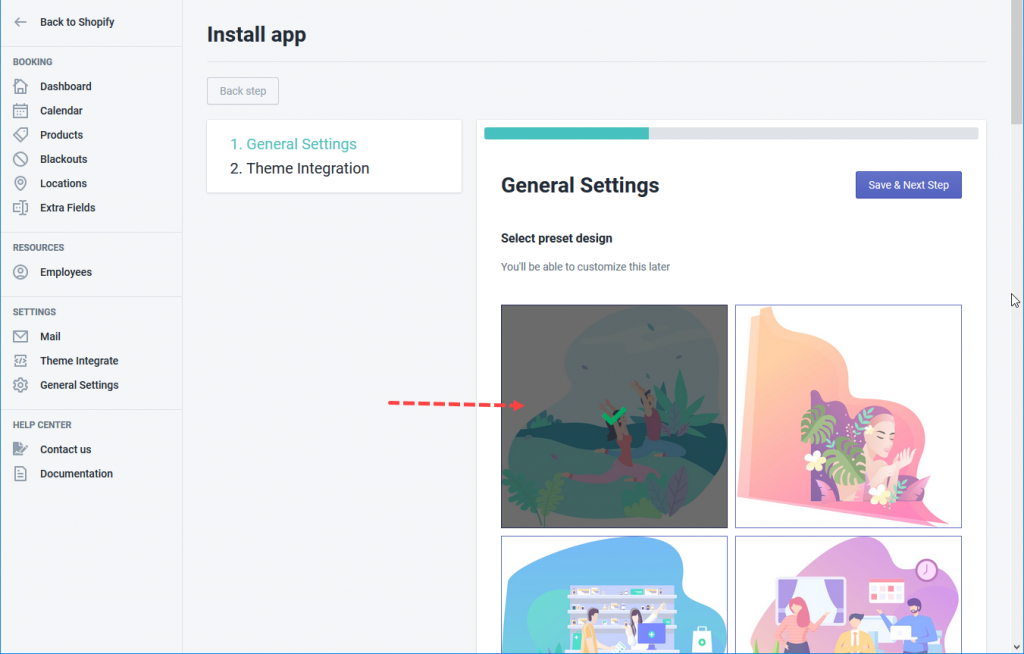
General Settings
- Select a preset design that matches your store
- Show/Hide “Add to cart” and “Buy now” button
- Set up general available time which can be applied to your booking products later
- Decide to use Multiple employees and Multiple locations or not
- Add suitable text to your booking form
- Click Save & Next Step
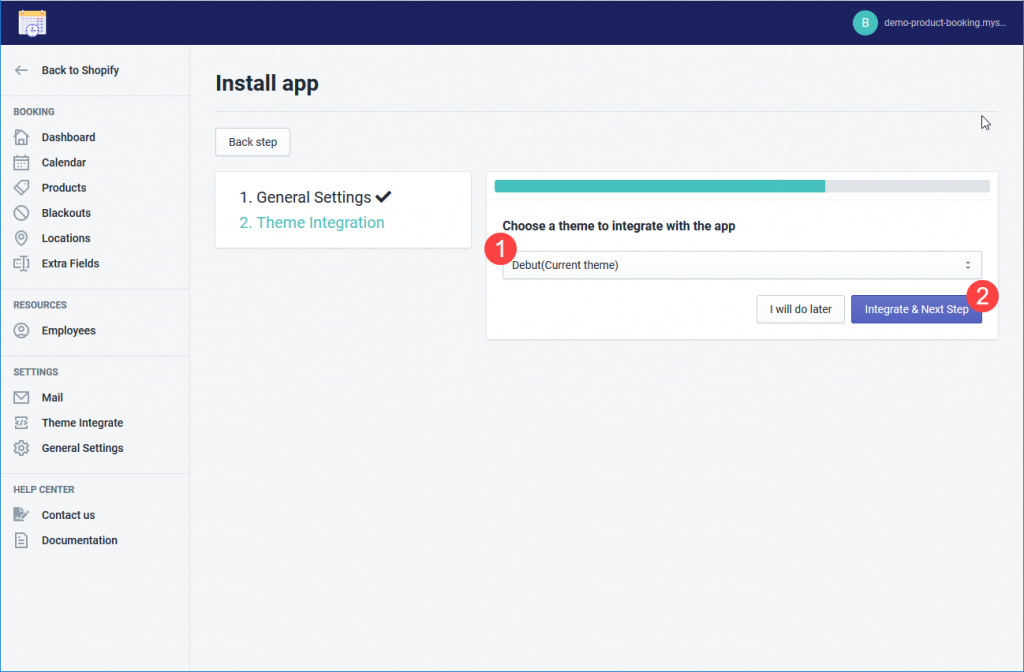
Theme Integration
- (1) Select a theme > (2) Integrate & Next Step
Skip this step by clicking “I will do later”
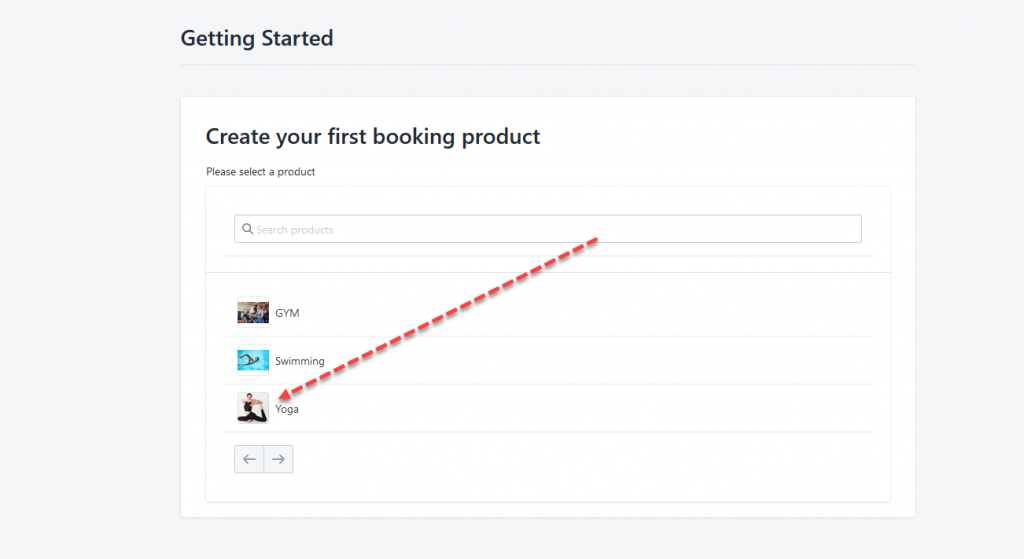
Set up Booking product
- Select a product/service to apply the booking function
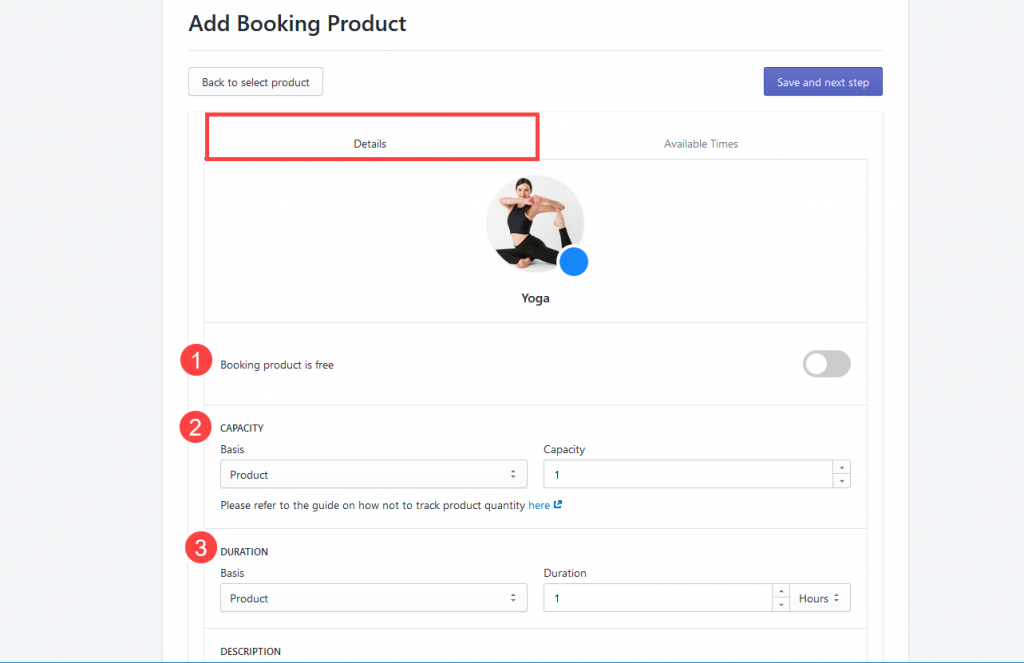
- Configure Product details
- If you do not want to charge your customers, please enable Free booking.
- Capacity: The maximum number of available slots which can be set according to product or variant
- Duration: The time period of a booking product/service which can be set according to product or variant
- Add Booking description if any
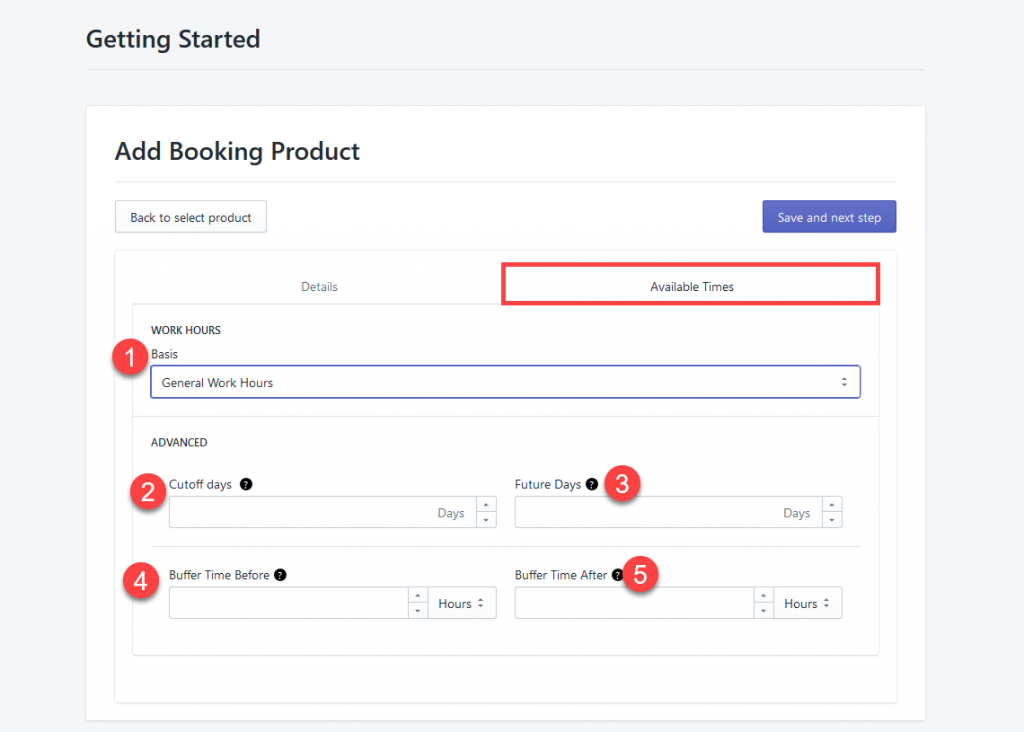
- Configure Product available times
- Set up product available time base on Product time, Employees time or General work hours
- Cutoff days: This setting specifies when to cutoff the date for accepting bookings. For example, if it is set to 1 day then the datepicker will only allow you to choose from tomorrow on (i.e. not today).
- Future days: This setting specifies the maximum number of days in the future that the customer can book. For example, if the value is set to 60, the max future availability that the customer will see will be 60 days from today.
- Buffer time before: Time needed to prepare for the appointment, when another booking for same service and employee cannot be made.
- Buffer time after: Time after the appointment (rest, clean up, etc.), when another booking for same service and employee cannot be made.
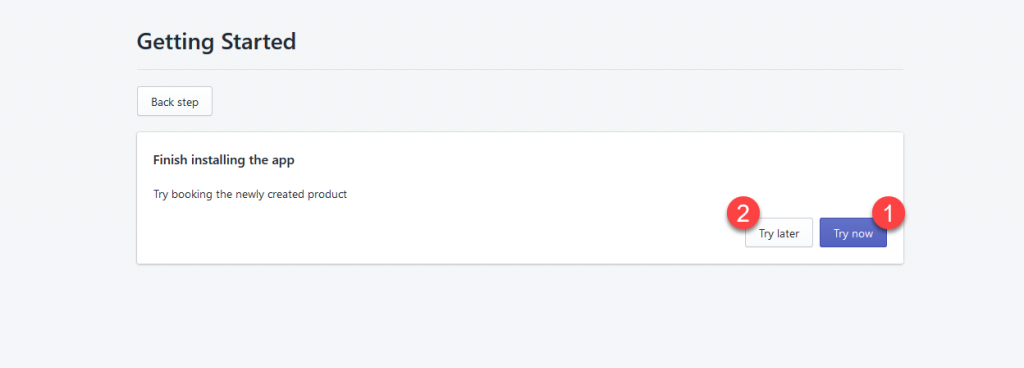
Preview
- Try now: Open the booking products in the front end of the integrated theme in a new tab as well as navigate to Dashboard in the back end.
- Try later: Navigate to Dashboard if clicking this button

