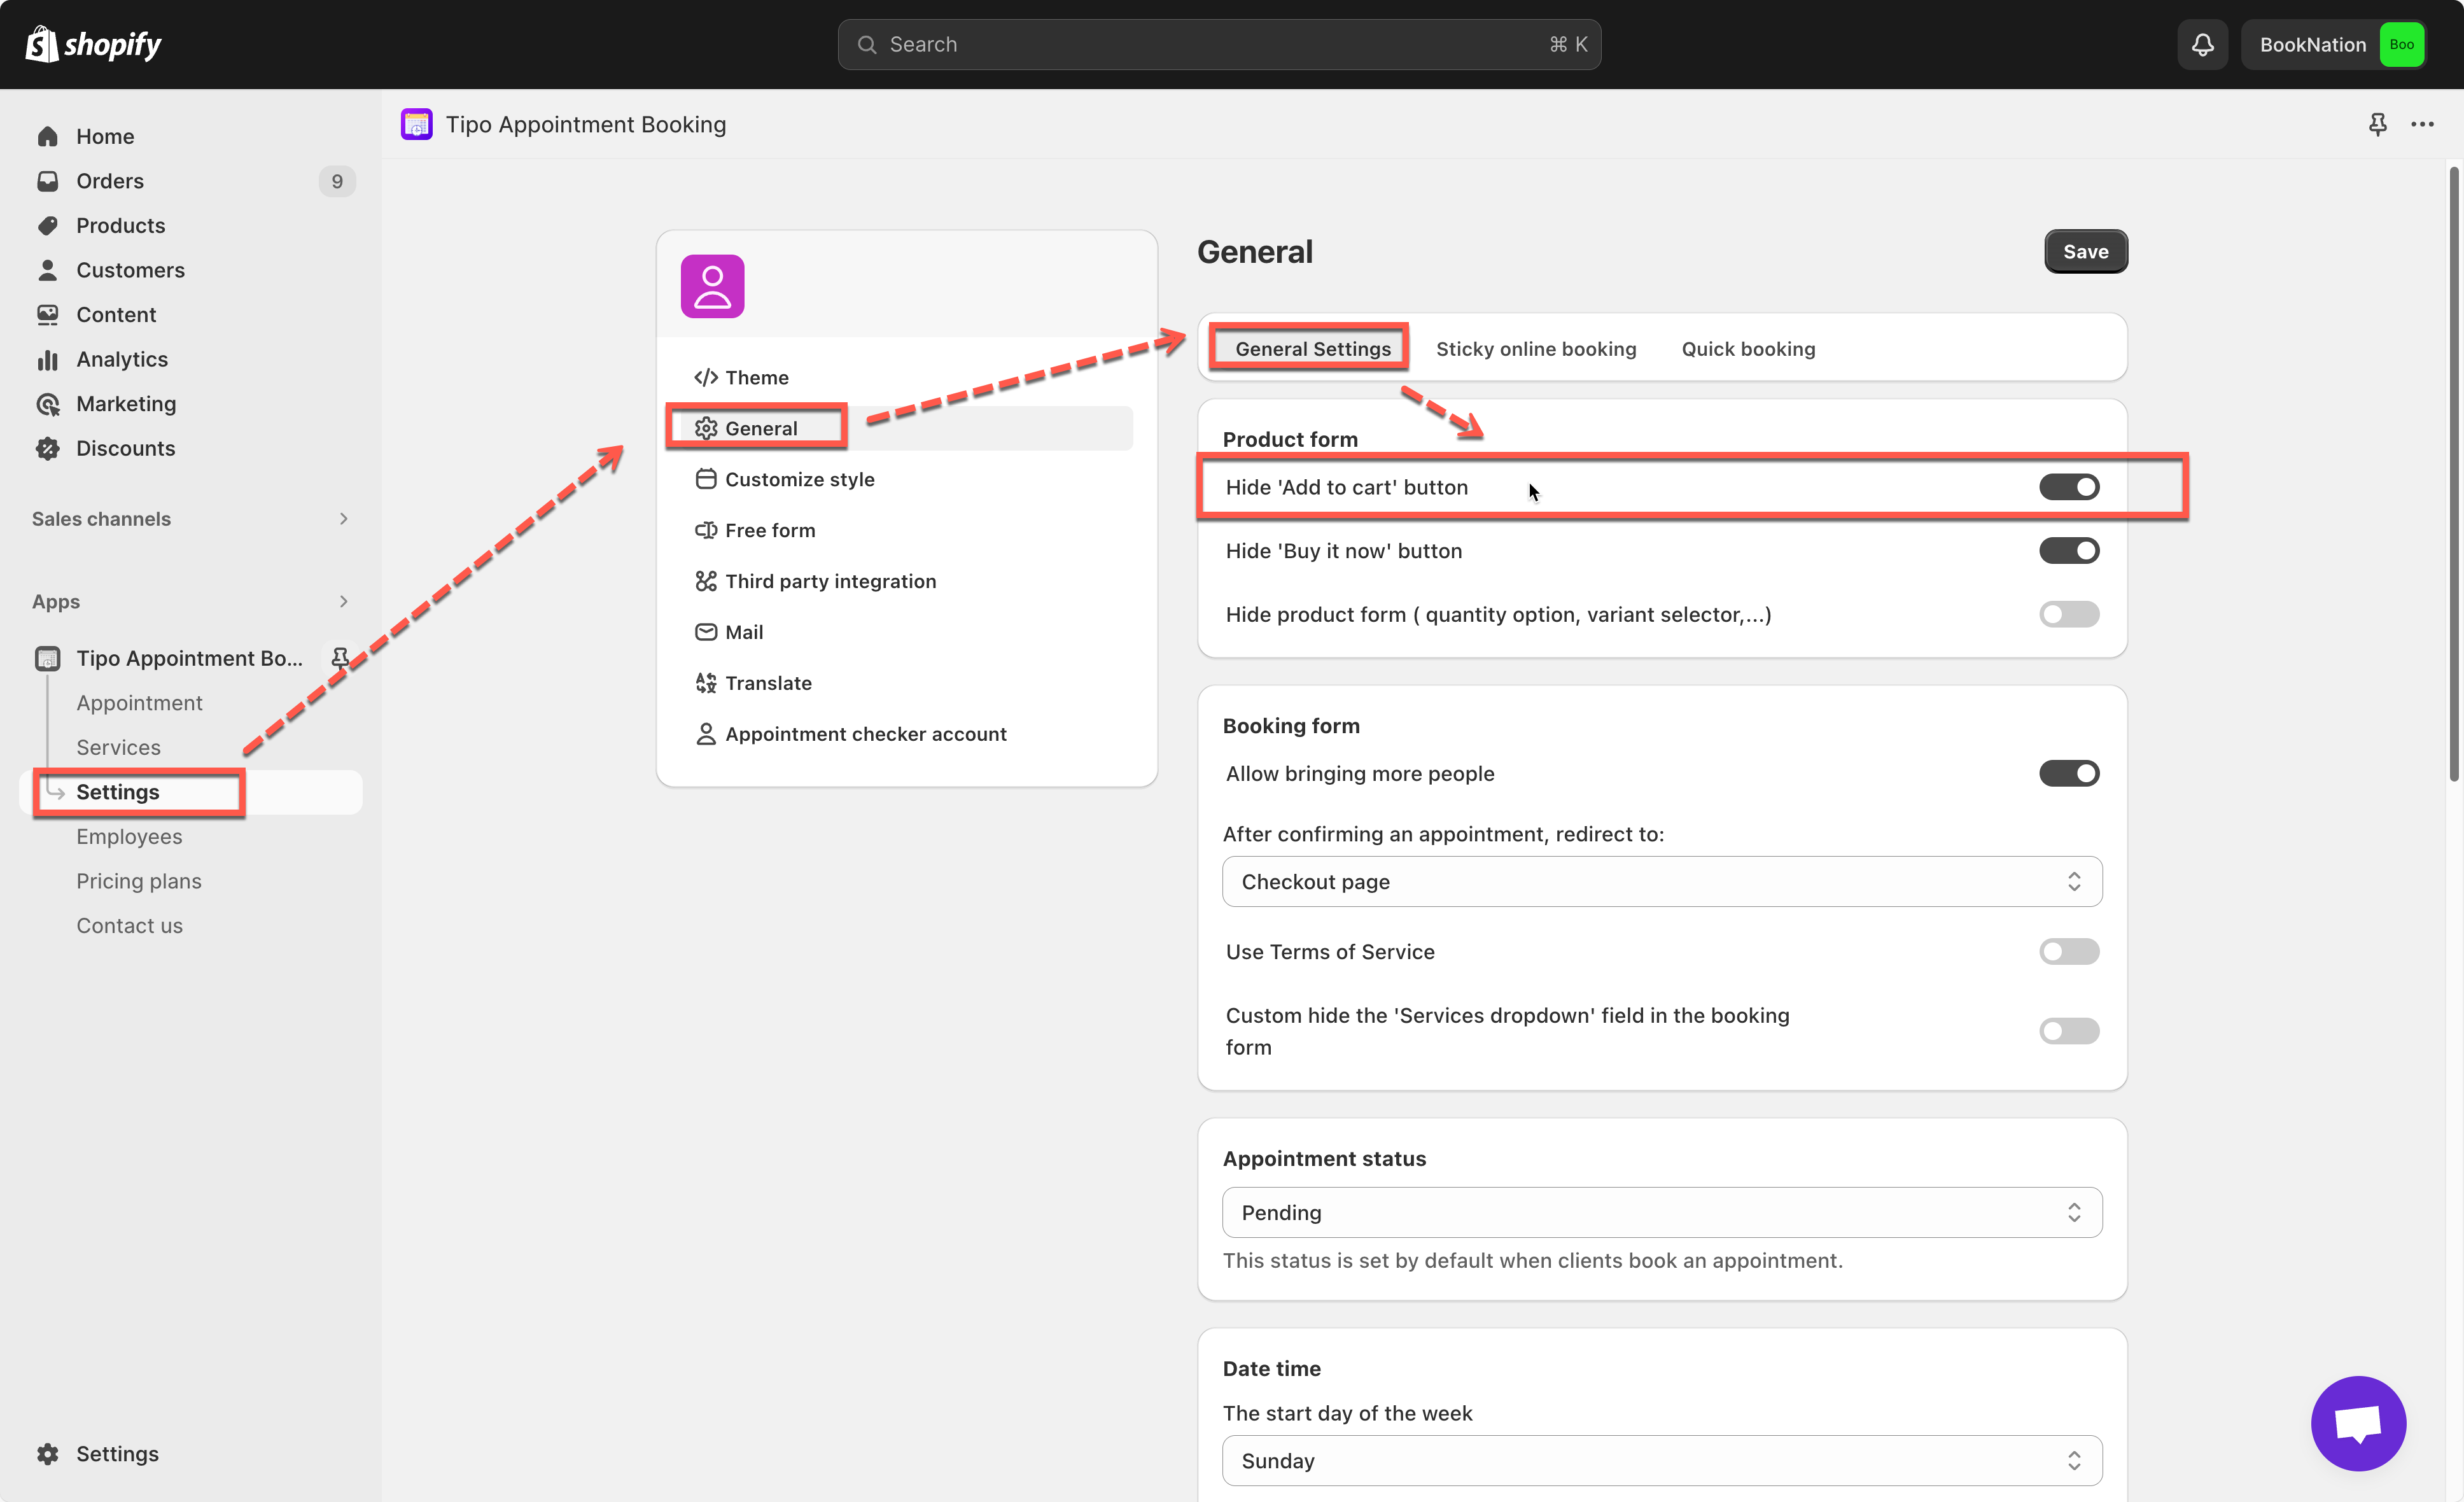
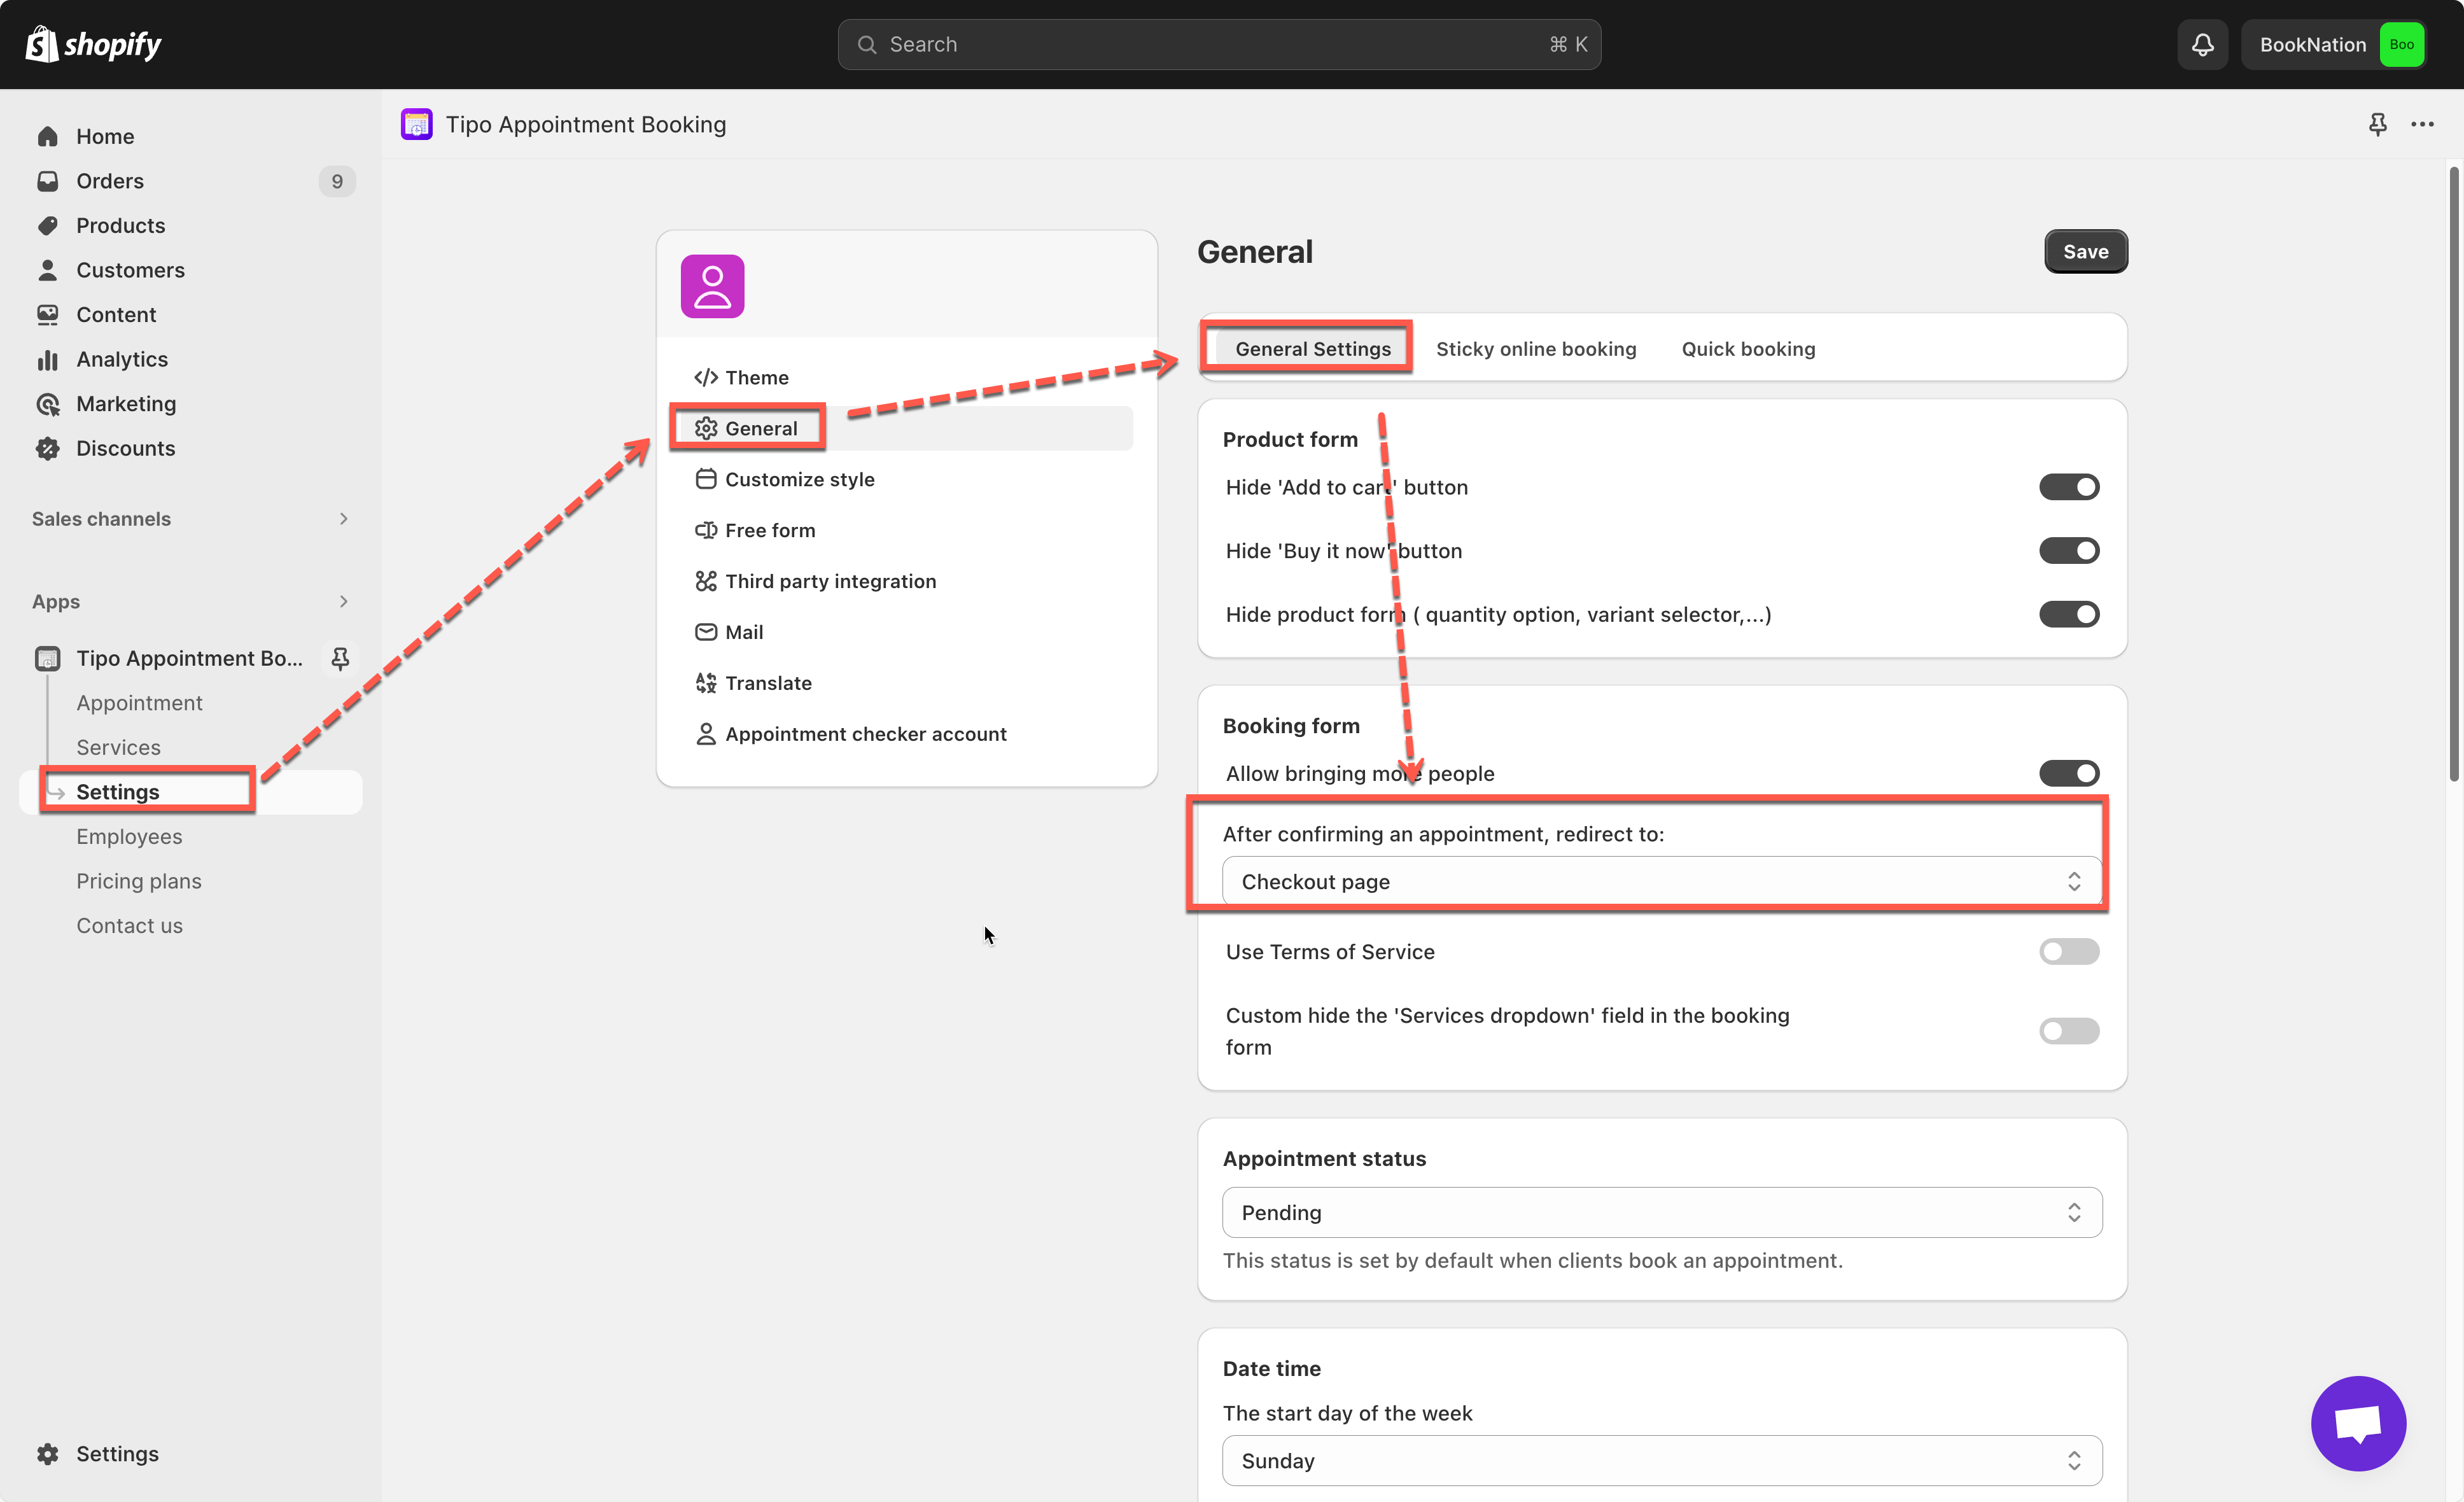
Hide “Add to cart” button
This function allows you hide the add to cart button on the product page(s) that the booking form shows up.
Steps to manage
- From the app admin page > click Settings > General
- In General setting > Product form > enable Hide ‘Add to cart’ button option
- Click Save
Hide “Buy it now” button
This function allows you hide the Buy it now button on the product page(s) that the booking form shows up.
Steps to manage
- From the app admin page > click Settings > General
- In General setting > Product form > enable Hide ‘buy it now’ button option
- Click Save

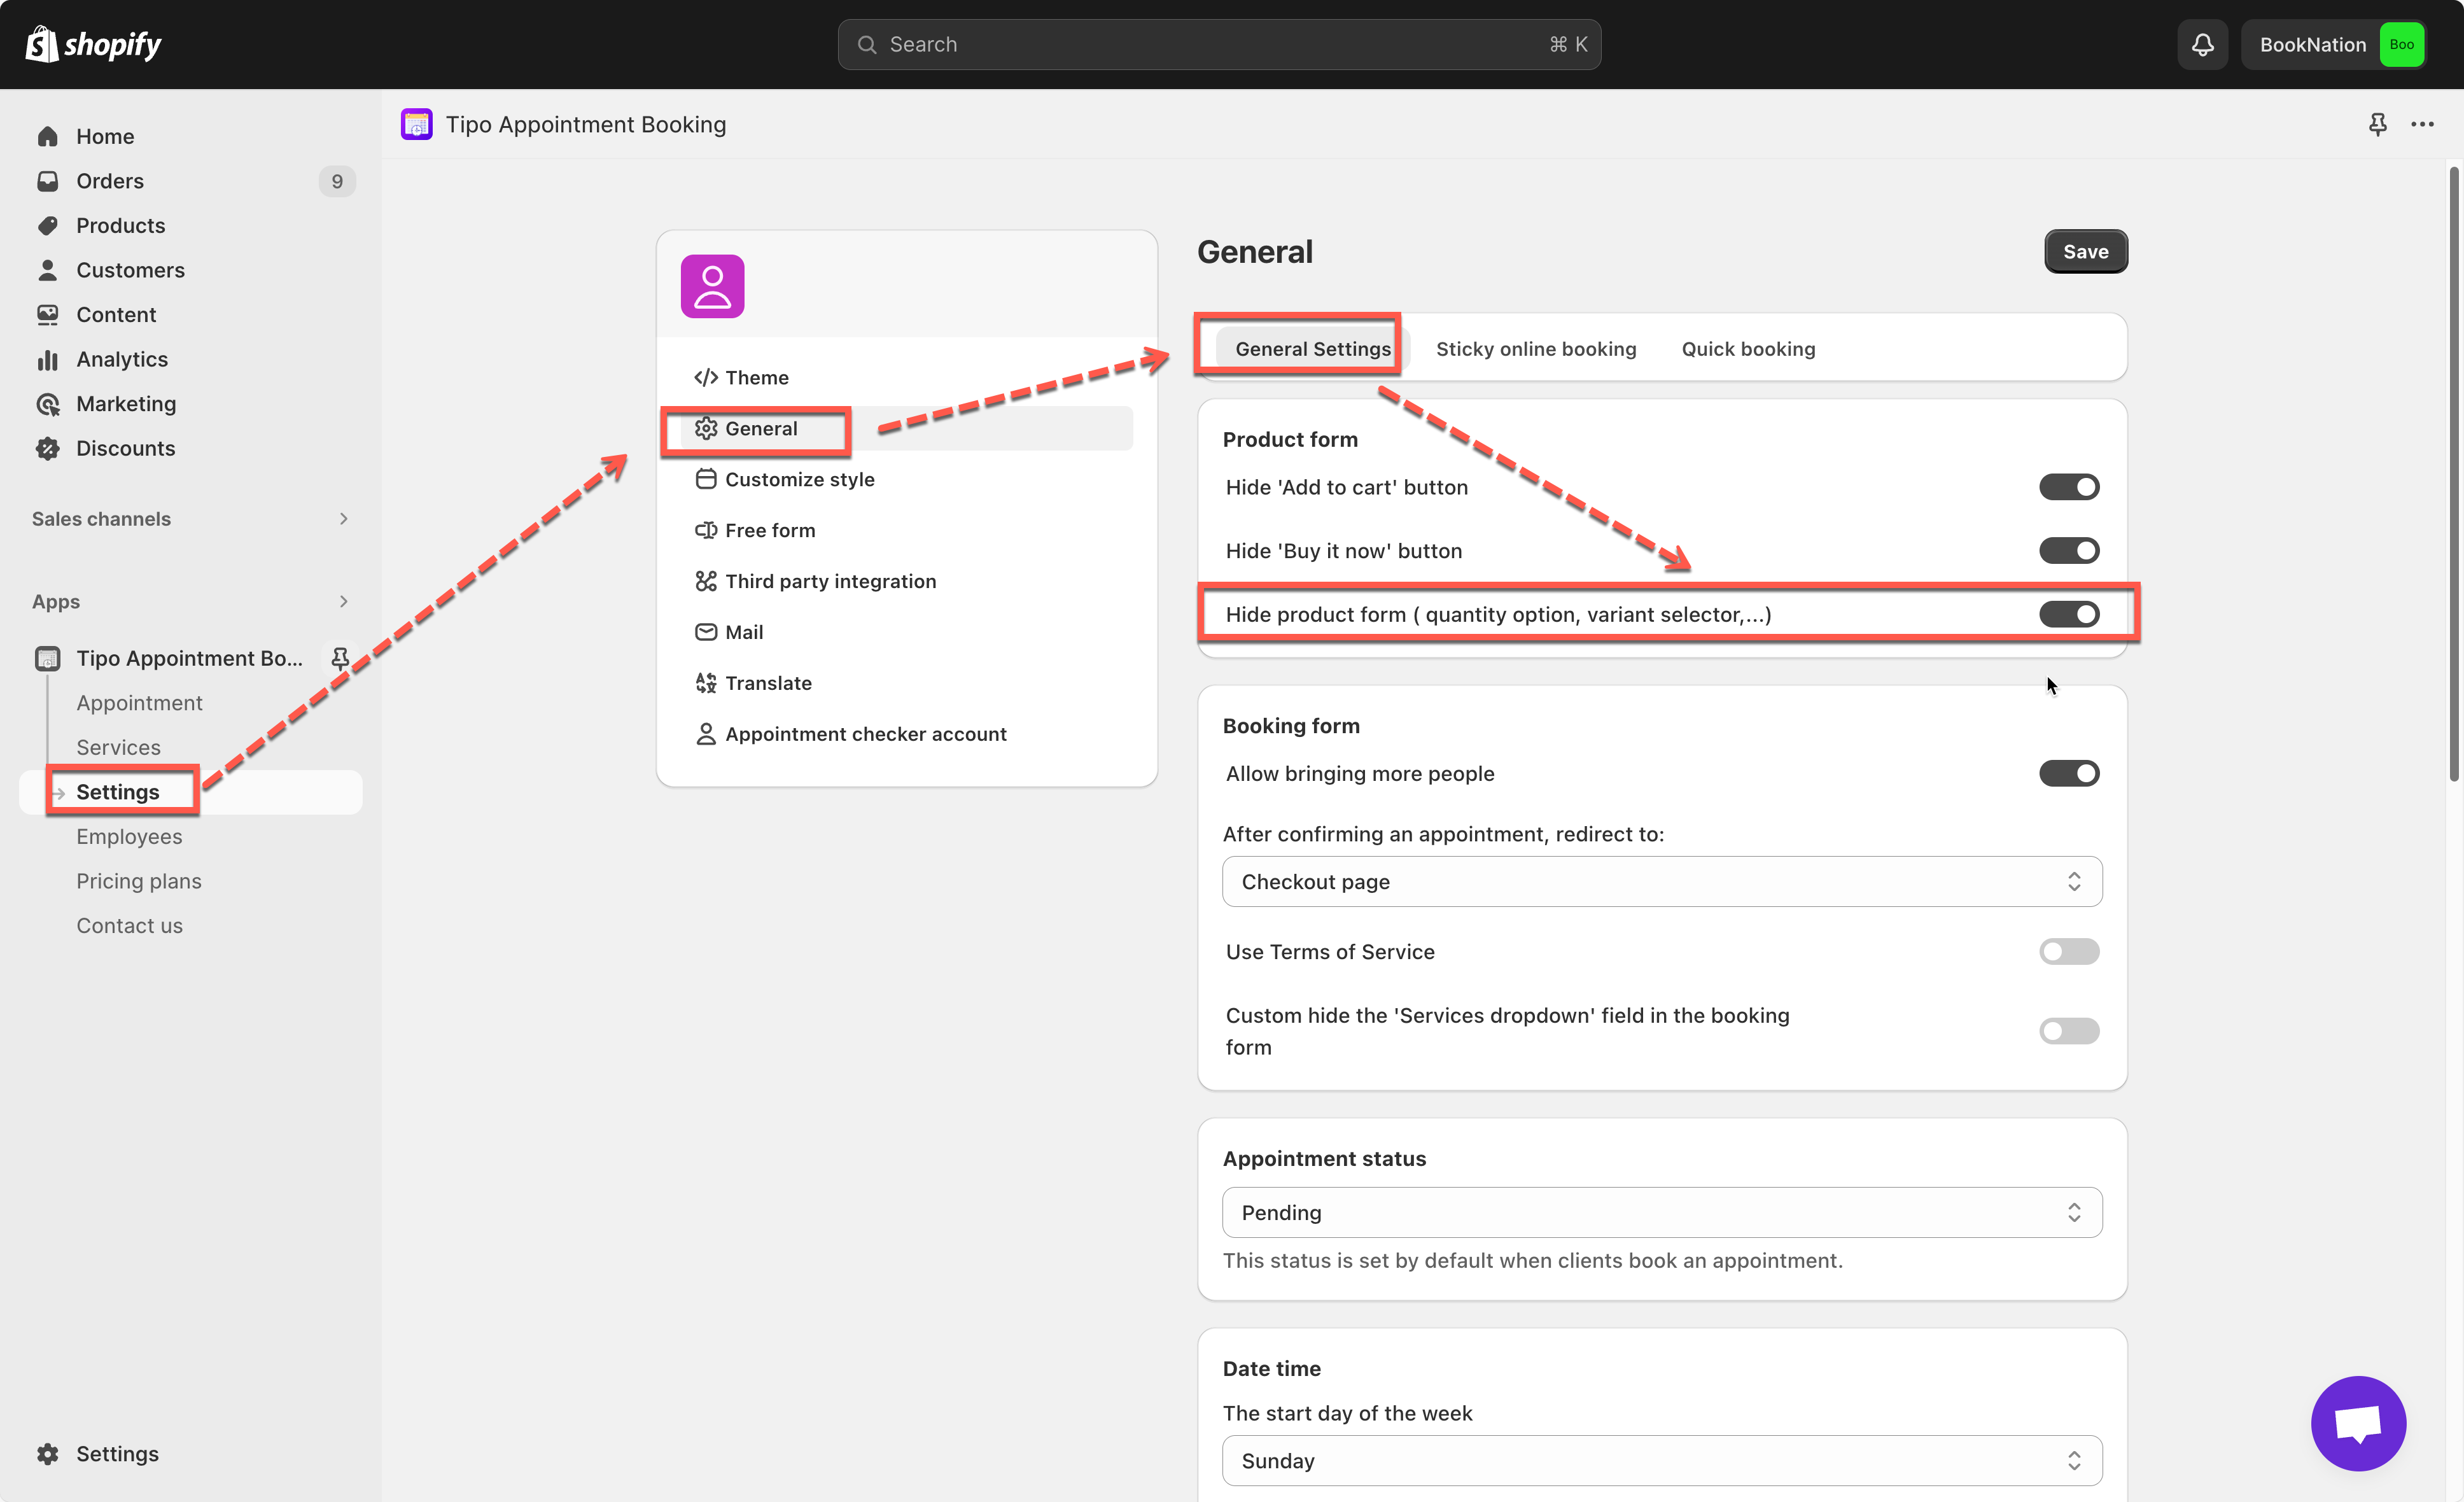
Hide product form ( quantity option, variant selector,…)
This function allows you to hide the product quantity box and product variants on the product page(s) where the booking form shows up.
Steps to manage
- From the app admin page > click Settings > General
- In General setting, click Settings tab > PRODUCT FORM > enable Hide product form ( quantity option, variant selector,…) option
- Click Save
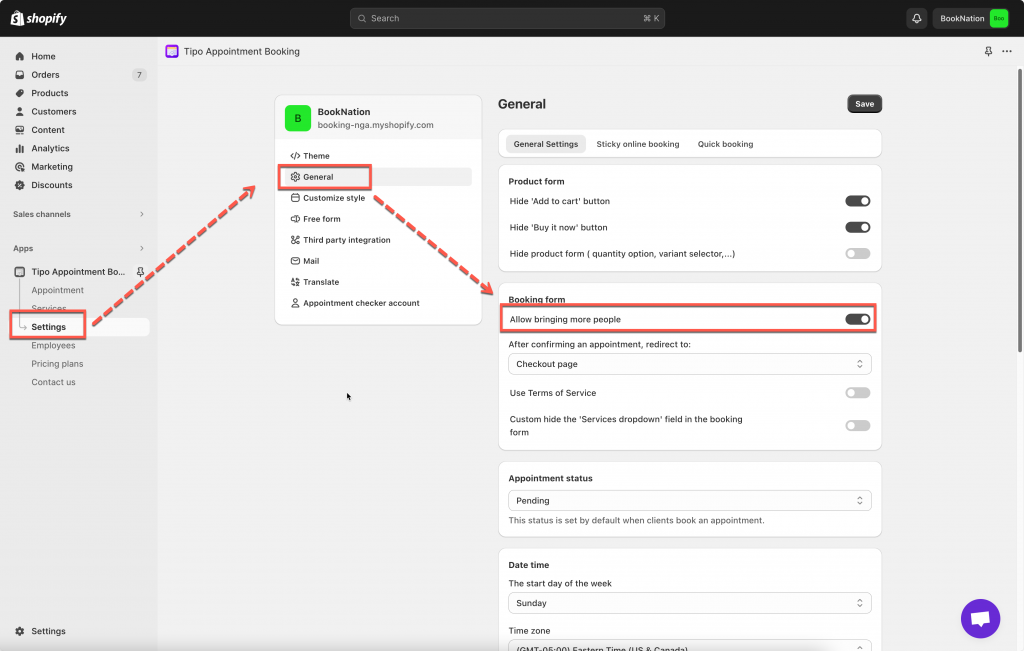
Allow bringing more people
Steps to manage
- From the app admin page > click Settings > General
- In General setting > Booking form part > enable setting Allow bringing more people
- Click Save
Learn more here
Redirect to page after a booking confirmation
Redirect to Checkout page
- From the app admin page > click Settings > General
- In General setting > After confirming an appointment, redirect to: > select Checkout page
- Click Save
Redirect to Cart page
- From the app admin page > click Settings > General
- In General setting > After confirming an appointment, redirect to: > select Cart page
- Click Save
Redirect to a specific page after confirming an appointment
- From the app admin page > click Settings > General
- In General setting > After confirming an appointment, redirect to: > select Other
- Enter the page link you want
- Click Save
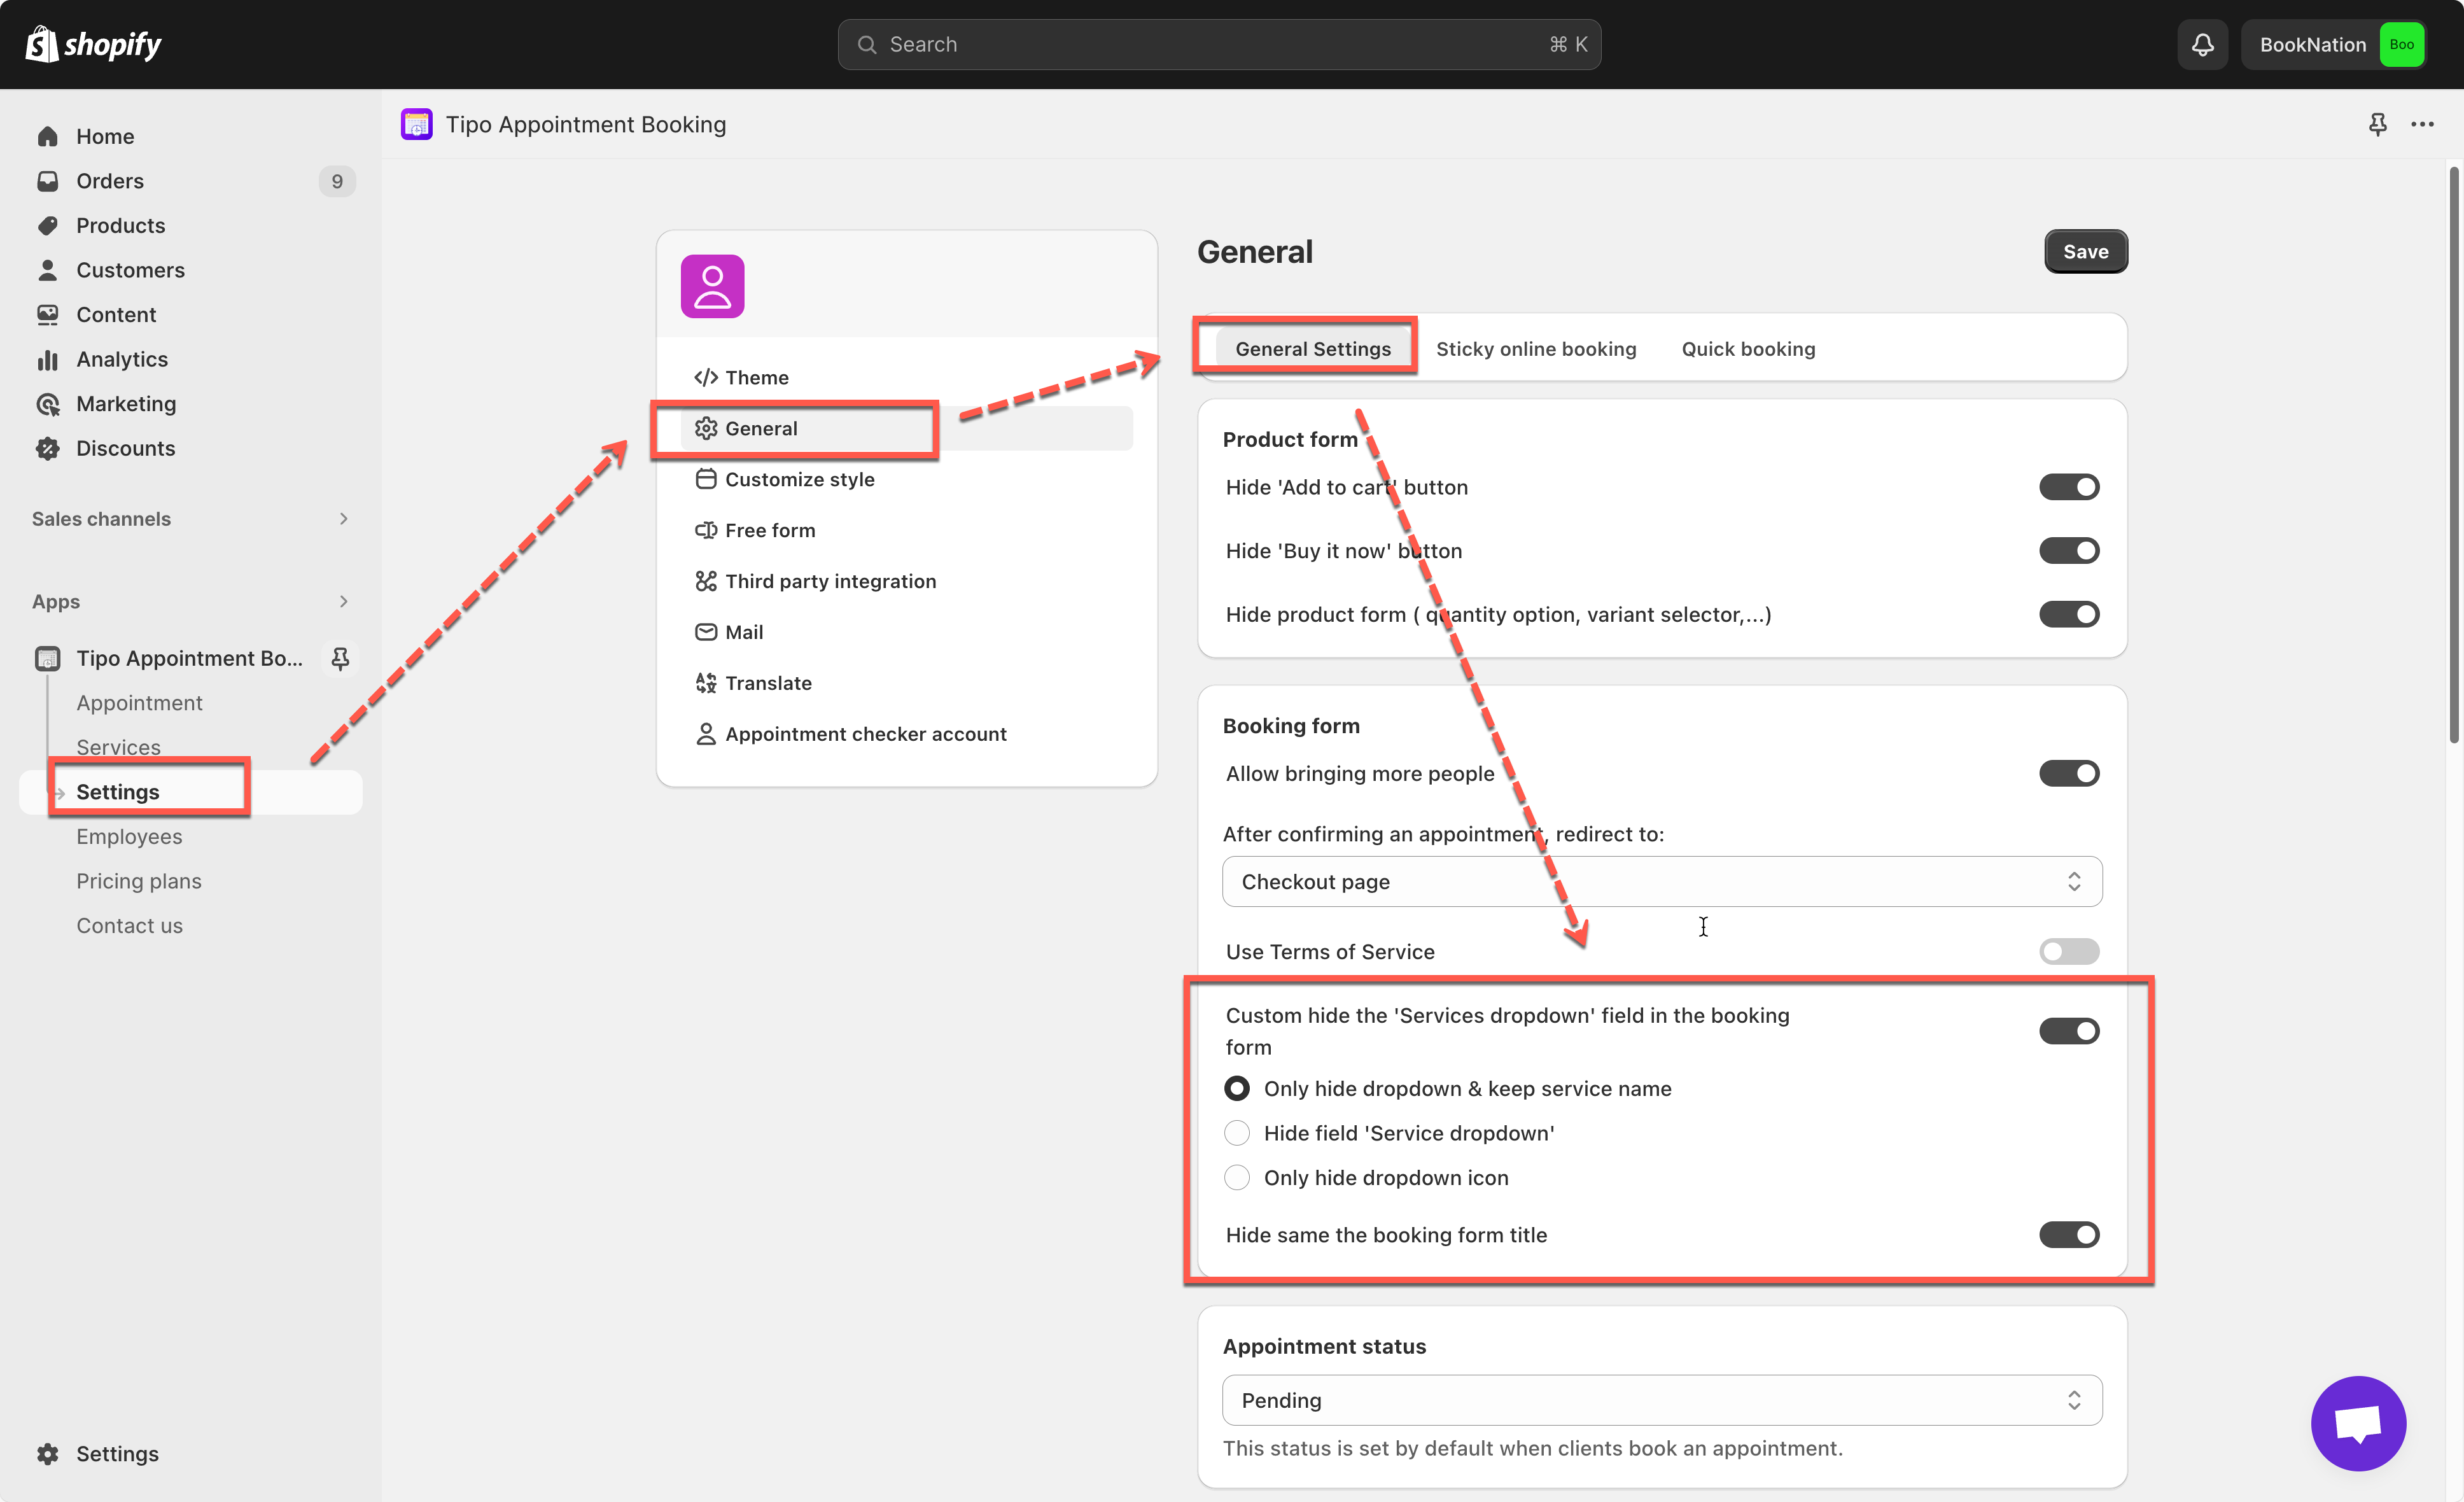
Hide booking form title with dropdown
This function allows you to hide the service name field on the booking form.
Steps to manage
1.Open the app > click Settings > General
2. In General setting > Booking form > enable option Custom hide the ‘Services dropdown’ field in the booking form
3. Select one of 3 options below: Only hide dropdown & keep service name, Hide field ‘Service dropdown’, Only hide dropdown icon
4. Tick on the checkbox Hide same the booking form title to hide the Booking form title (optional)
5. Click Save
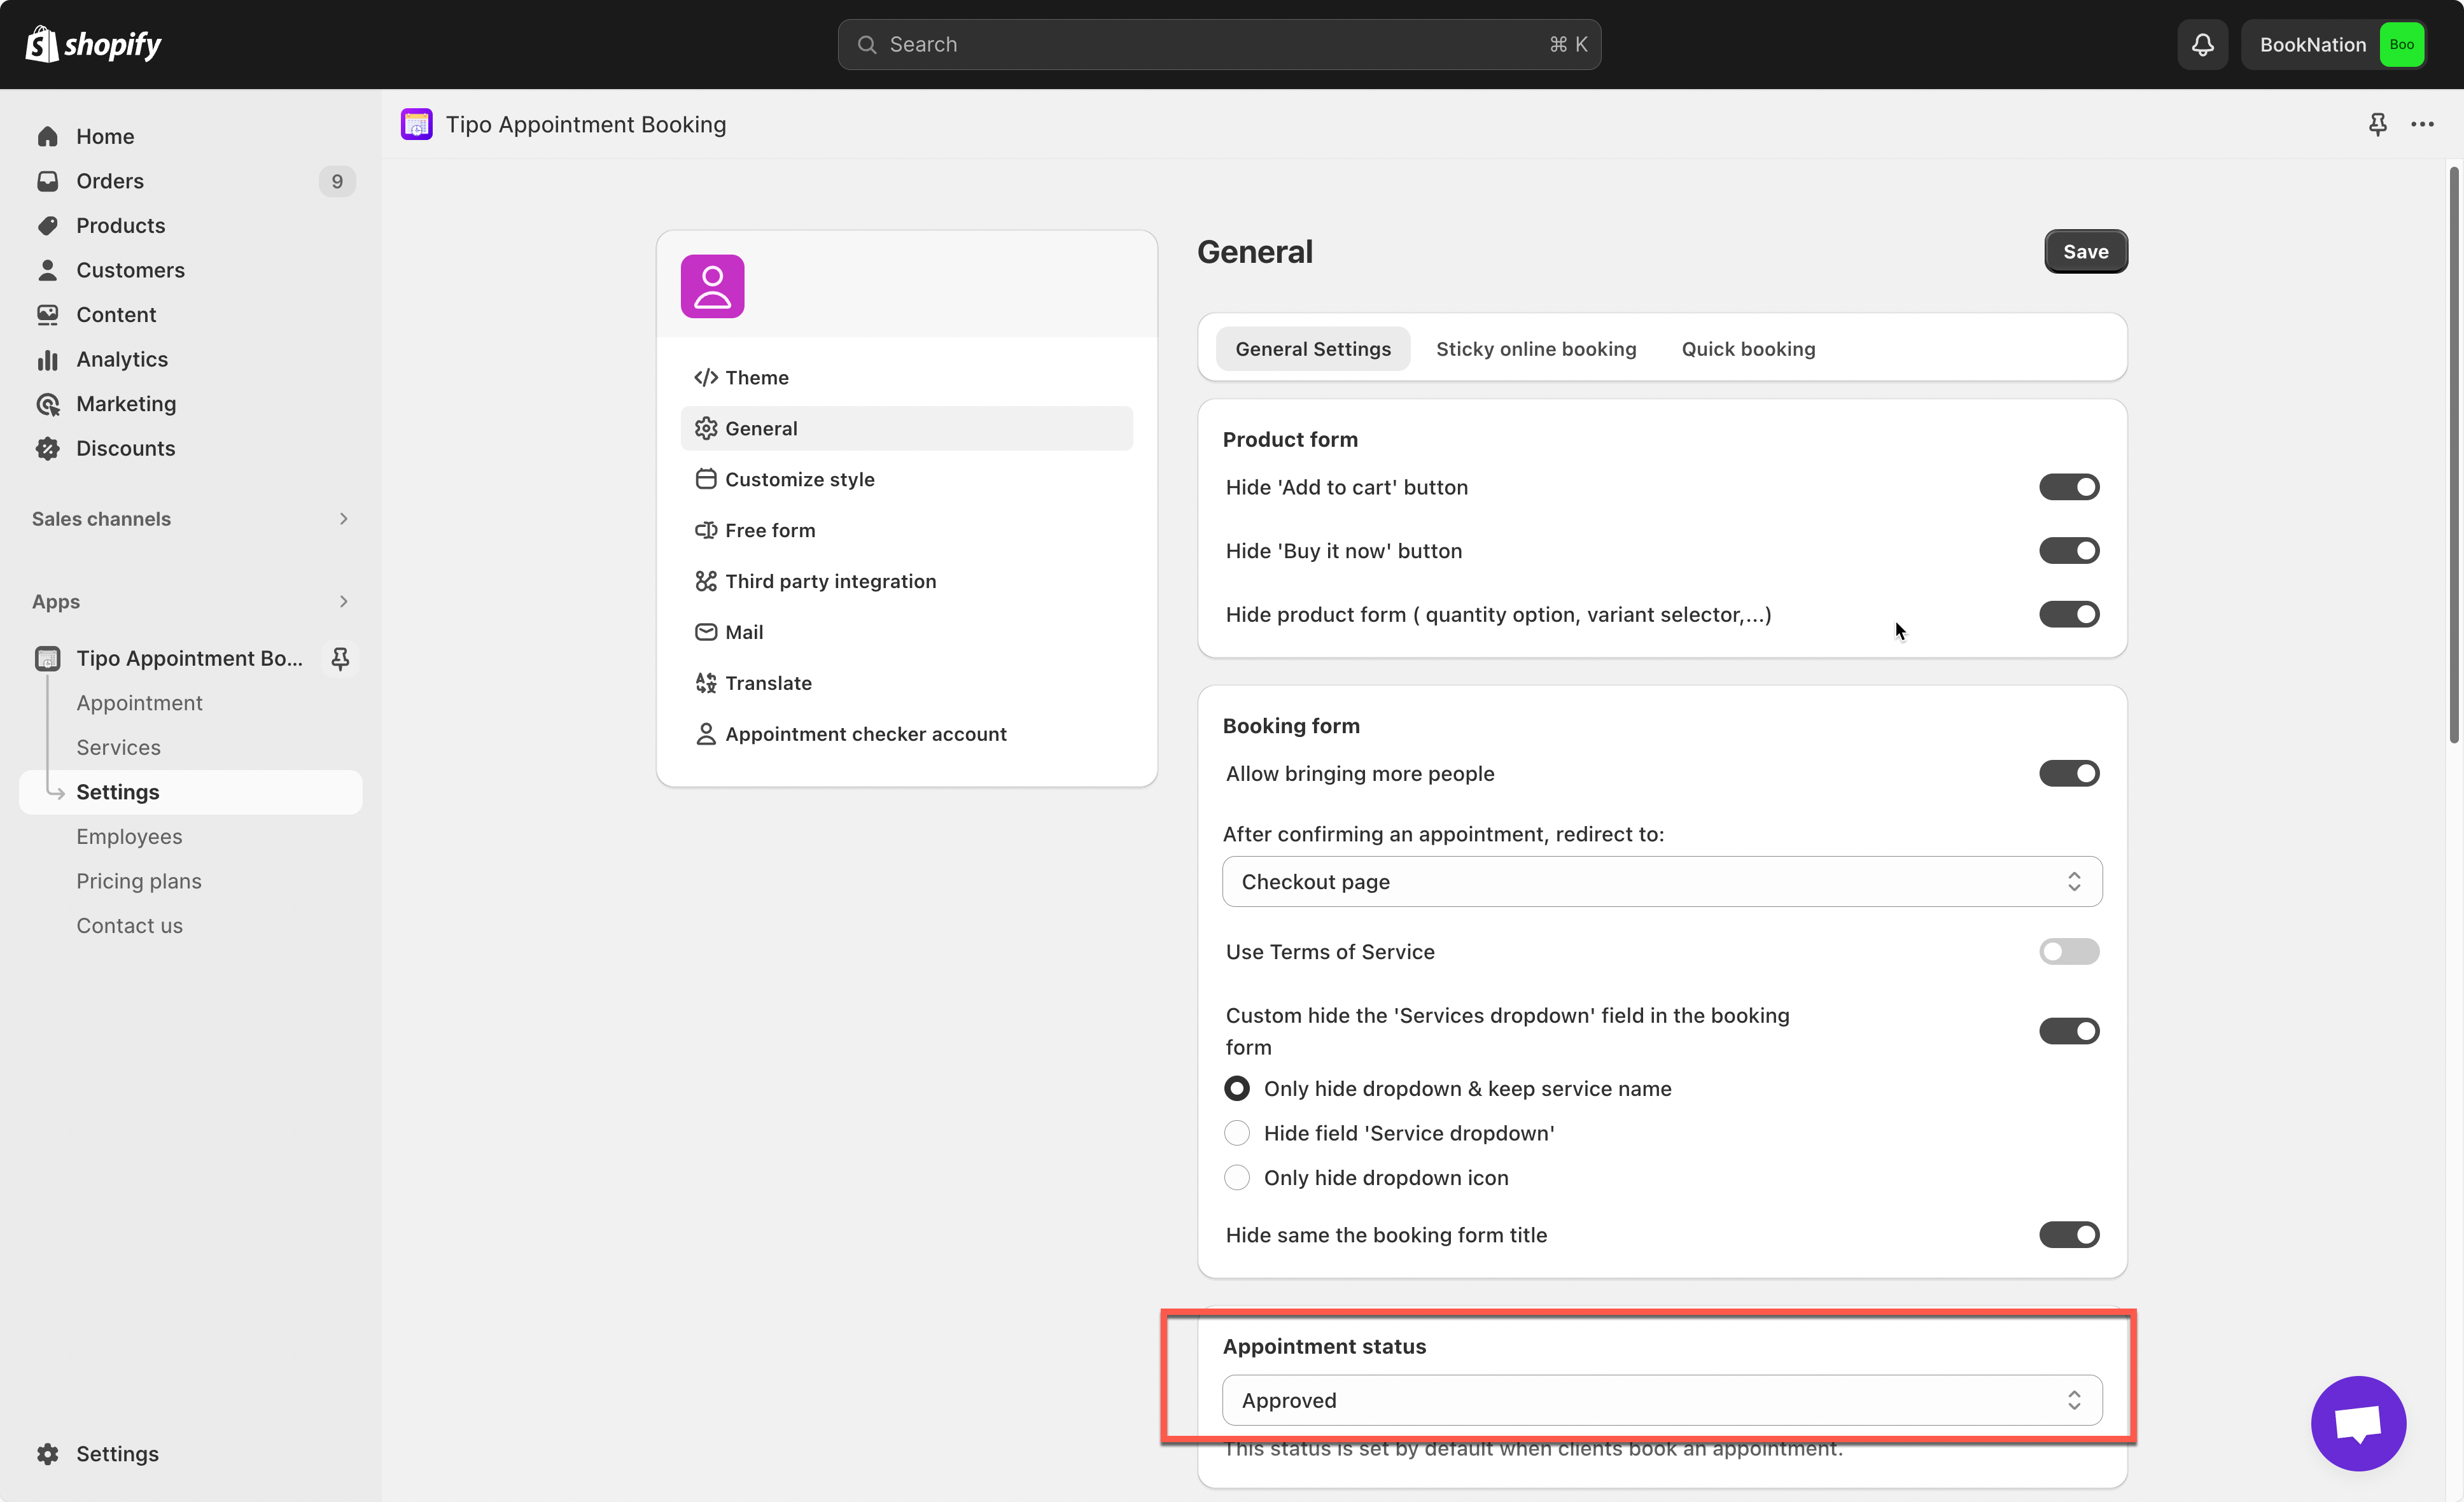
Automatically approve appointments
This setting will make the appointment status to be approved by default in the Tipo Calendar
- Open the app > click Settings > General
- In General setting > Appointment status > select Approved
- Click Save
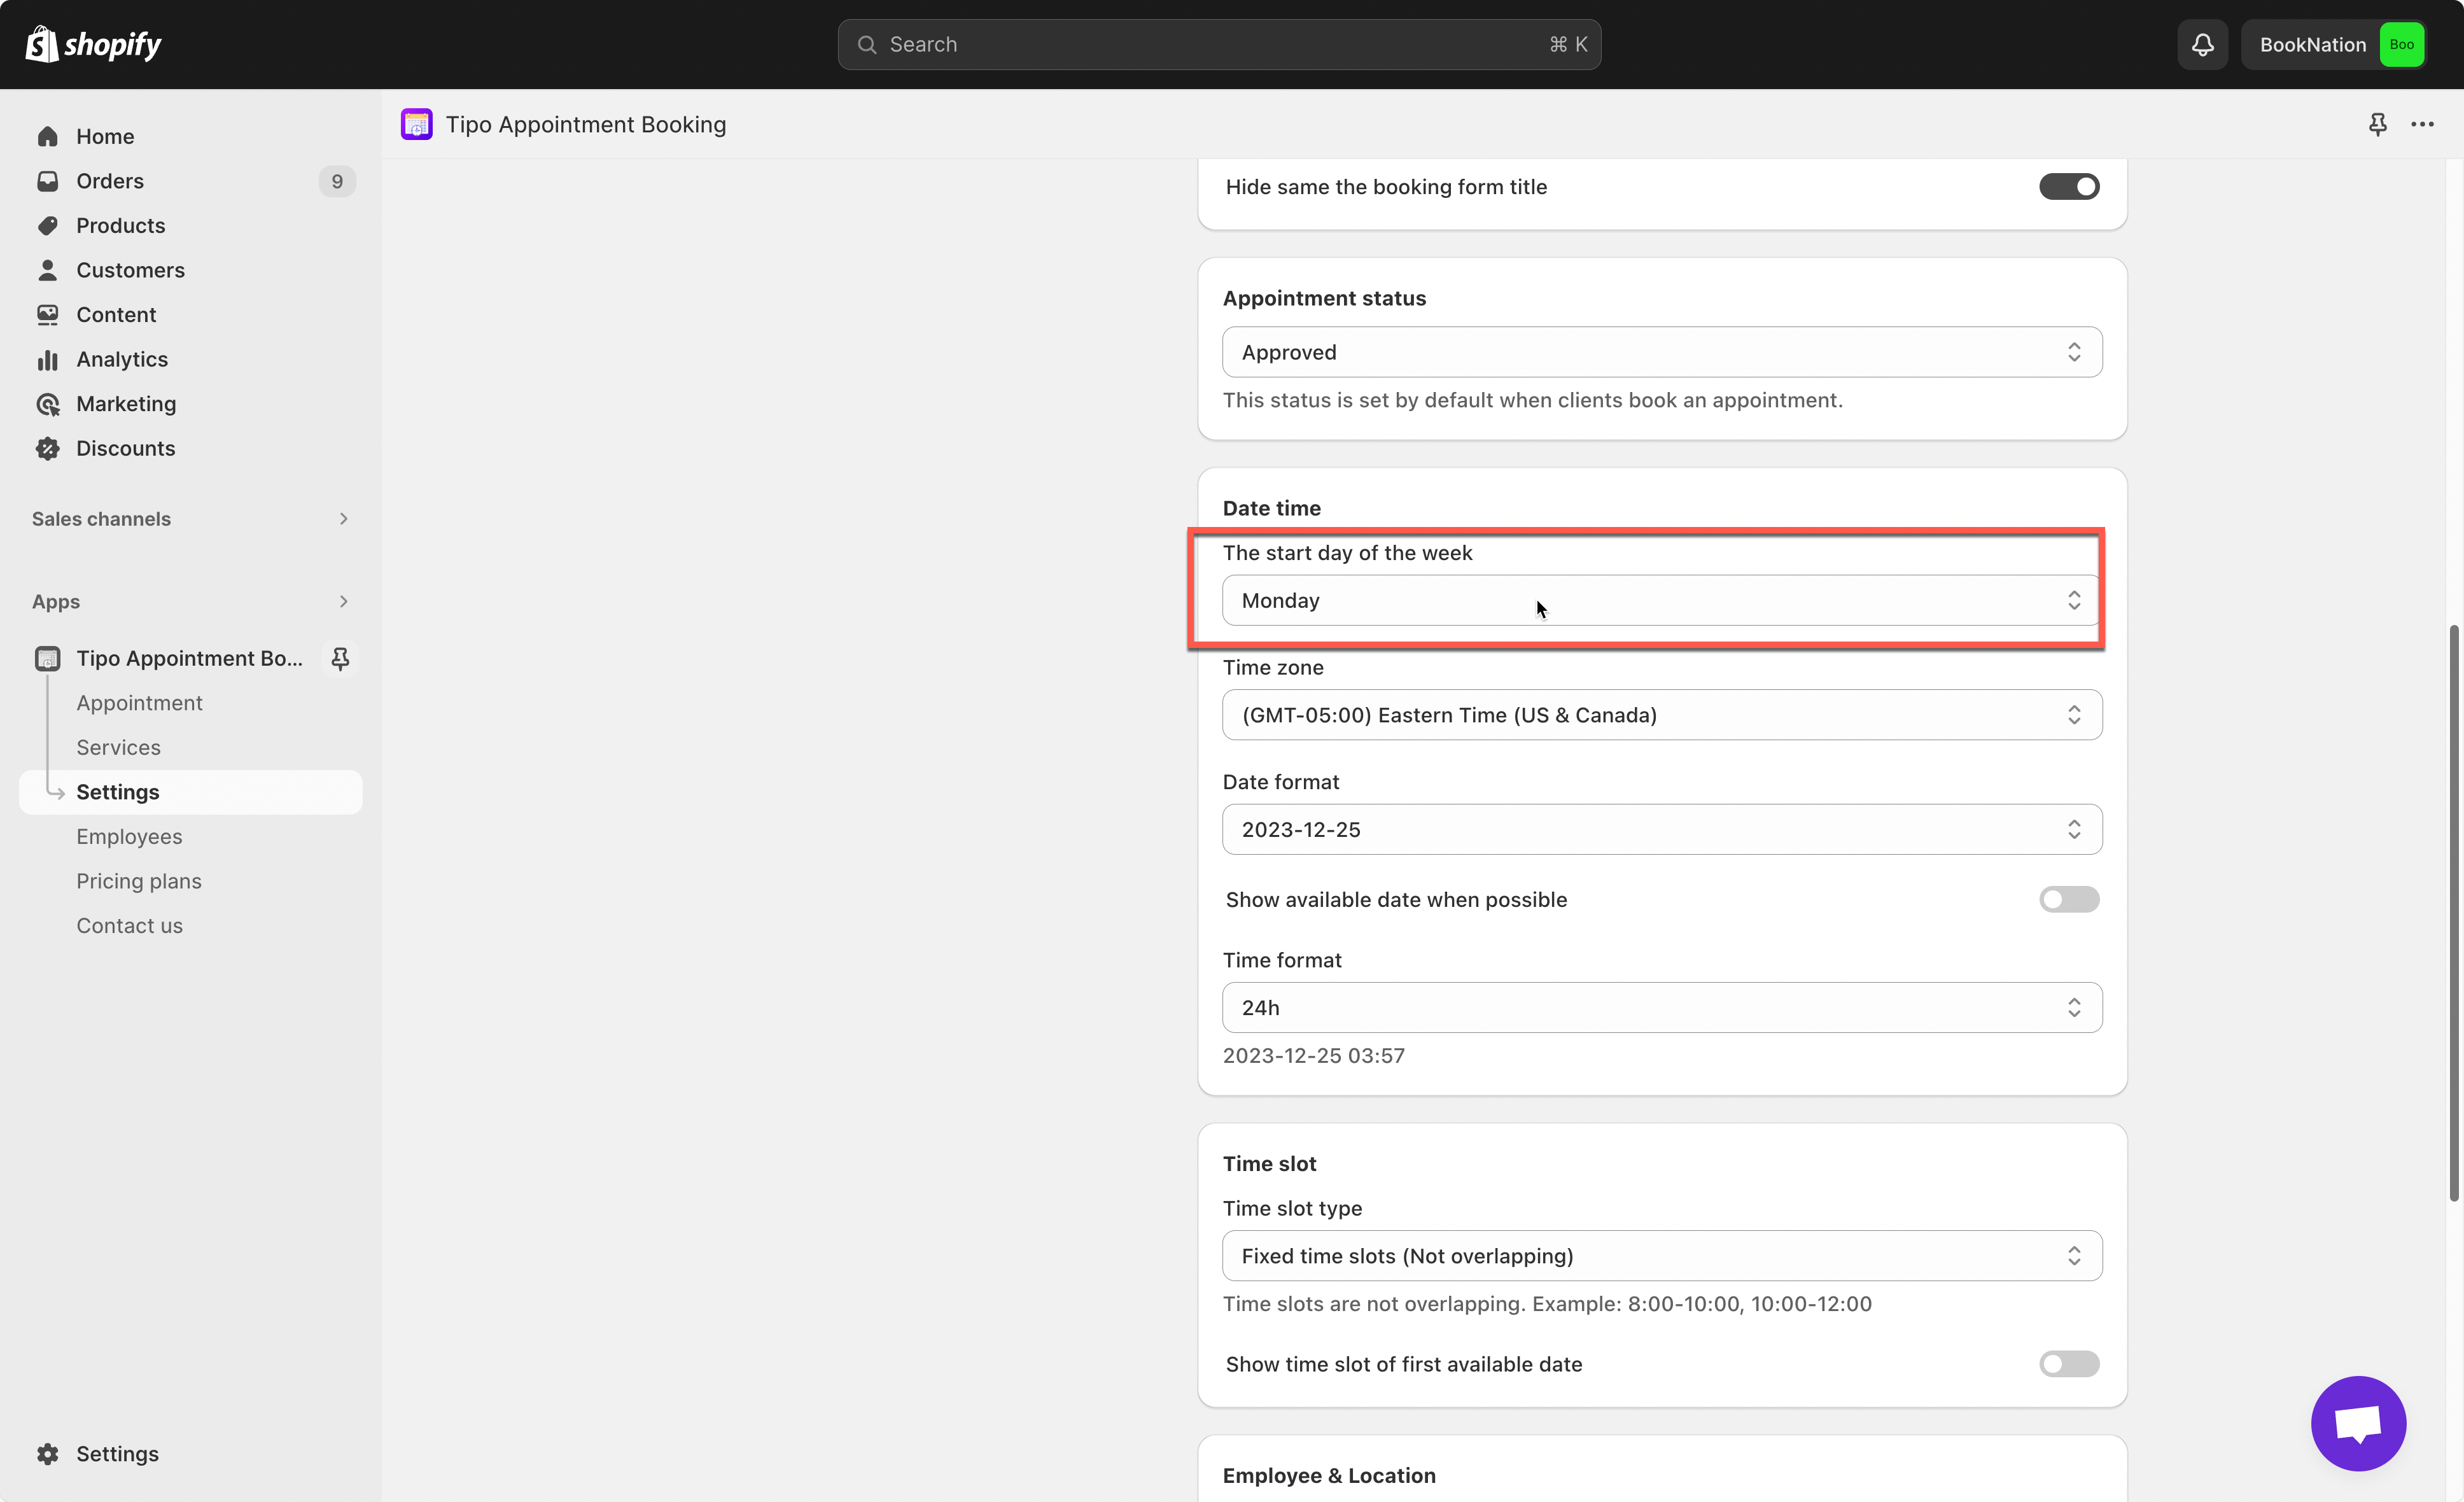
Change the week-starting day on booking calendar
- Open the app > click Settings > General
- In Date time > The start day of the week, select the day you want (eg. Monday)
- Click Save
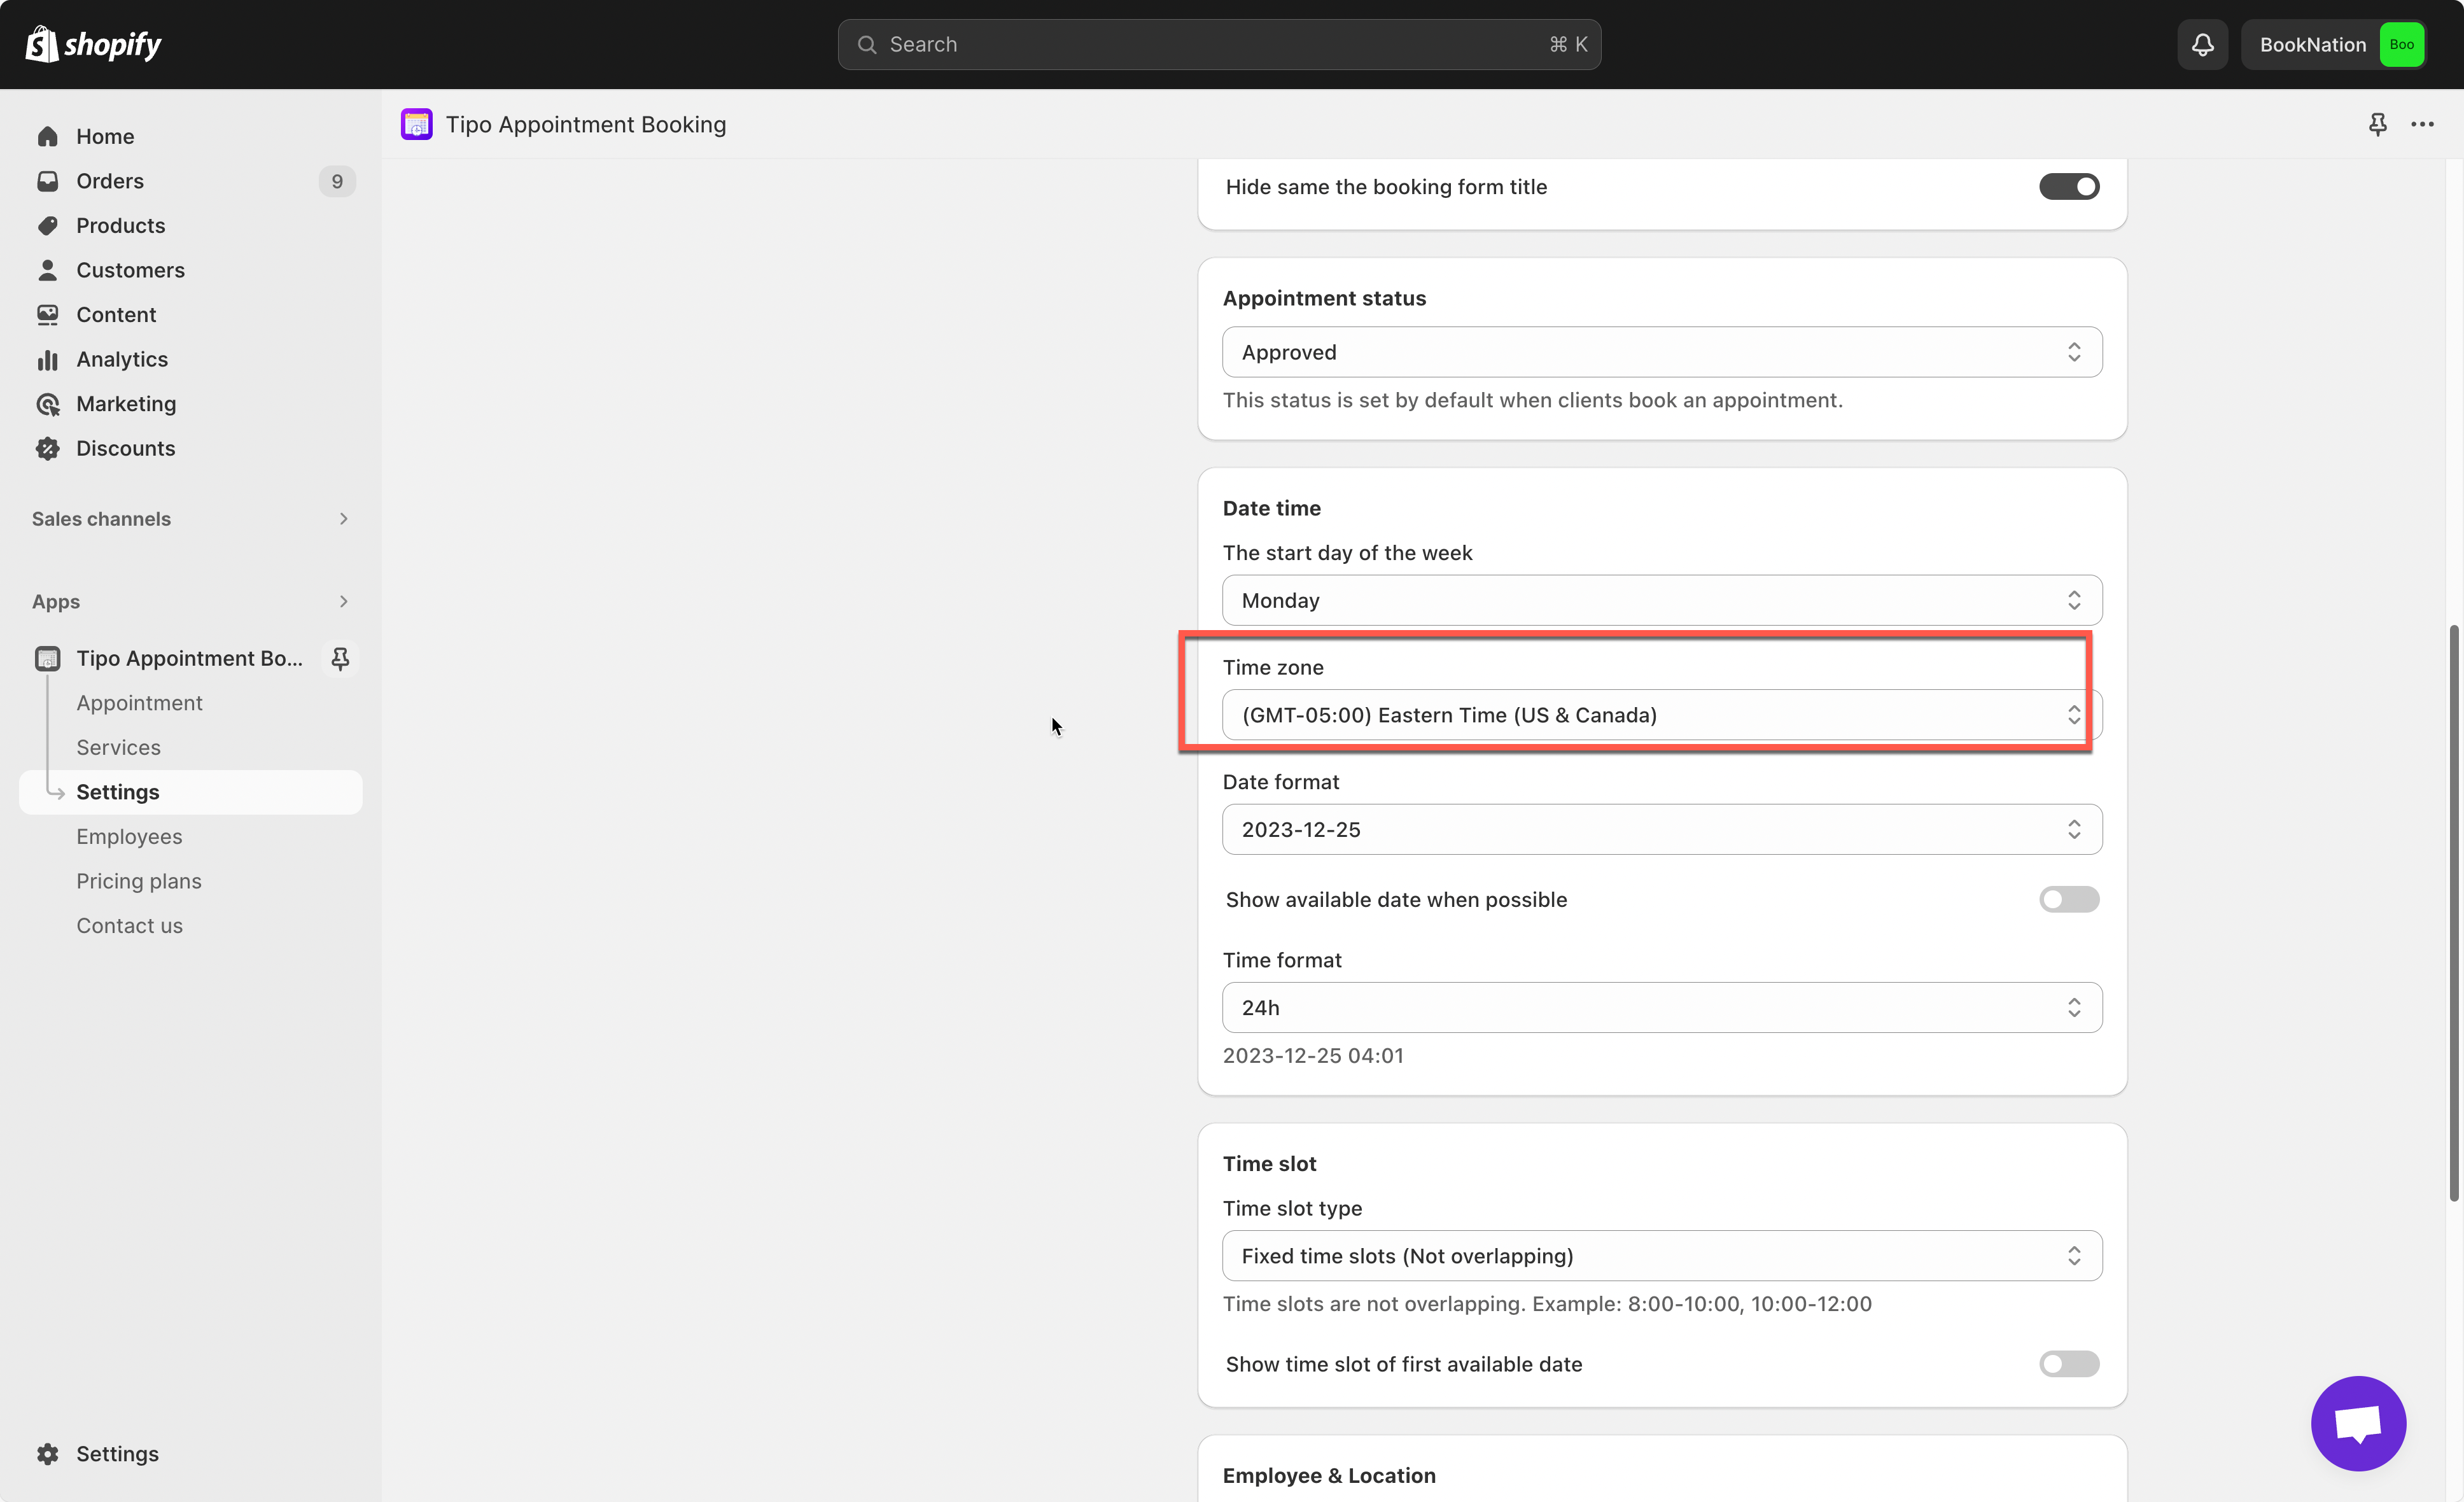
Apply your timezone to appointments
- Open the app > click Settings > General
- In Date time > Timezone > select your timezone
- Click Save
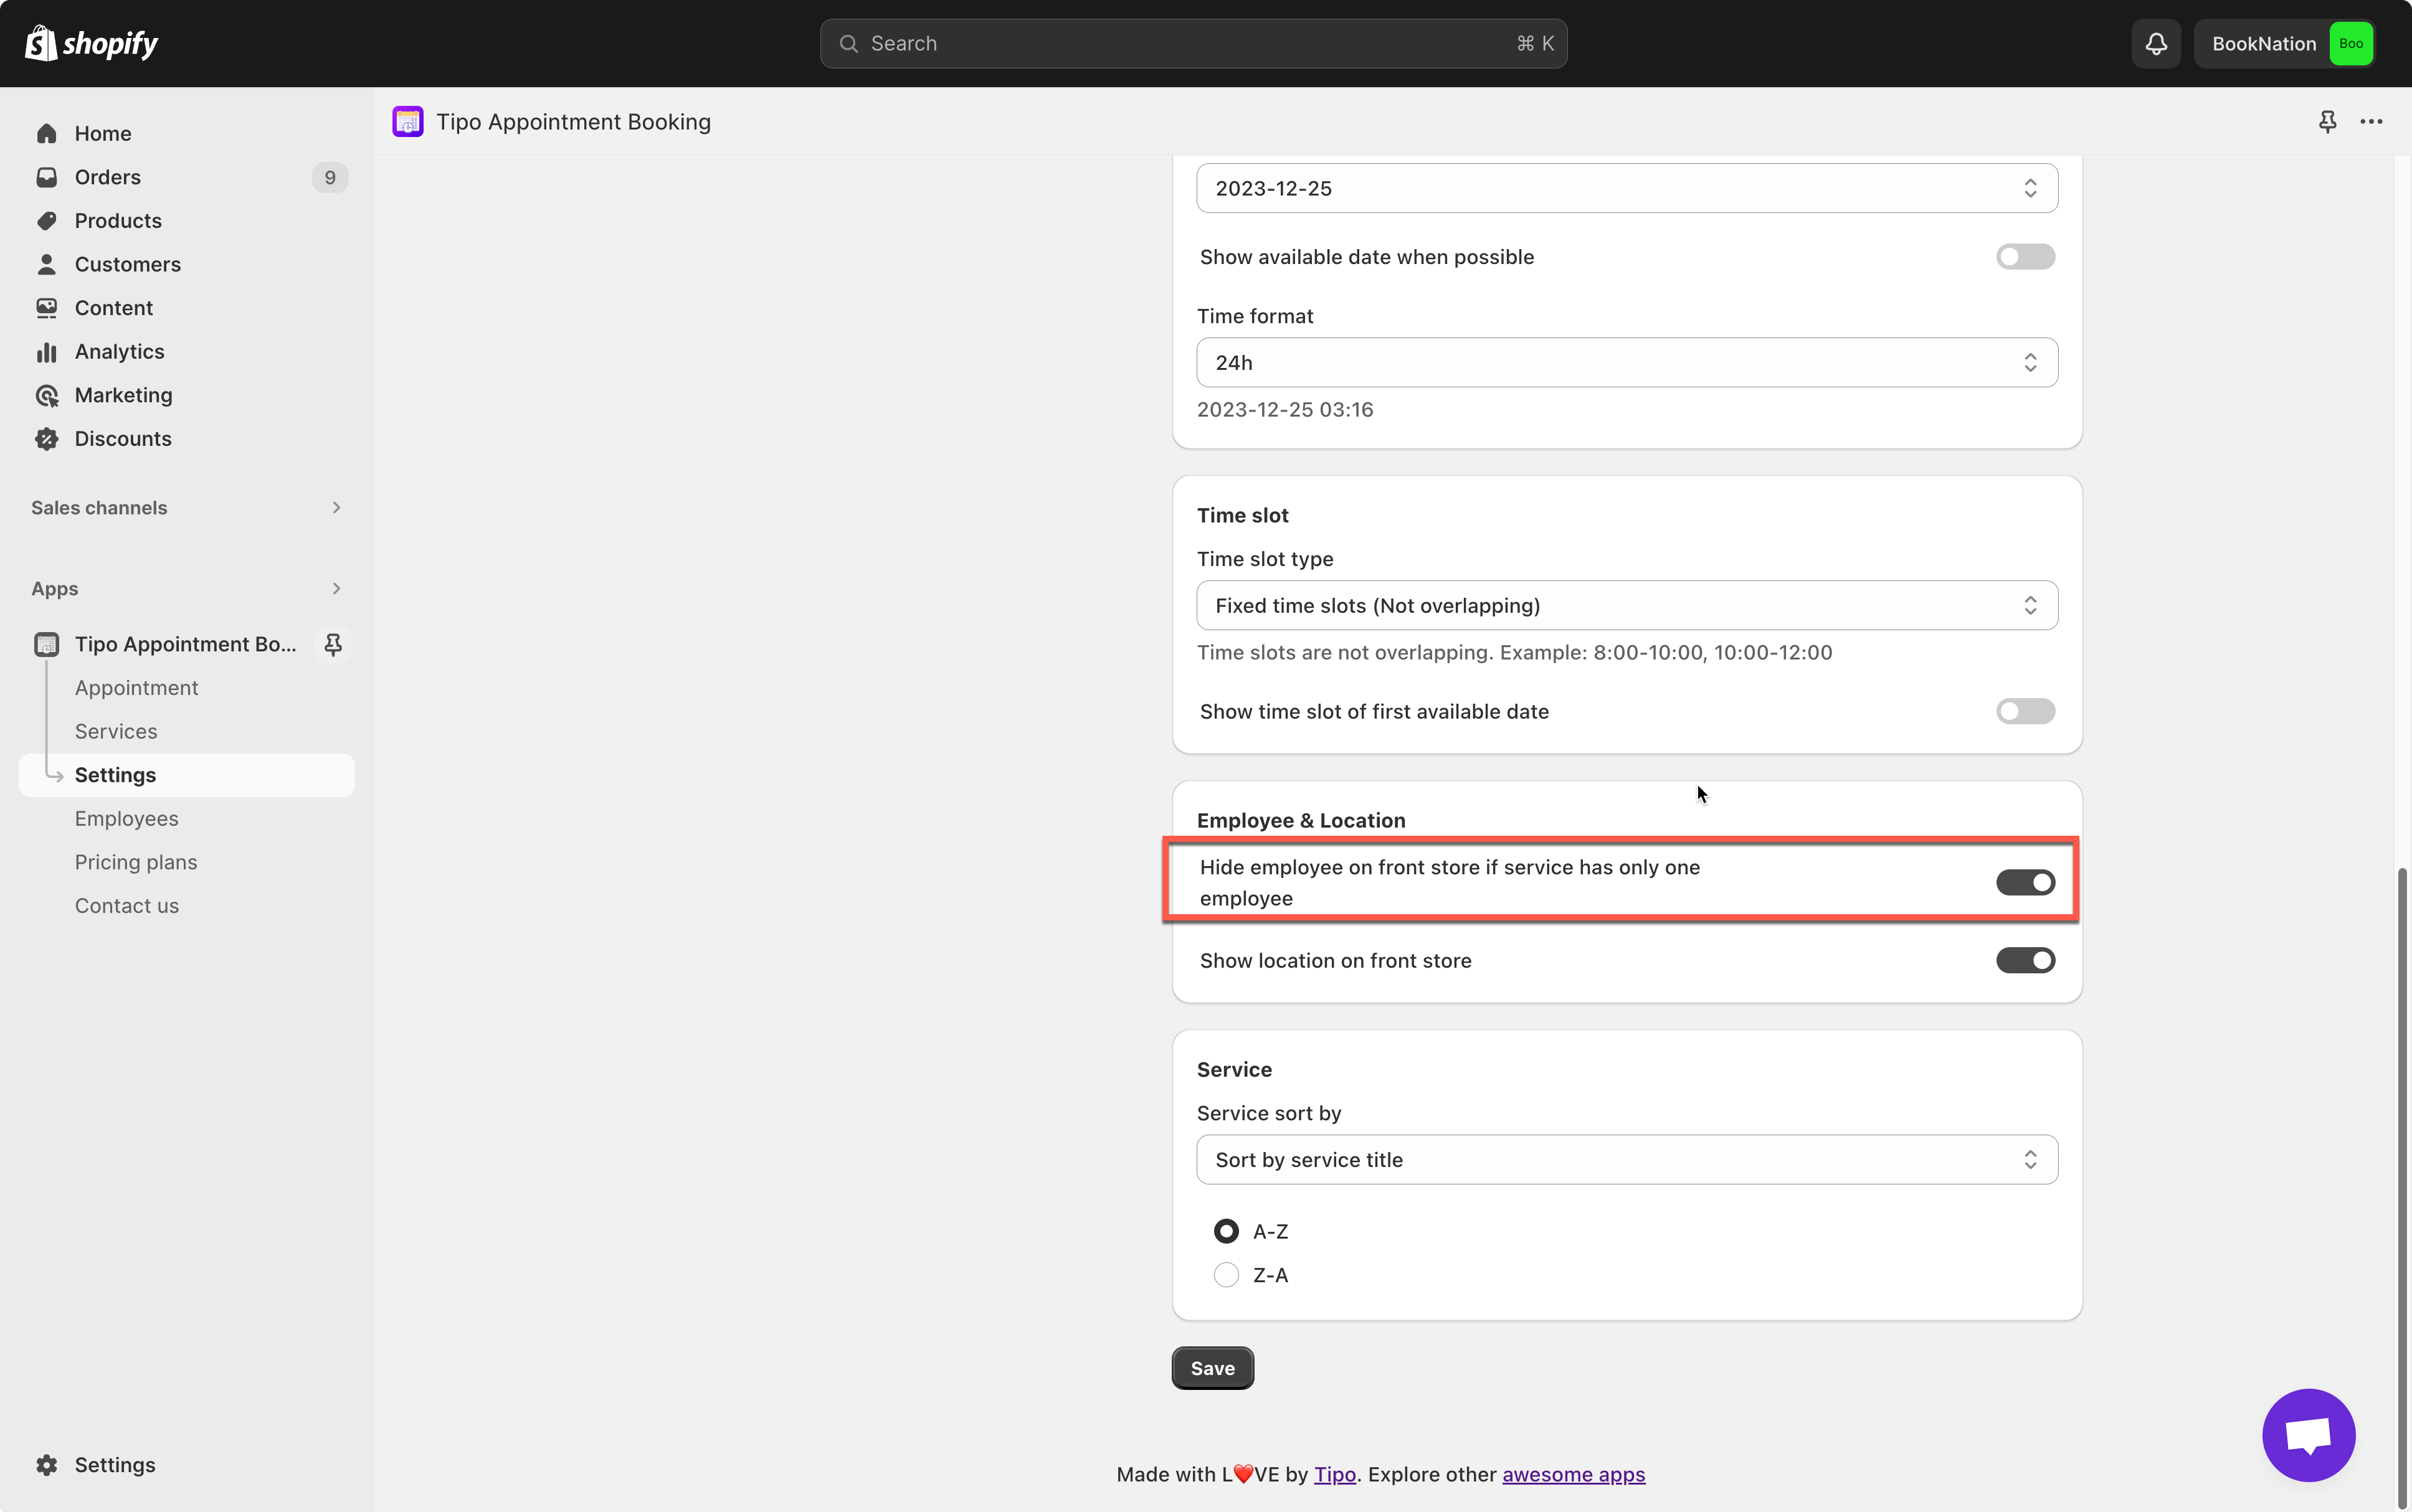
Hide employee on booking form if service has only one employee
Steps to manage
1. Open the app > click Settings > General
2. In General setting > Employee & Location > enable option Hide employee on front store if service has only one employee
3. Click Save