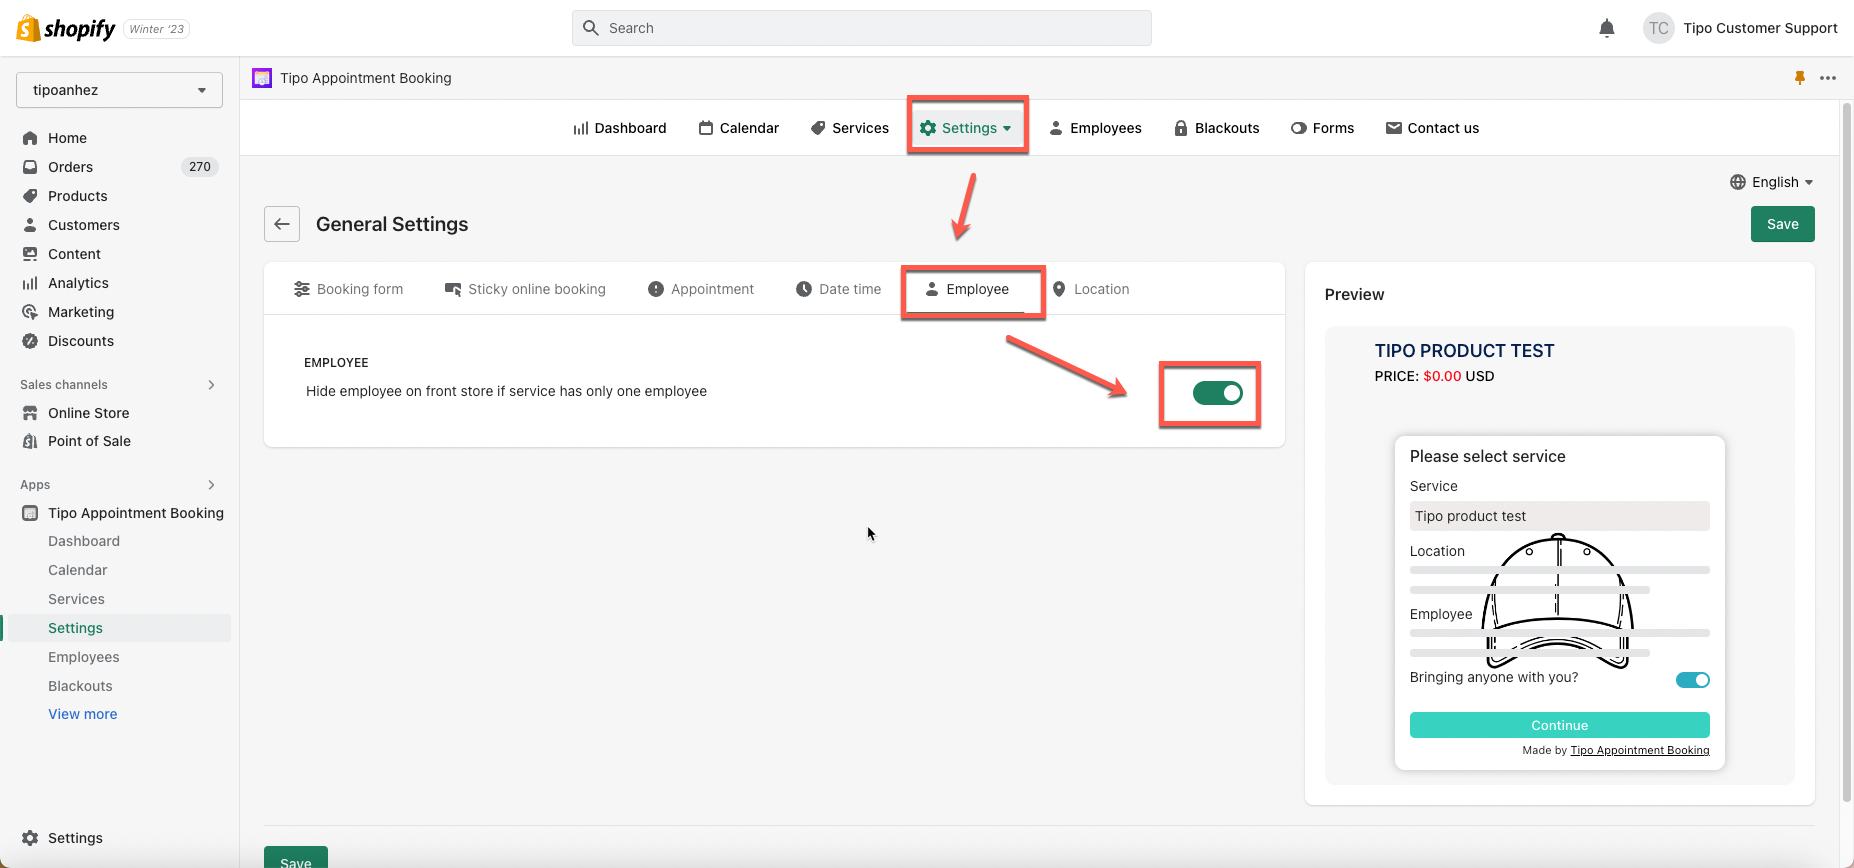
Hide employee on front store if service has only one employee
- From the app admin page > click Settings > General
- In General setting > click Employee
- Enable setting Hide employee on front store if service has only one employee
- Click Save
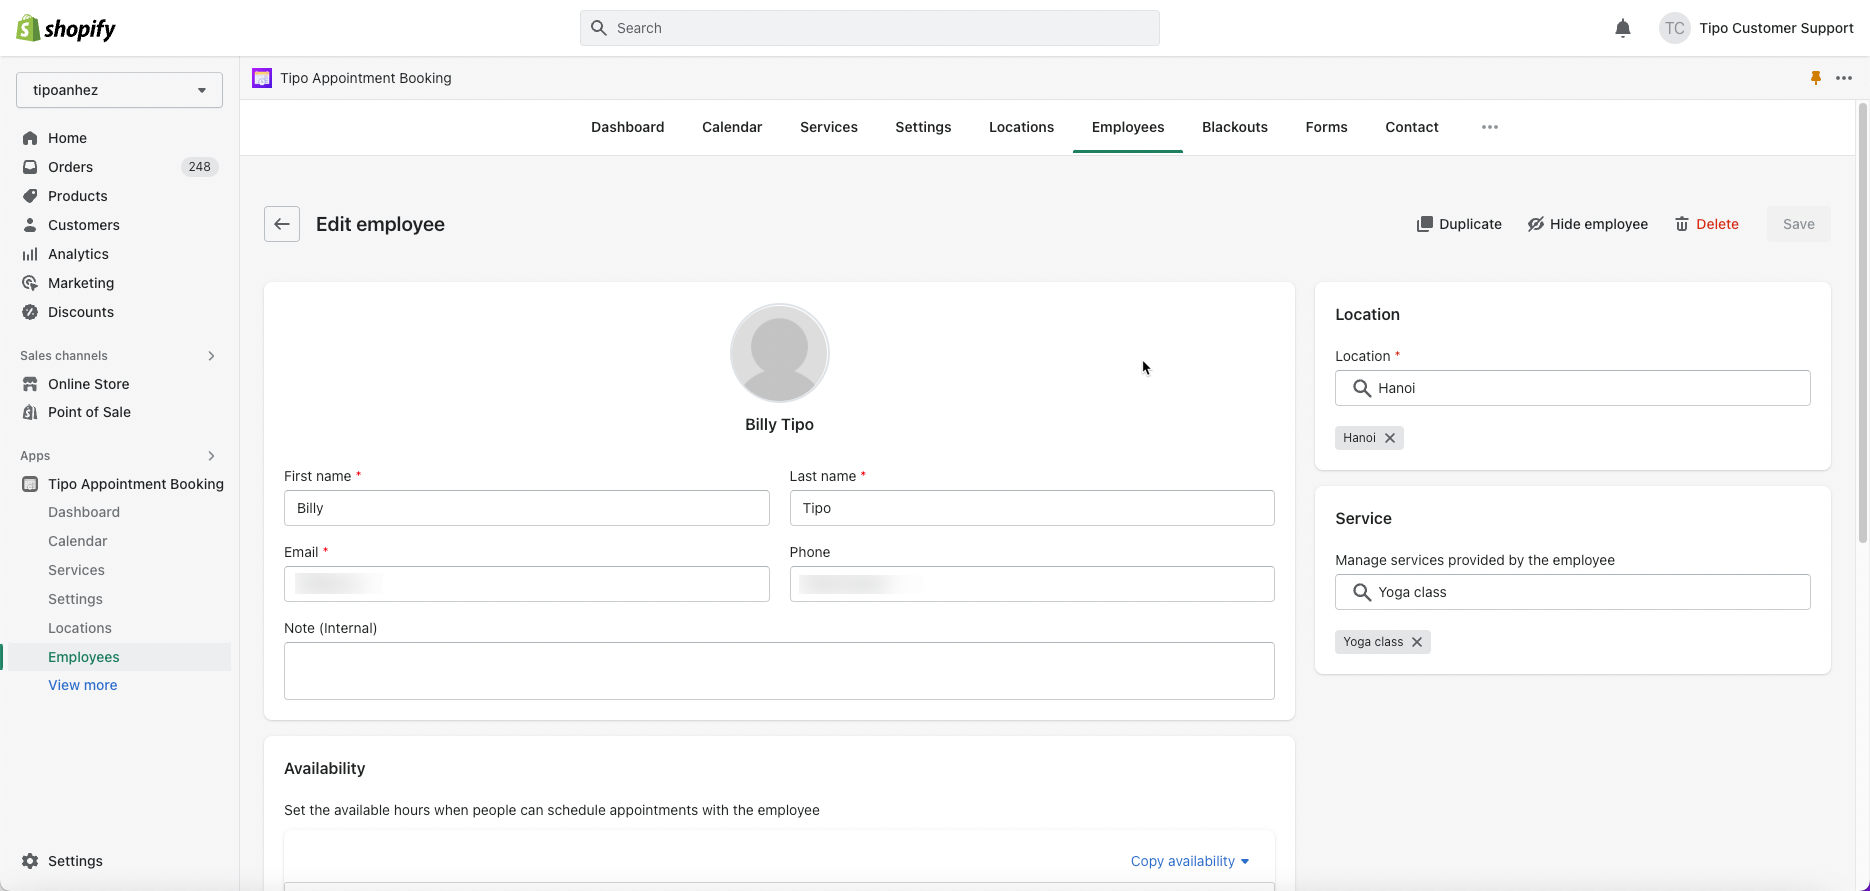
- From the app admin page > click Employees
- Click Add employee
- Upload avatar and input required employee information
- Set up the employee’s Availability
- In Location part, assign this employee to locations (if any)
- In Service part, select the service(s) that this employee will serve
- Click Save
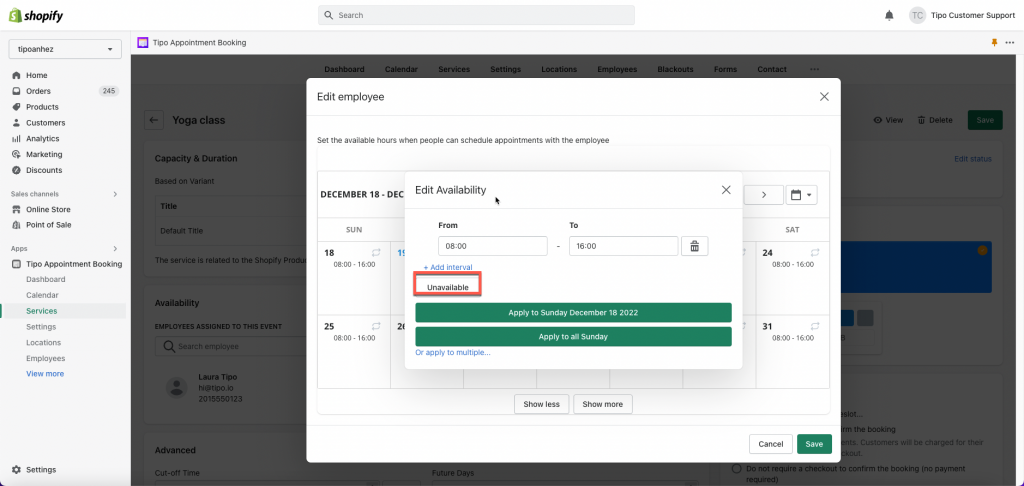
Add employee’s Unavailable time
- From the app back end, click Employees > open the employee detail you want to edit
- Scroll down to Availability, select the employee(s) in the EMPLOYEES ASSIGNED TO THIS EVENT field or create a new employee to assign to the service
- Click on Edit Availability button in the employee name you want to adjust the time
- Click on a date you want > click the Unavailable button > Apply to > select the date(s) you want
- Save
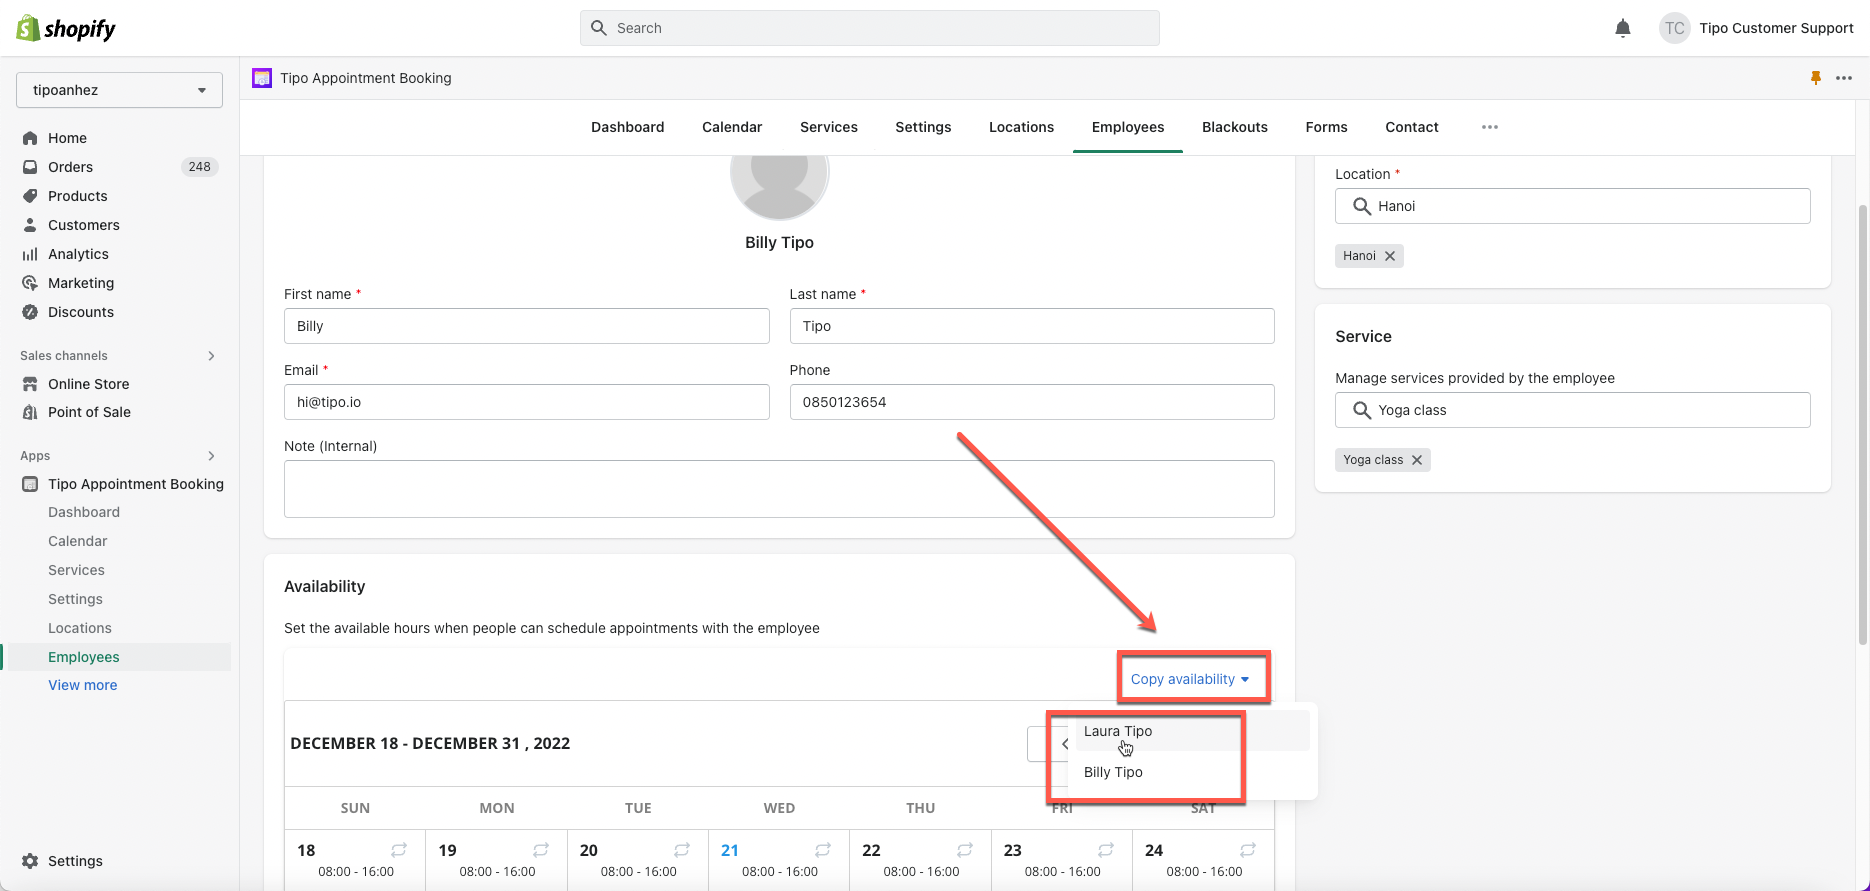
Copy Employee’s Availability
- From the app back end, click Employees > open the employee detail you want to edit
- Scroll down to Availability
- Click Copy availability > select an employee you want to copy his availability
- Click Save
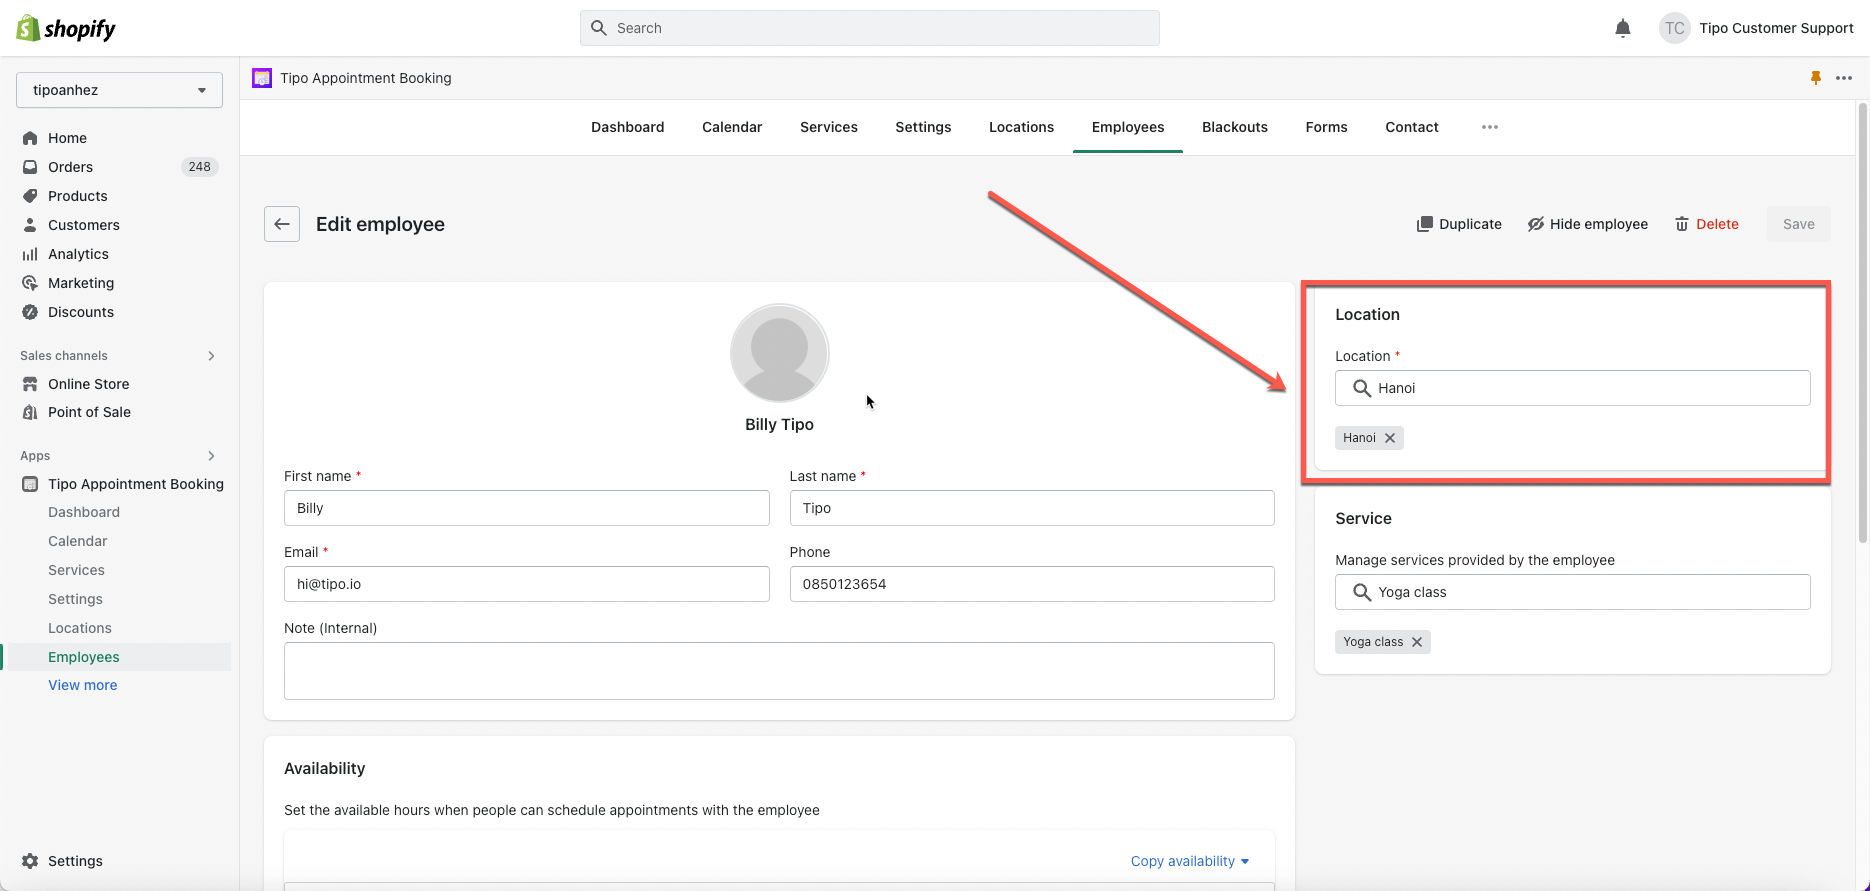
Assign employee to location
Note : One employee is only available at one location.
Steps to manage
- From the app back end > click Employees > open the employee detail you want to edit
- In Location part, select a location where the employee will work
- Click Save
Assign services to employee
- From the app back end, click Employees
- Edit the employee you want
- In Service section, select service(s) that the employee will serve
- Click Save

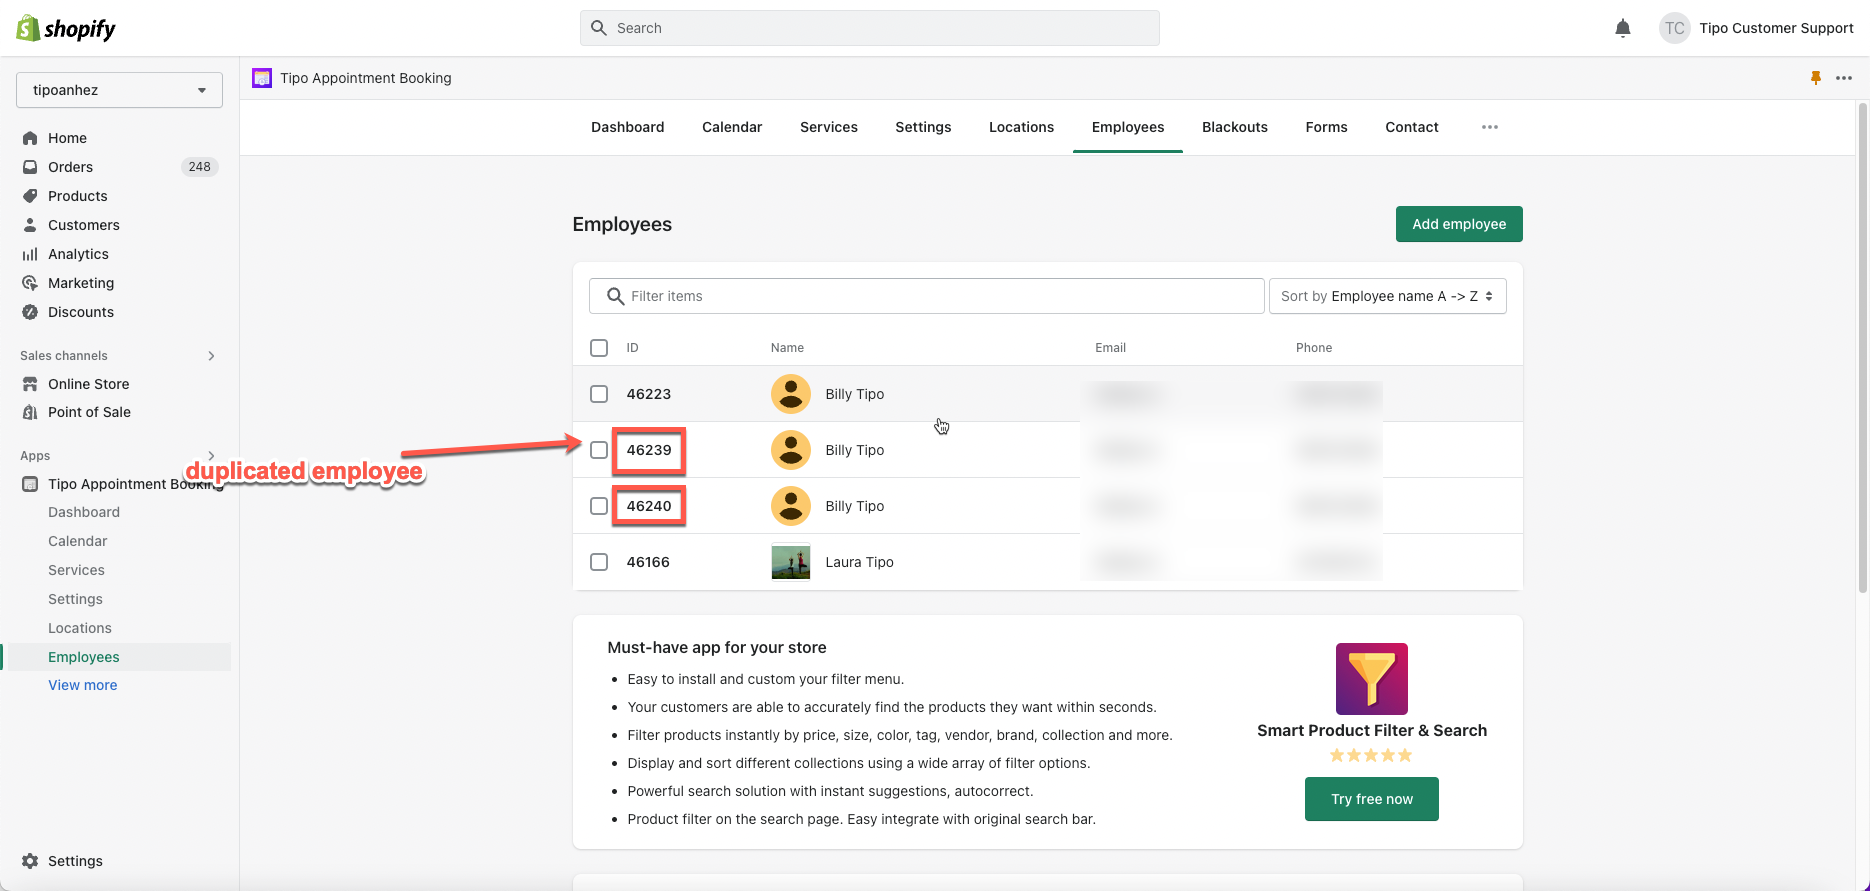
Duplicate Employee
Steps to manage
- From the app back end, click Employees > open the employee detail you want to edit
- Click on duplicate icon, then a popup will show up > click Duplicate button to confirm the action
- Close this employee detail > open the new duplicated employee
- Save the new employee