
You can build up dynamic content for email notifications using provided variables.
- From the app admin page, go to Settings
- From the Setting page, click Mail
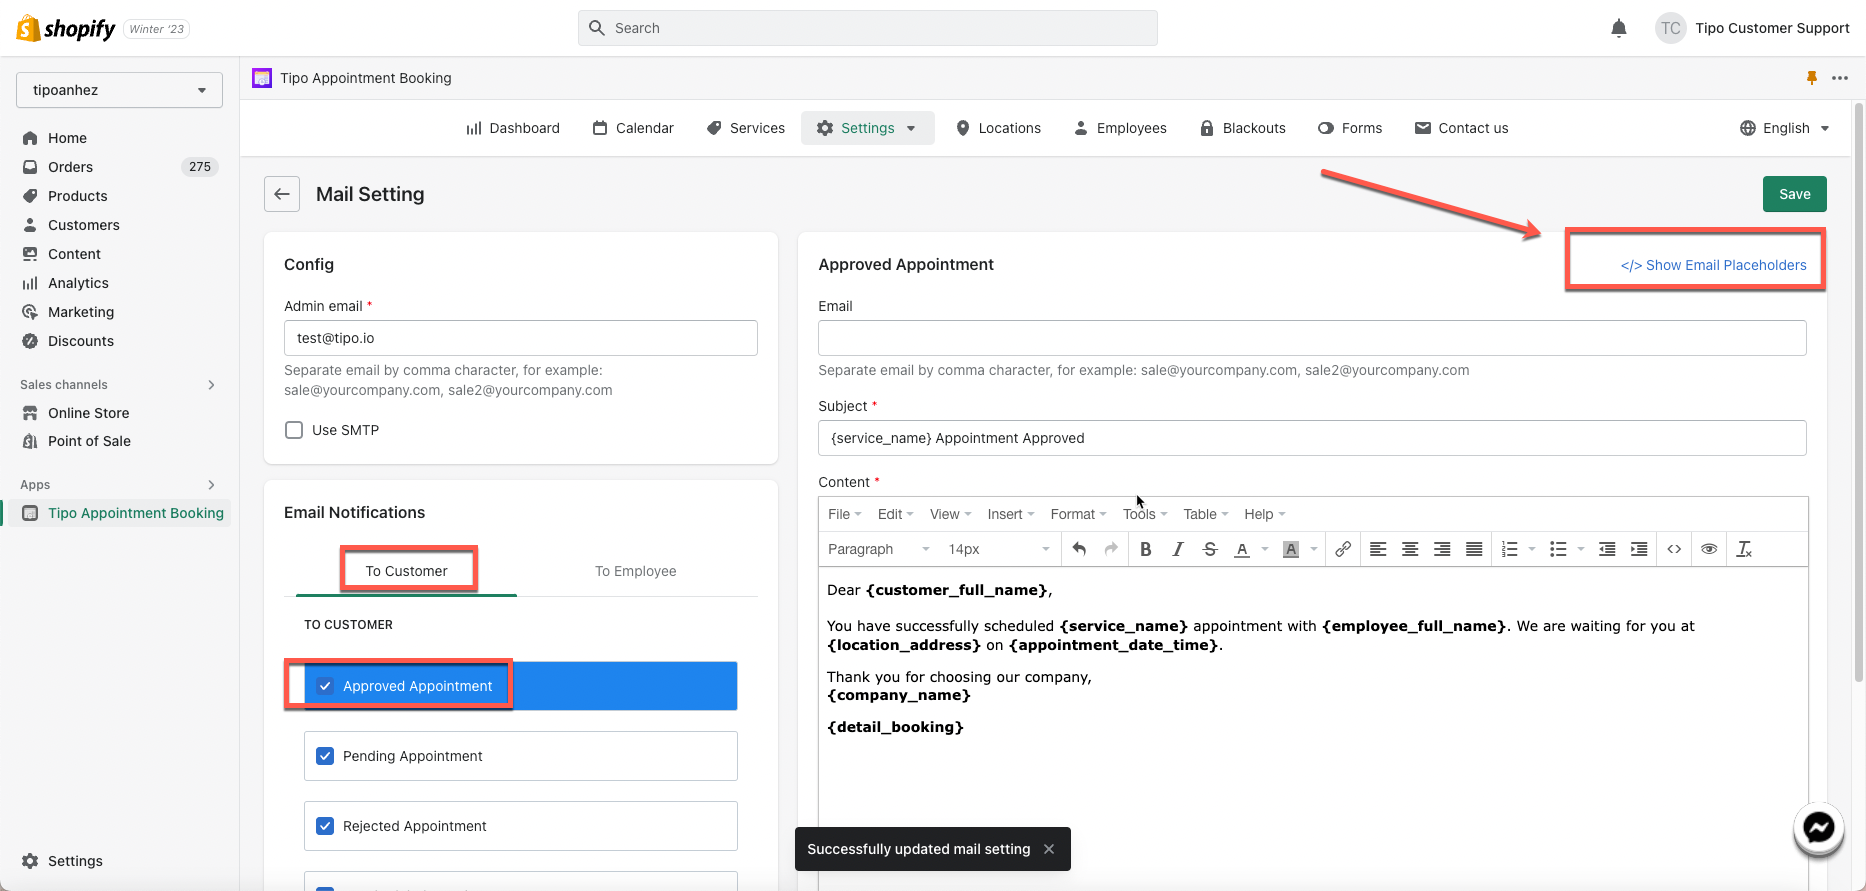
- In Mail setting, click the email template you want to edit, eg. To Customer > Approved appointment
- On the top right corner, click </> Show email placeholder
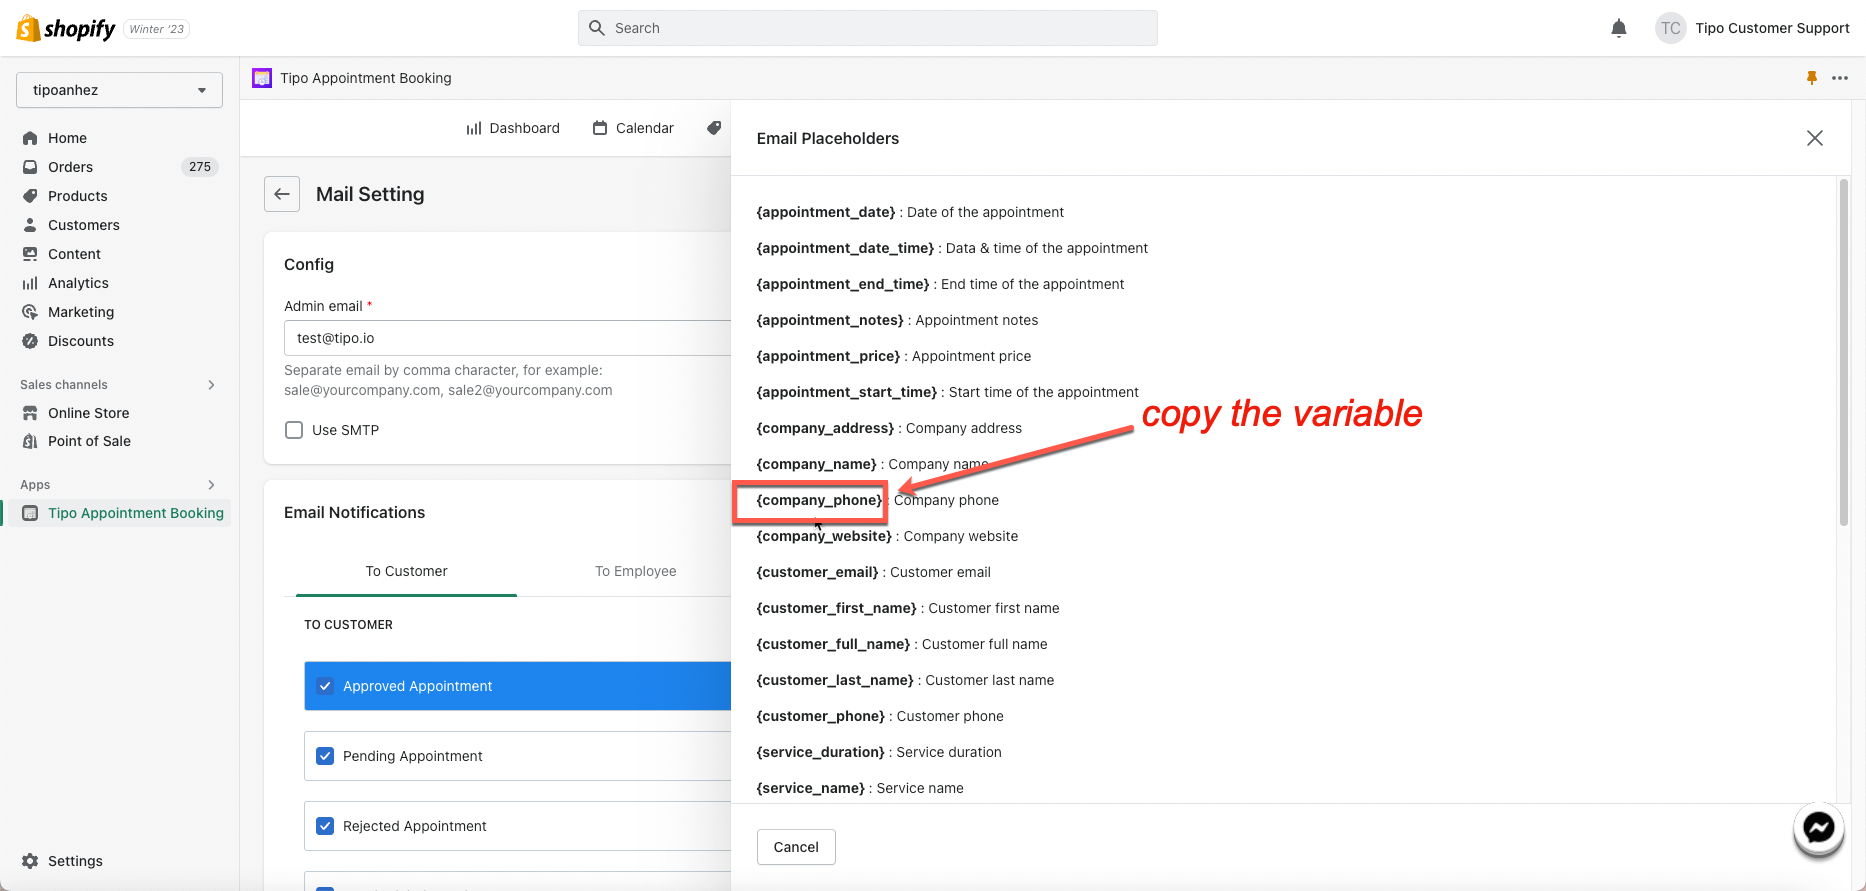
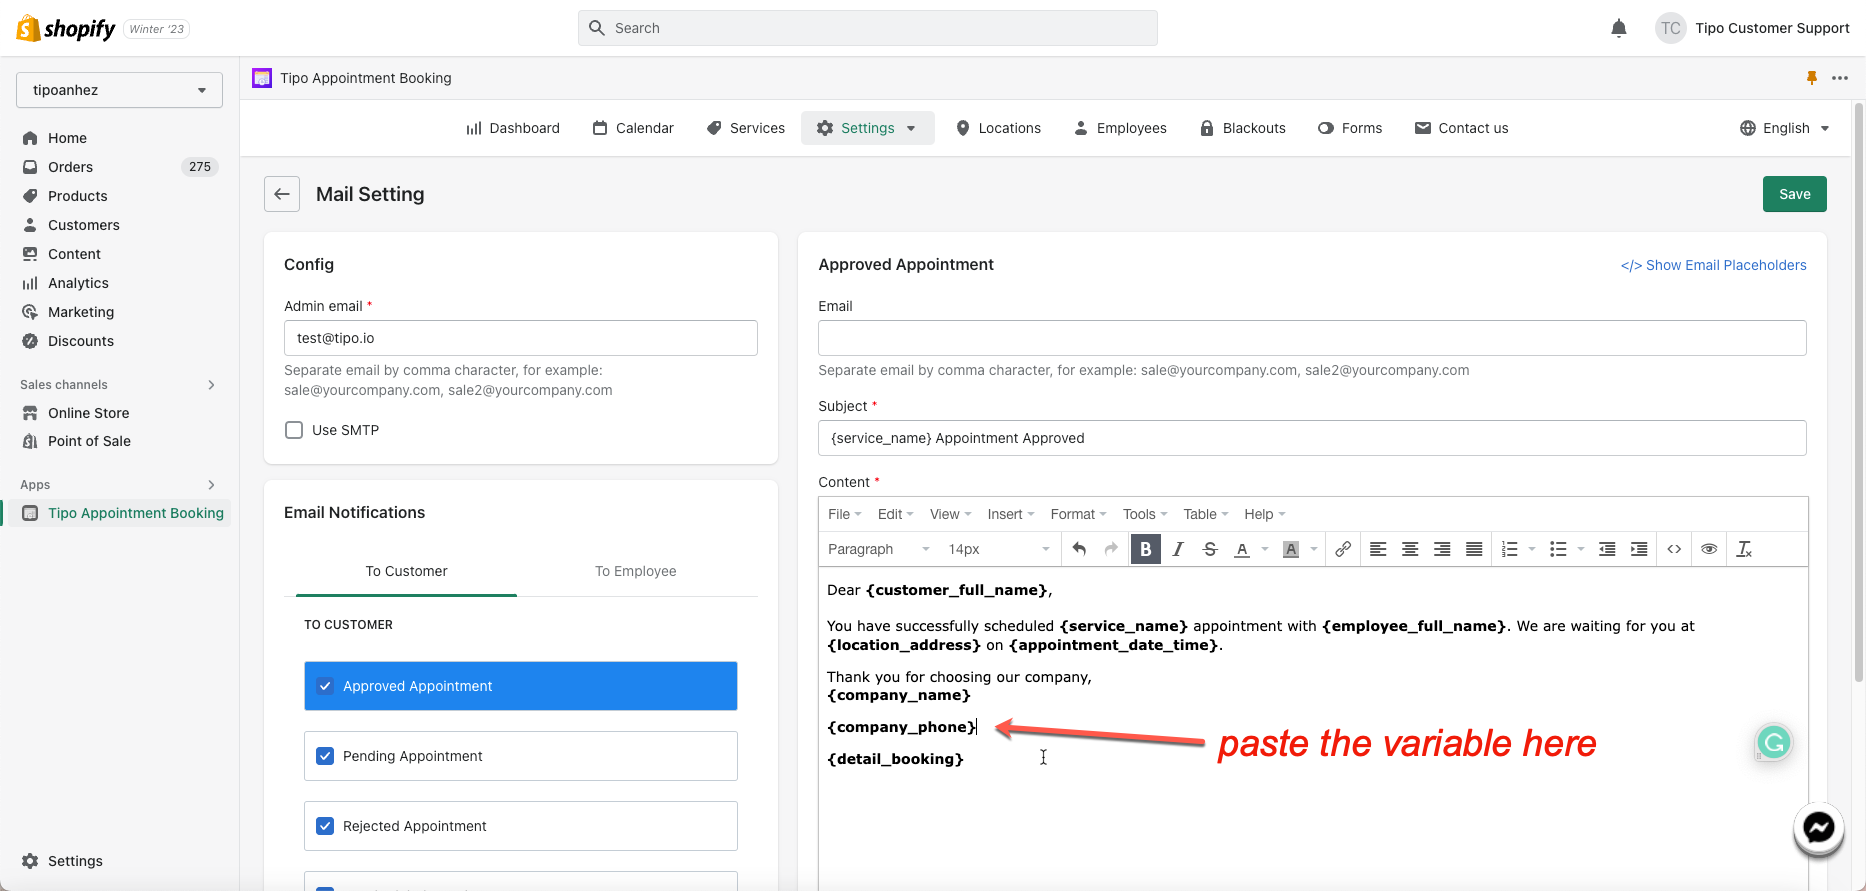
- Click on the wanted variable to copy it > paste it in the email content
- Click Save
- From the app admin page, go to Settings
- From the Setting page, click Mail
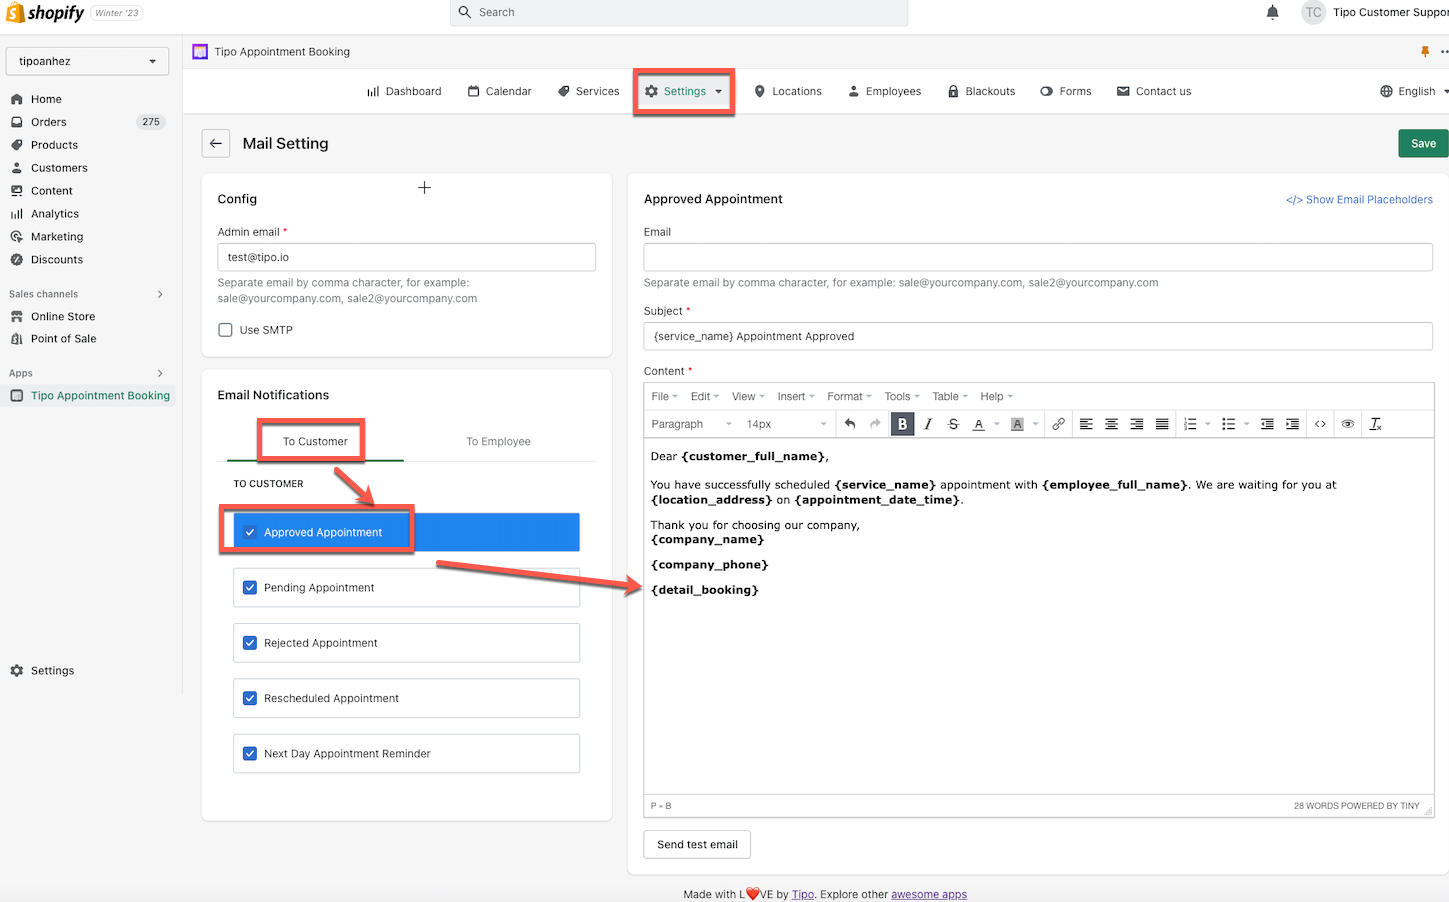
- n Mail setting > select To Customer
- Tick to enable the email notification(s) you want
- Click on the email notification (eg. Approved appointment) to set up email Subject and Content
- Click Save
Set up email to employees
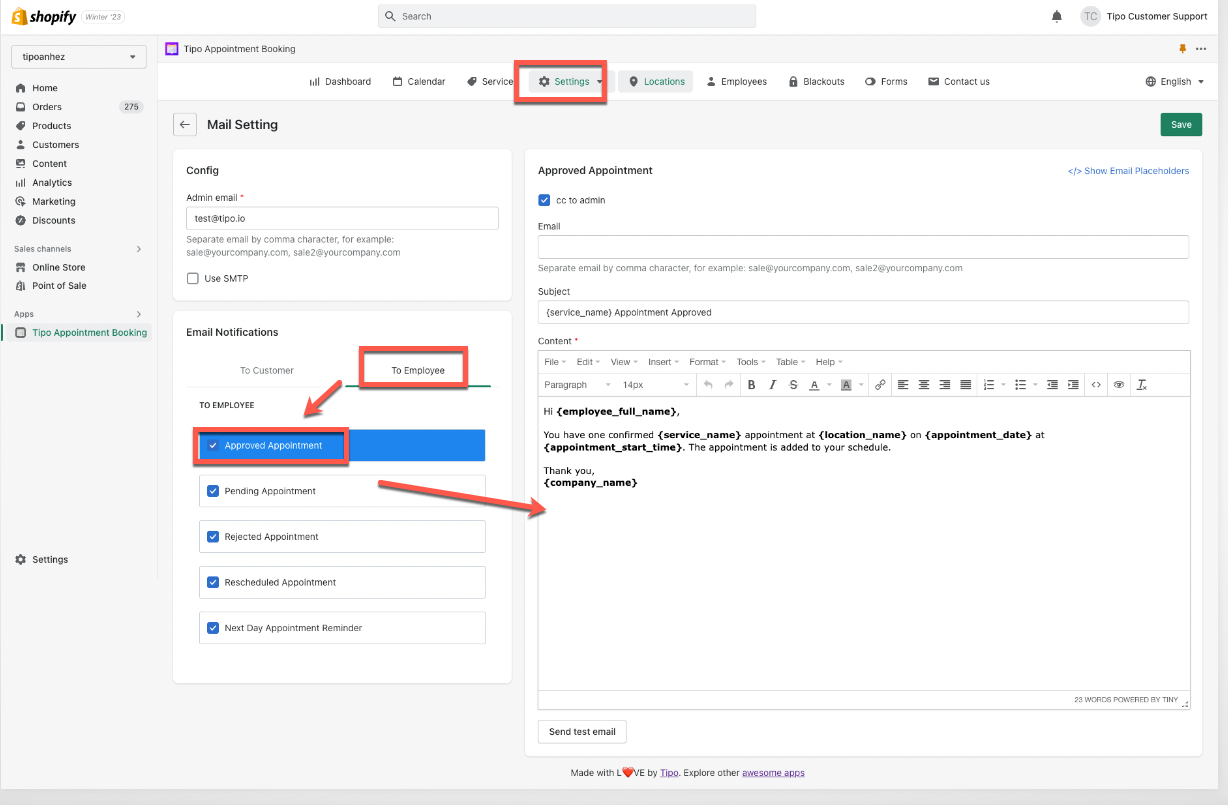
- From the app admin page, go to Settings
- From the Setting page, click Mail
- In Mail setting > select To Employee
- Tick to enable the email notification(s) you want
- Click on the email notification (eg. Approved appointment) to set up email Subject and Content
- Click Save
Bcc to people who may concern
This option allows you to bcc emails to any people, for example, staff who are in charge of reading and managing the emails.
- From the app admin page, go to Settings
- From the Setting page, click Mail
- In Mail setting, click the email template you want to edit, eg. To Customer > Approved appointment
- Find Email input field > add email address(es) you want to bcc to
- Click Save

Cc email to admin
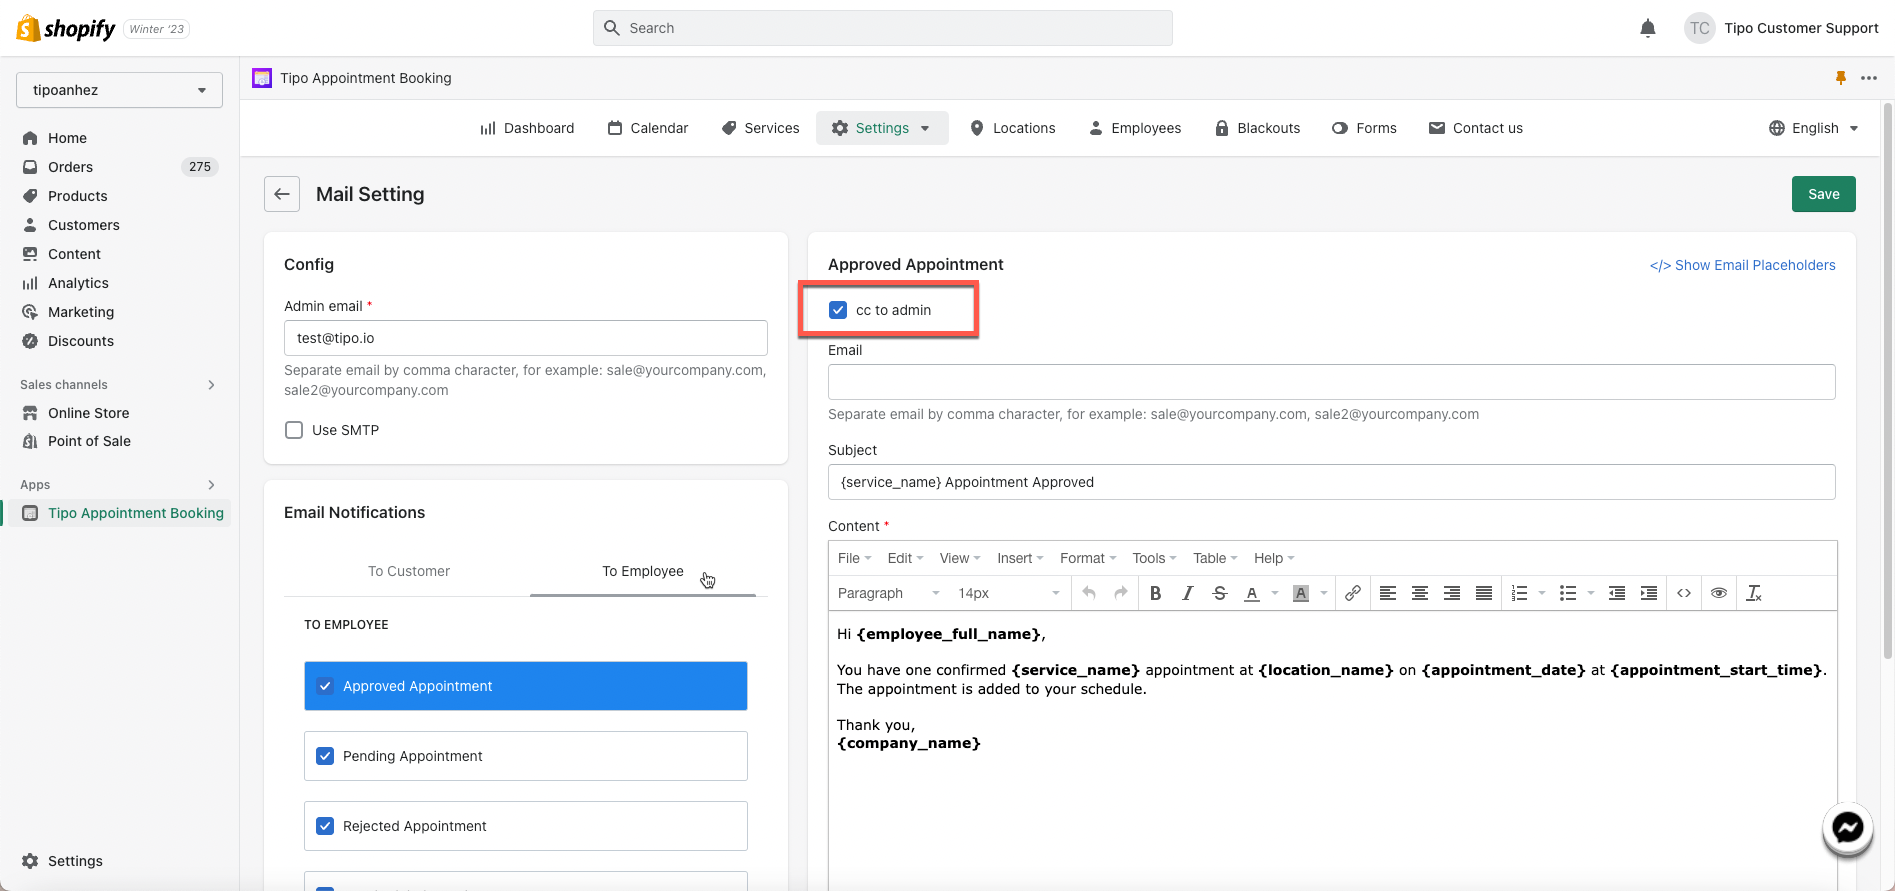
- From the app admin page, go to Settings
- From the Setting page, click Mail
- In Mail setting > select To Employee
- Select the email notification type you want (eg. Approved appointment) > put a tick to enable Cc email to admin
- Click Save
Send test email
- From the app admin page, go to Settings
- From the Setting page, click Mail
- In Mail setting, click the email template you want to test, eg. To Customer > Approved appointment
- Below the email content, click Send test email
- A popup will show > add Recipient email
- Click Send
