
Supported metafield types
- Multi-line text
- Rich text
- Integer
- Decimal
- Date and time
- Date
- Dimension
- Volume
- Weight
- True or false
- Rating
- URL
- Money
- Link
- JSON
🚫 Not supported yet:
Reference types (e.g. product reference, collection reference) are not currently supported.
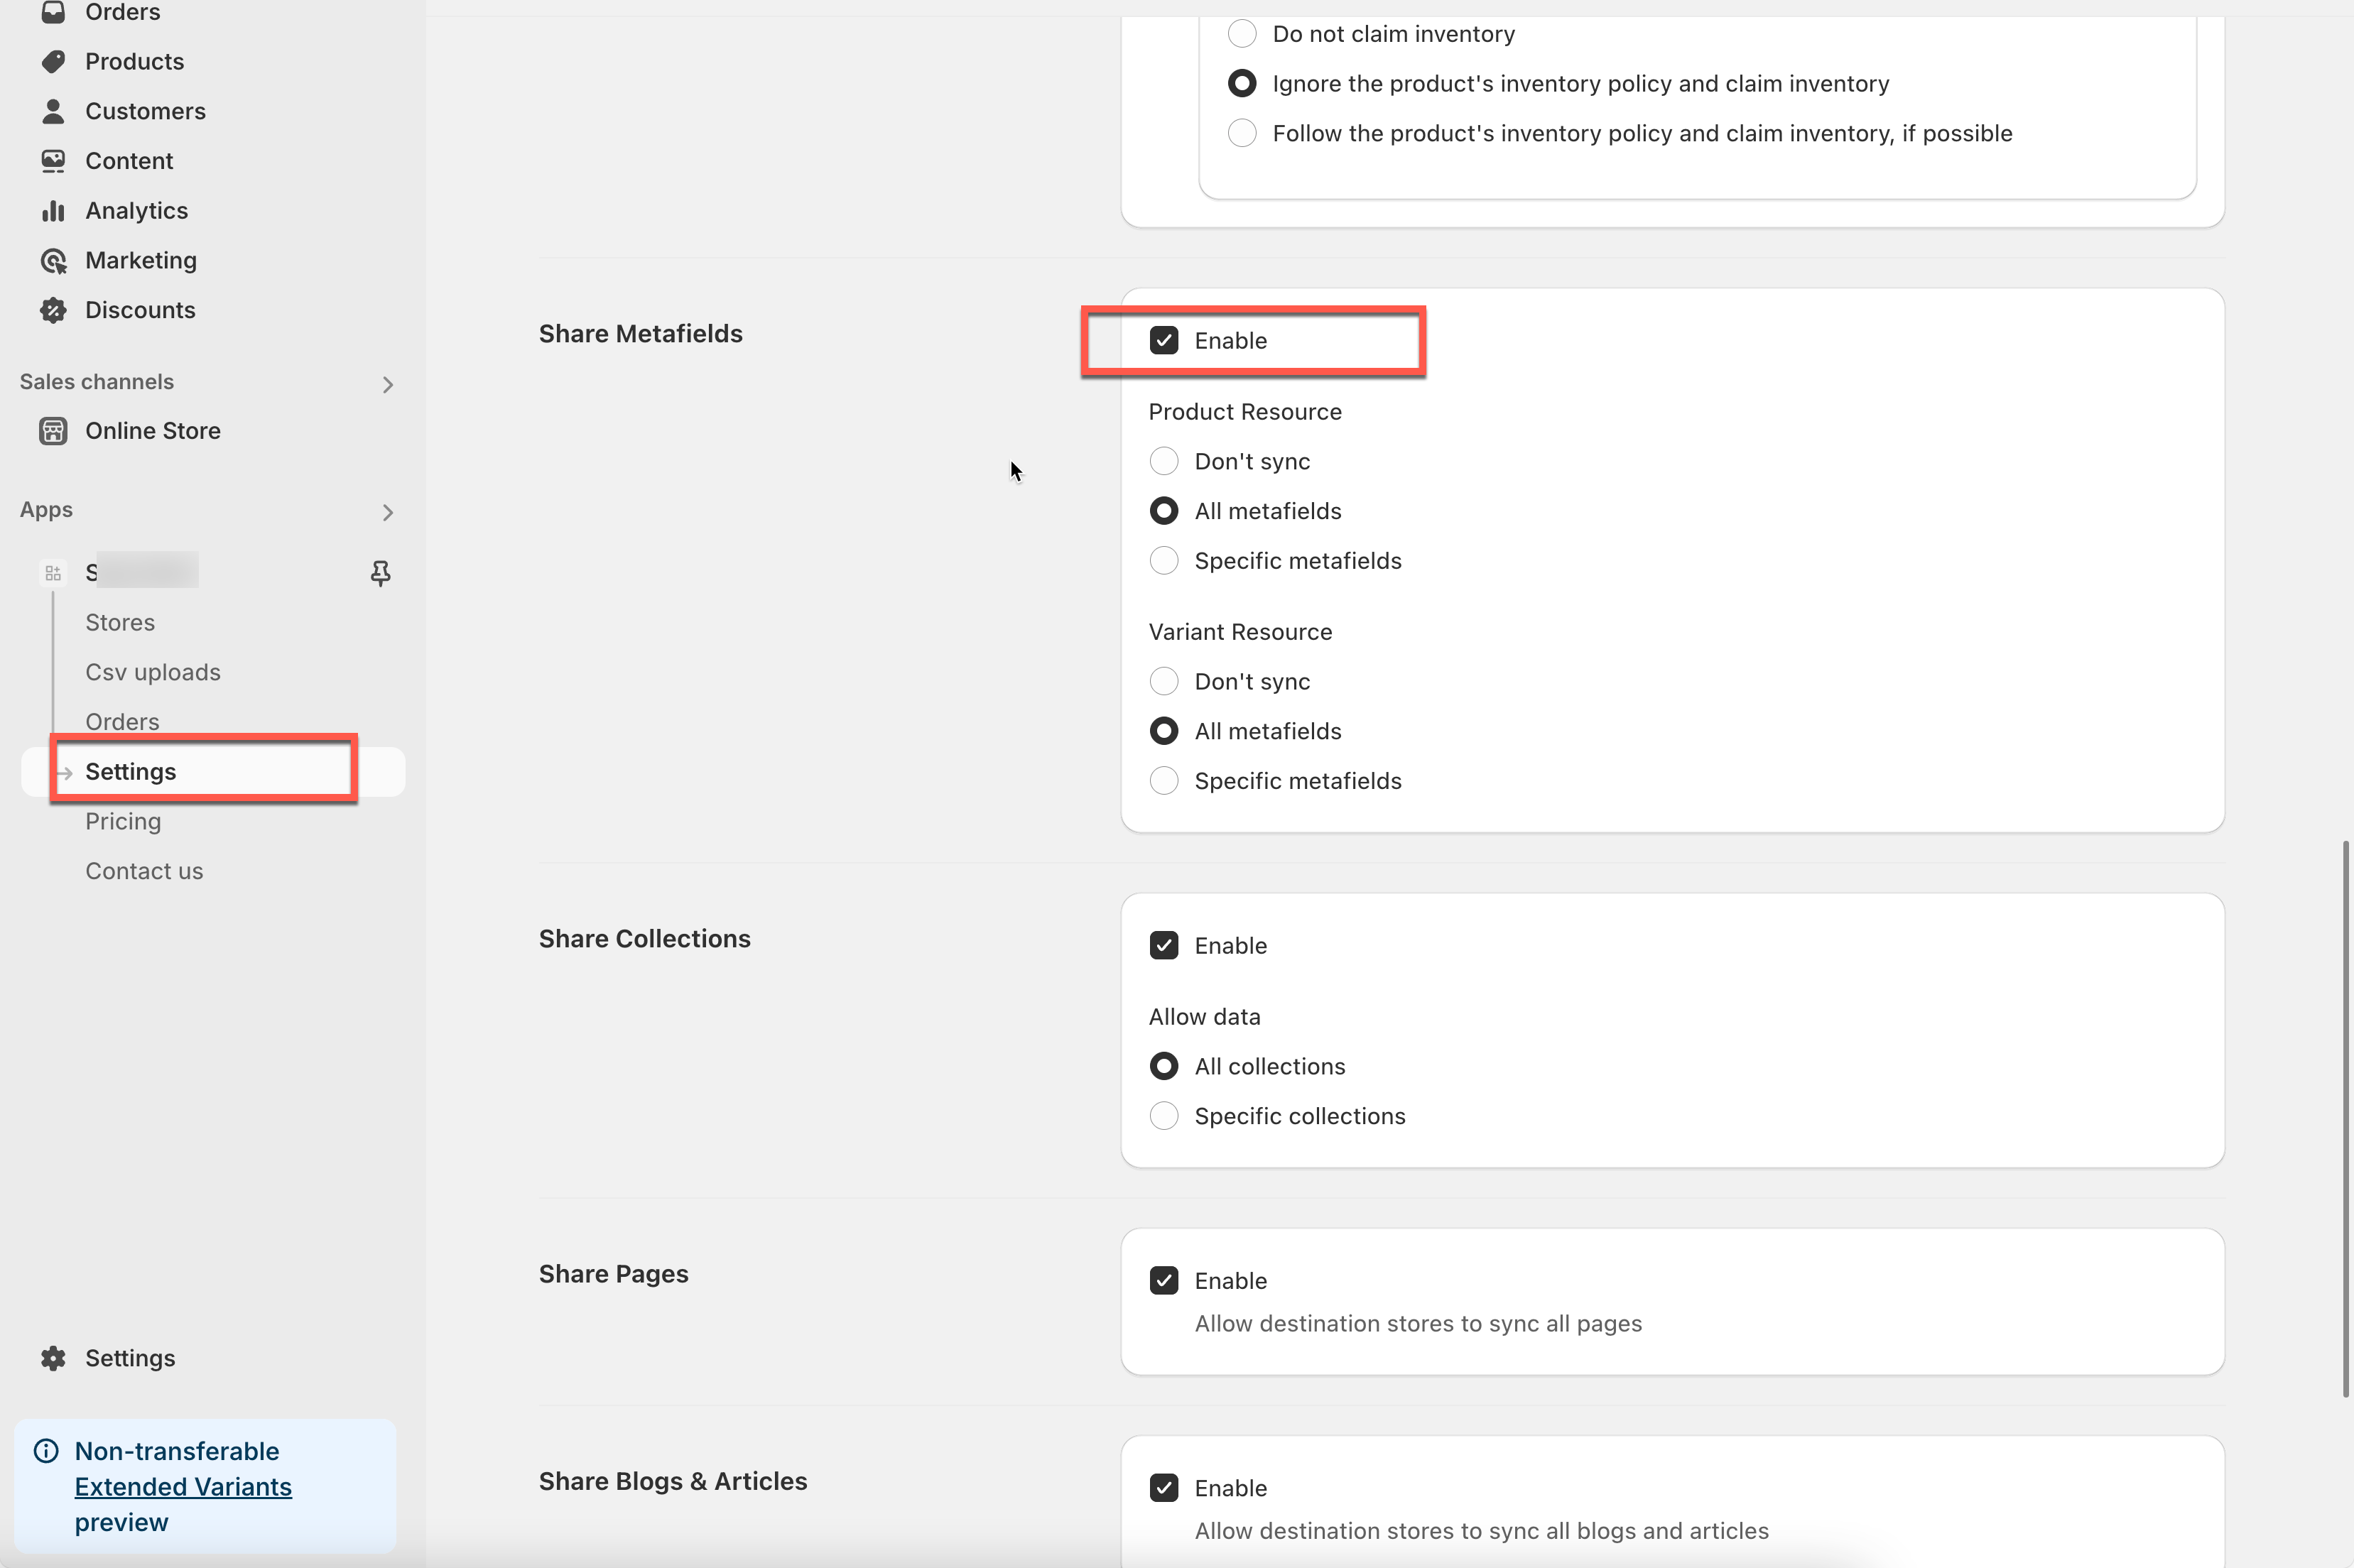
Step 1: Configure Metafields on the Source Store
- Open the app > click Settings > find Share Metafields
- Tick on the checkbox Enable of Share Metafields option > select the Metafields you want to sync for products and variants
- Click Save to update the changes
Step 2: Configure Metafields on the Destination Store
1. Open the app > click Stores > click on the source store URL to open the connection detail

2. Find Metafields sync section > tick on the checkbox Enable of Metafields sync option > select the Metafields you want to sync for products and variants
3. Click the metafield icon next to the Product or Variant metafield sections. A popup will appear showing the metafield sync status.
-
✅ Green: Metafields that already exist in the destination store and are valid to sync.
-
⚪ Gray: New metafields that will be created and synced.
-
🟠 Orange: Invalid metafields due to mismatched data types between source and destination stores. These must be fixed manually in Shopify.
-
🔴 Red: Unsupported metafields that cannot be synced by the app.

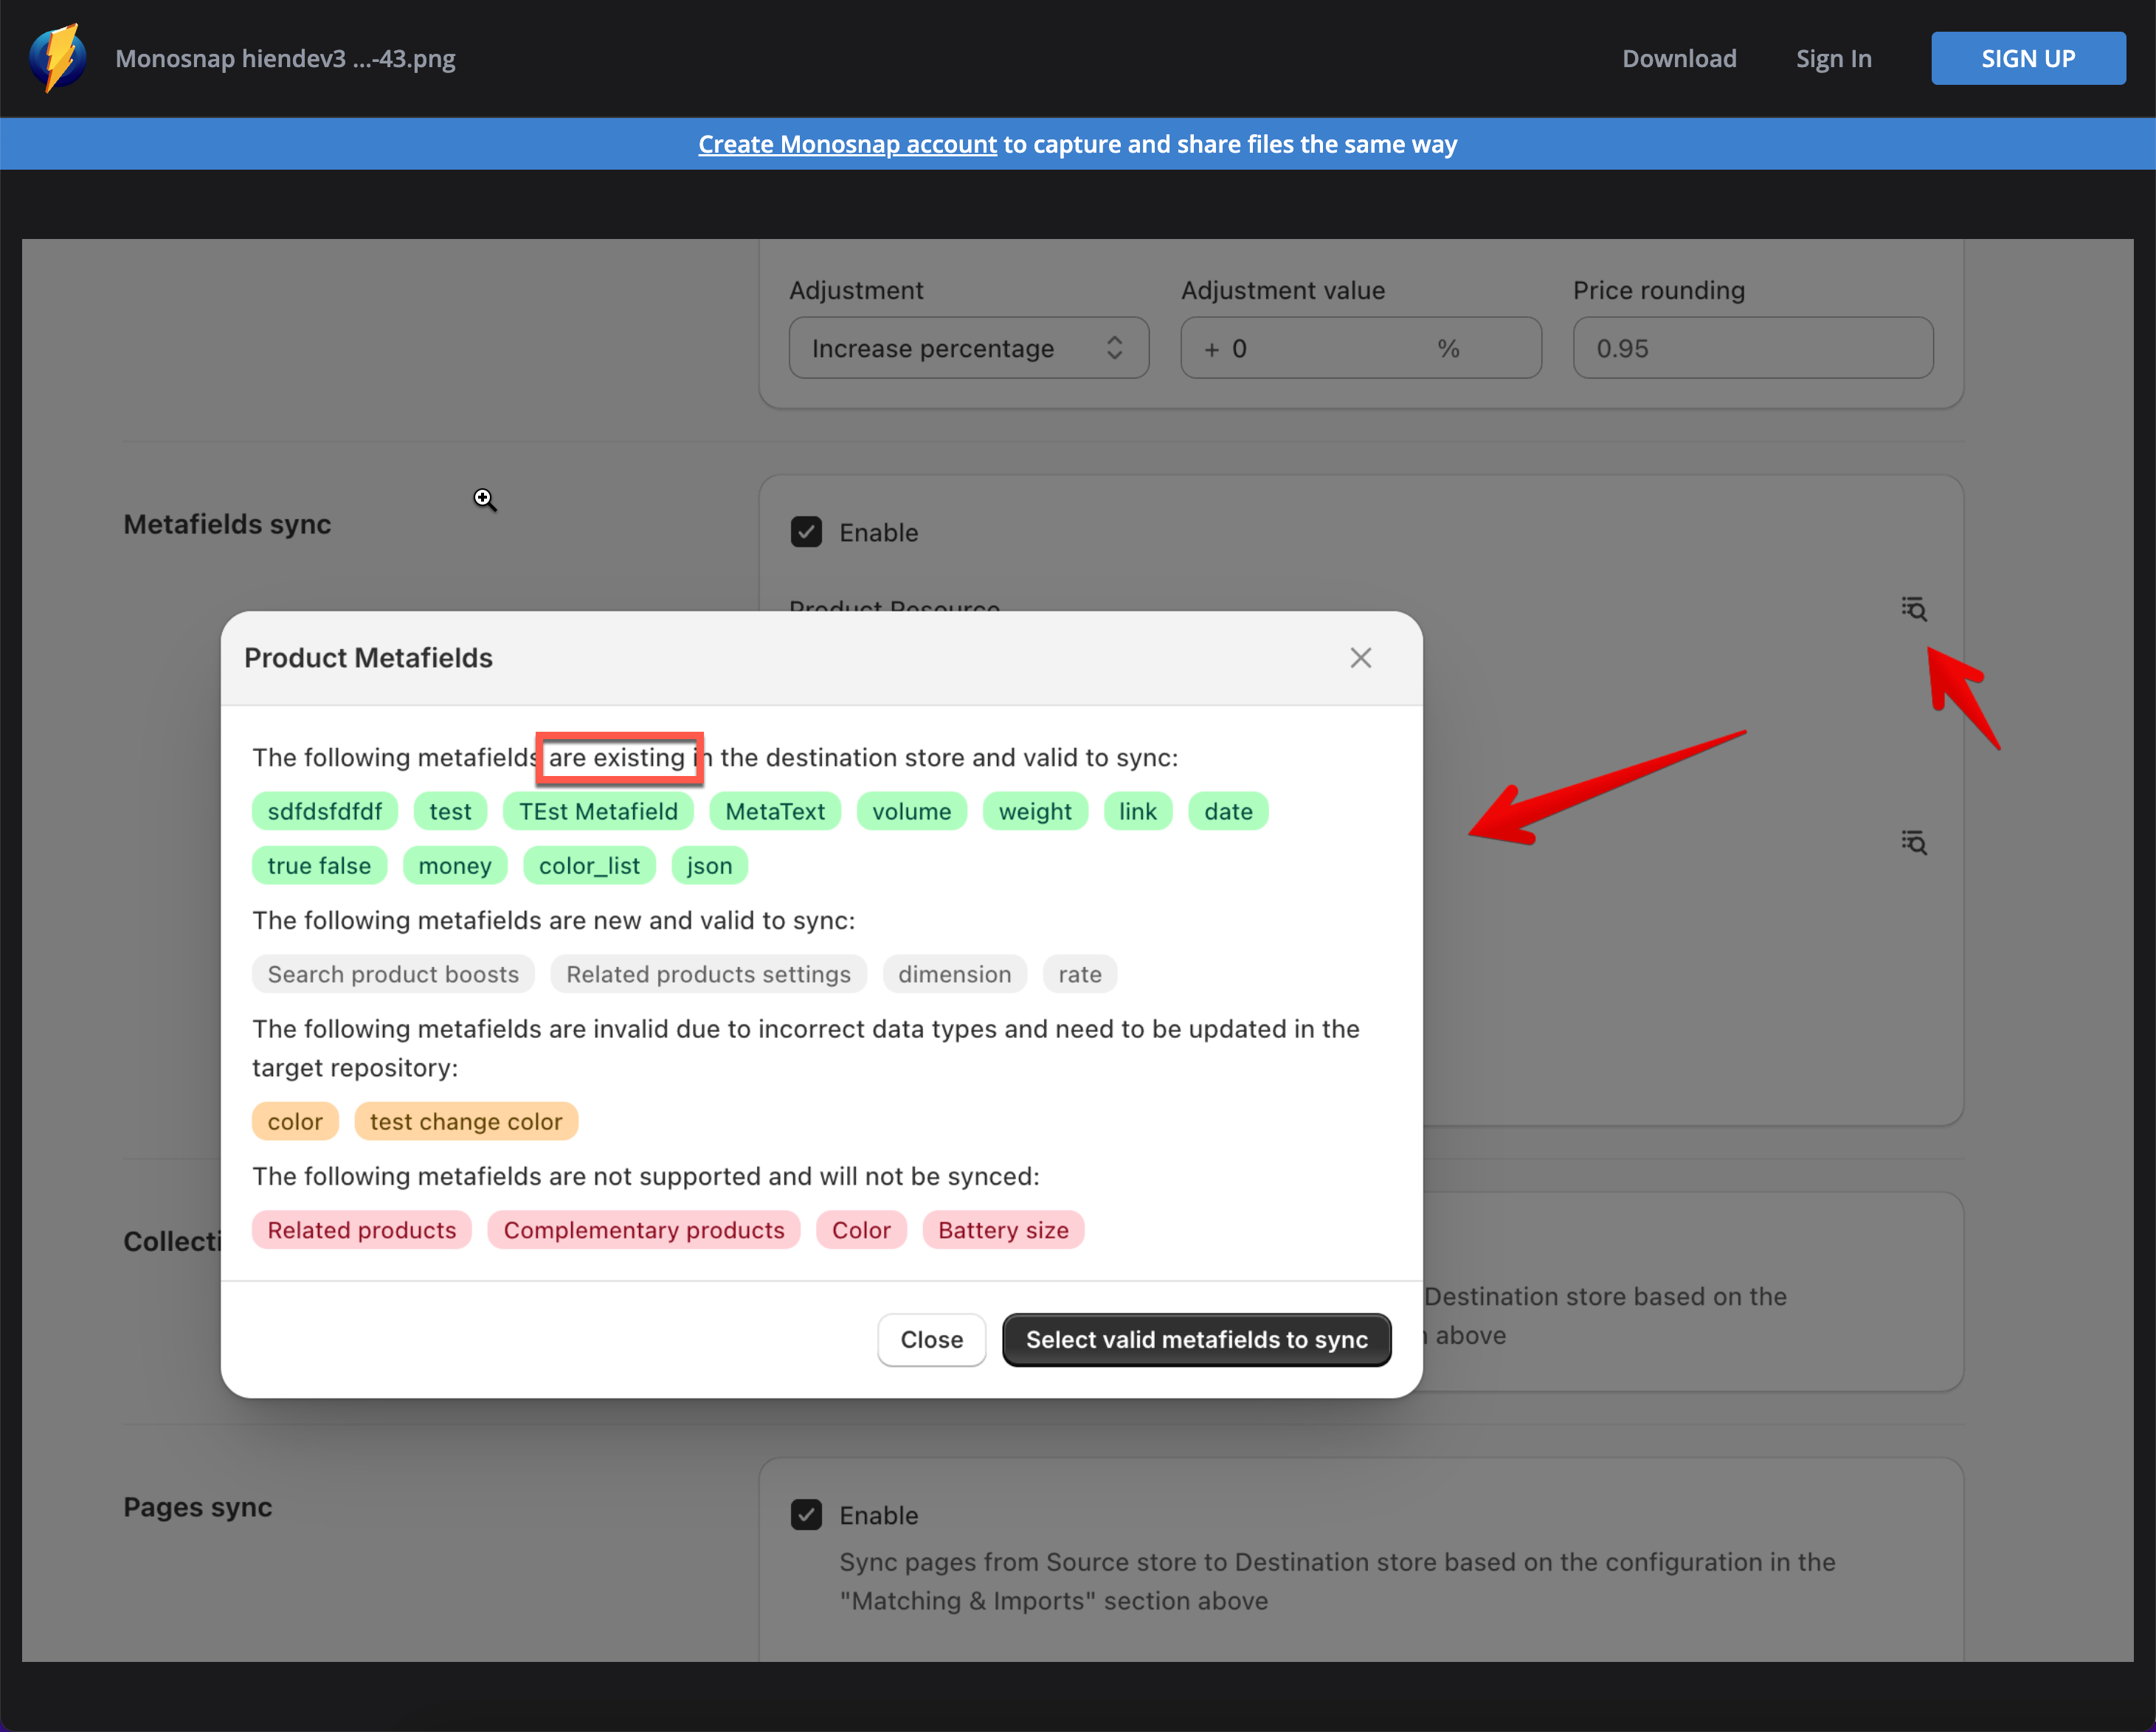
3. Click Select valid metafields to sync to auto-fill only the metafields that are confirmed as valid.
4. Click Save to update the changes
Notes:
-
This list only includes defined metafields. Unstructured (undefined) metafields are not shown and cannot be synced.
-
If a metafield is invalid (wrong data type), go to Shopify admin → Settings > Custom data and fix the data type in the destination store.
-
Always map metafields carefully, especially for critical data like specifications or filters.
What Happens During Sync
- If the Destination store does not have the metafield, the app will automatically create it. You can find the newly created metafield data in store settings
- If the Destination has the metafield but no data in Source, the app will not overwrite it.
- Data types between Source and Destination must match exactly.
Notes and Best Practices
-
Shopify limits stores to 200 metafields per resource (e.g., product).
-
We recommend using Specific metafields option to sync only the necessary data.
-
Data types must match between Source and Destination metafields. Otherwise, the sync may fail.
-
⏱ Sync speed may vary depending on:
-
The number of metafields synced
-
The number of products in your store
-
-
⚠️ Avoid syncing metafields that are:
-
Frequently updated
-
Controlled by third-party apps. This could lead to sync conflicts or outdated data.
-

Example: Syncing a Product Metafield – “Material”
You want to sync a custom product metafield called Material (e.g., “Cotton”, “Leather”, “Wool”) from your Source Store to your Destination Store using our app.
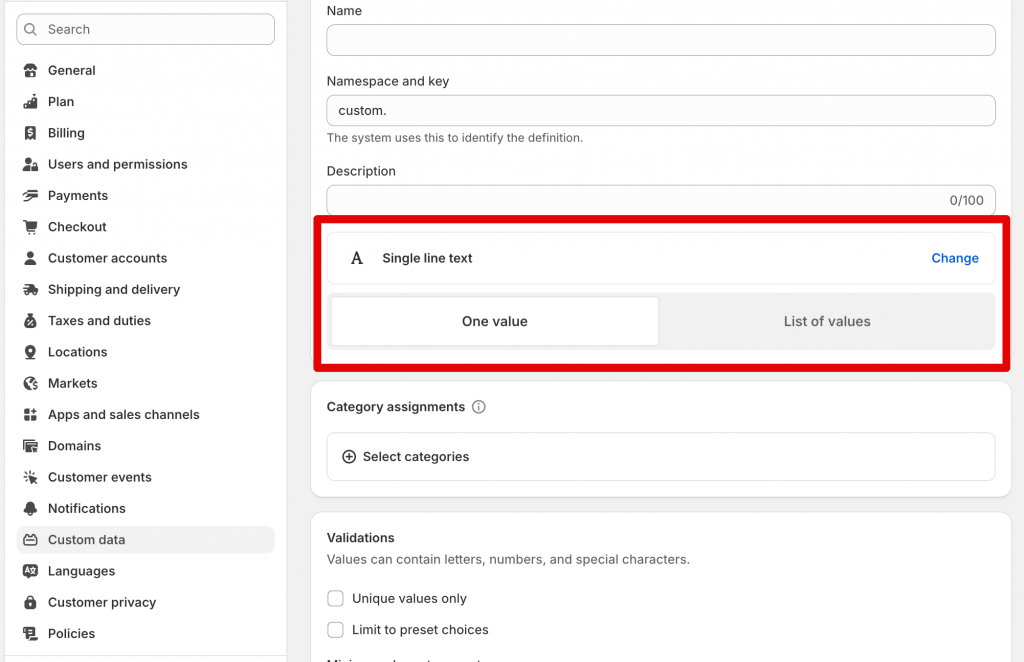
Step 1: Define the Metafield in Shopify
In your Source Store:
-
Go to Shopify Admin > Settings > Custom Data > Products
-
Click Add definition (if it’s not already created) > fill out the metafield definition:
-
Name: Material
-
Namespace:
custom -
Key:
material -
Type: Single line text
-
=> This gives you the full metafield key: custom.material
Repeat this step in your Destination Store (must match the same key and type).
Step 2: Add Metafield Data to Products
In your Source Store, go to a product and scroll down to Metafields > Under Material, enter: Cotton
This product now has the metafield custom.material = "Cotton".
Step 3: Configure Sync in Our App
-
Open our app in the Destination Store > go to Connect Configuration > Metafield Sync
-
Choose Specific Metafields > enter the metafield key exactly:
custom.material
Result
-
Our app will find
custom.materialin the Source Store -
If it does not exist in the Destination product, the app will create it
=> Result:custom.material = "Cotton"in both stores -
If it exists in Destination but Source is empty, we do not override the value
FAQs
How to Set namespace.key in your store?
To sync a specific metafield, you’ll need to enter the metafield definition key in this format: namespace.key (for example: custom.color).
Here’s how to find it in your Shopify admin:
-
Go to your Shopify Admin >cavigate to Settings > Custom Data > Products
-
Click on the metafield you want to sync
→ You’ll see the Namespace and Key values -
Combine them in this format:
namespace.key
→ Example:custom.description