Create an appointment
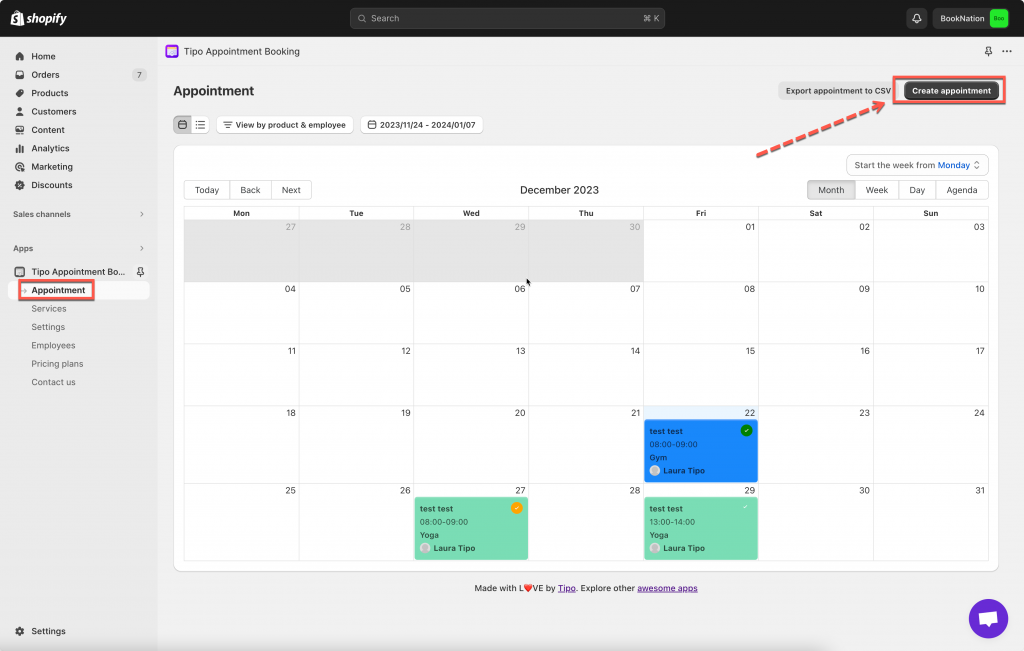
This feature allows you to manually make an appointment with your customers in the app back end. Your customers should have registered an account in your Shopify store already.
Steps to manage
1. Open the app > click Appointment > click Create appointment button
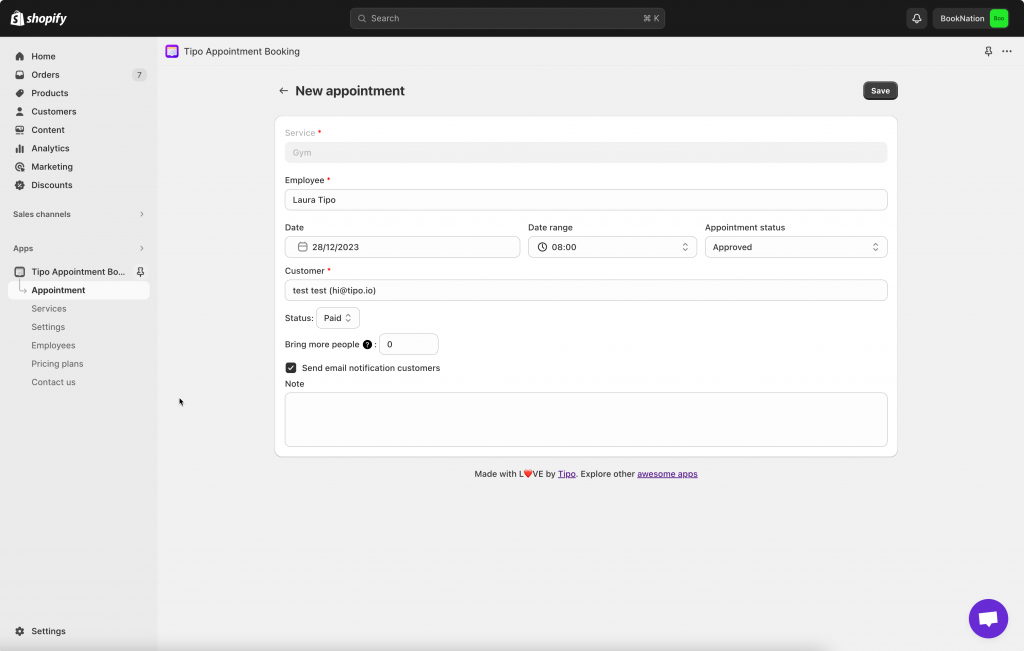
2. Select service and employee
3. Select date and hour for the appointment, set up status
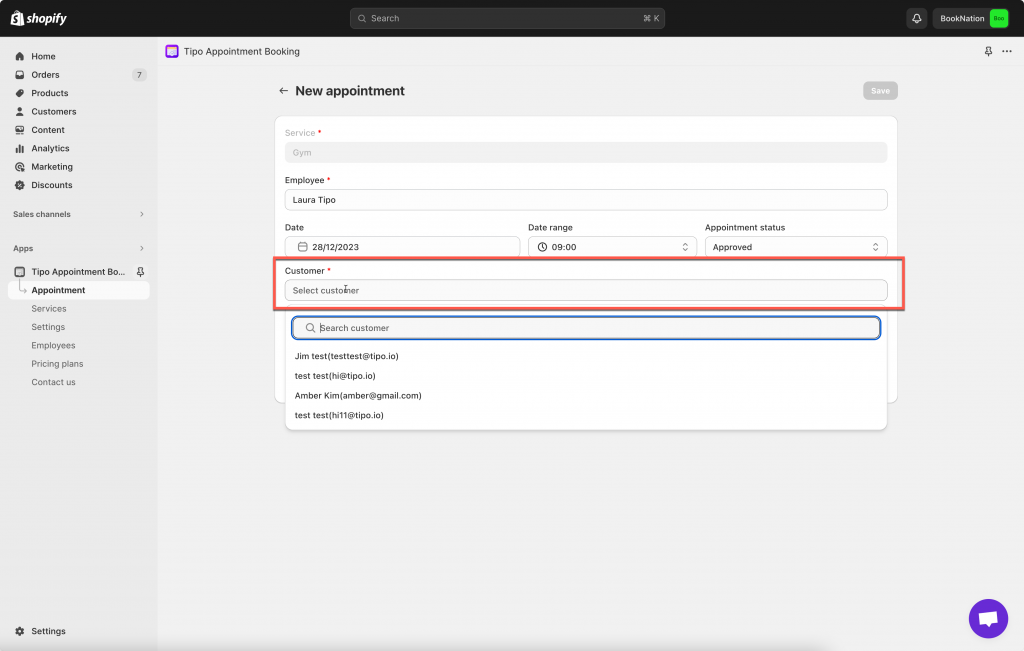
4. Select Customers who will attend the appointment.
Note: the customer needs to exist in your Shopify customer list. If the customer account does not exist, please create a new one.
5. Tick to the checkbox Send email notification to the customers if you want to inform your customer about the new appointment you have created
6. Click Save to finish
Note: The Email notification will work based on the appointment status
– If appointment status is Approved => Employee will receive Approved Appointment email
– If appointment status is Pending => Employee will received Pending Appointment email
– If Order status is Pending => customers will receive a Shopify invoice email. After they complete the order, they will receive Shopify order confirmation email as well as app email notification (Pending or Approved based on the Appointment status). Meanwhile, the order status will be switched from Pending to Paid.
– If Order status is Paid => customers will receive Pending or Approved email notification based on the Appointment status
Approve an appointment
1. Open the app > click Appointment > click on the appointment you want
2. In the appointment details, click edit icon 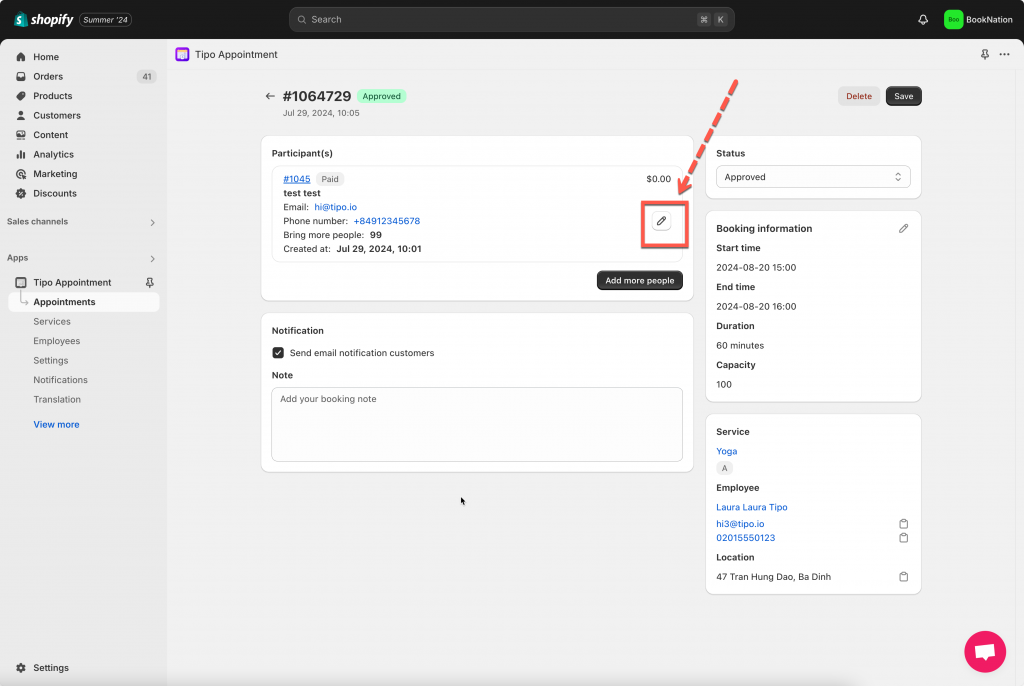
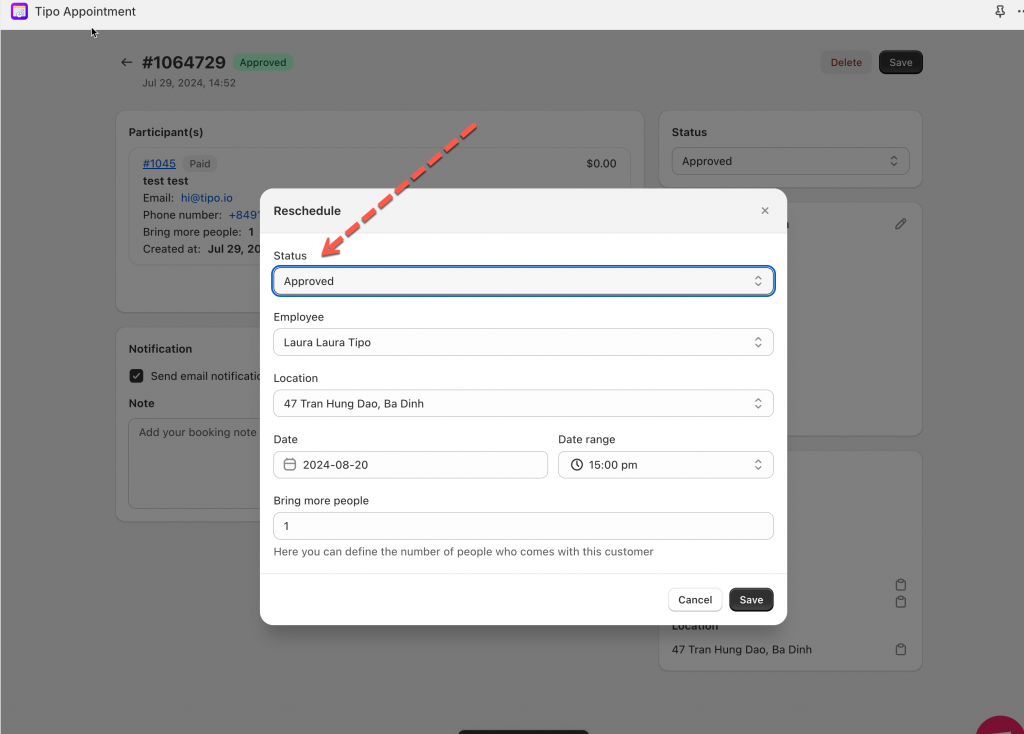
3. Select Approved in status dropdown > click Save to close the popup
4. Click Save again to update the changes
Reschedule an appointment for a customer
1. Open the app > click Appointment > click on the appointment you want
2. In the appointment details, click edit icon 
3. Edit the Date and hour of the appointment > click Save to close the popup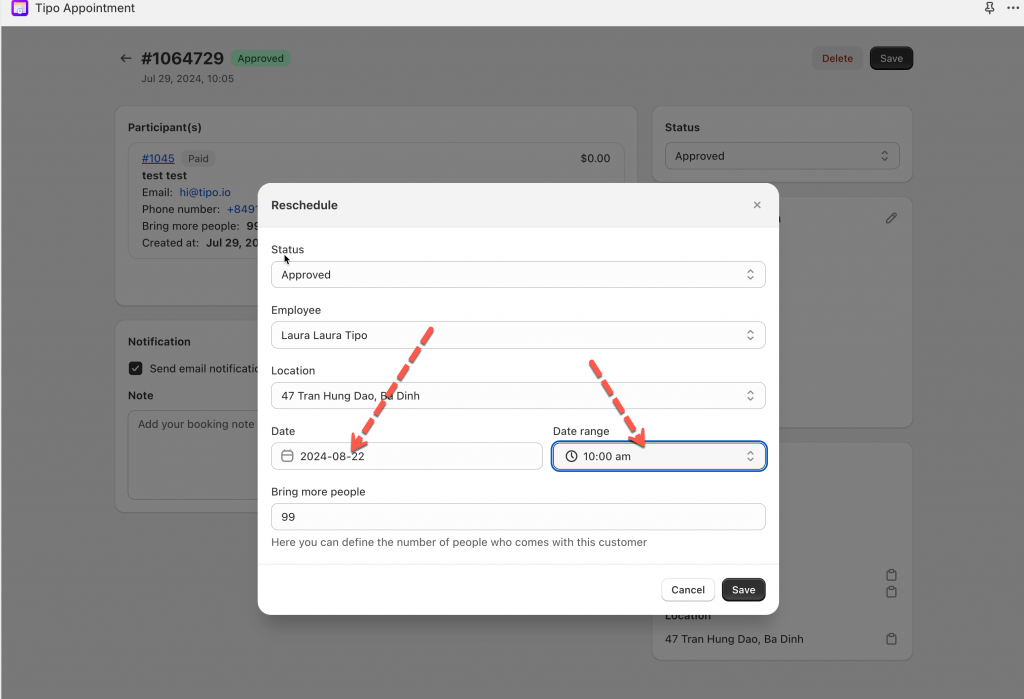
4. Put a tick on Send email notification to the customers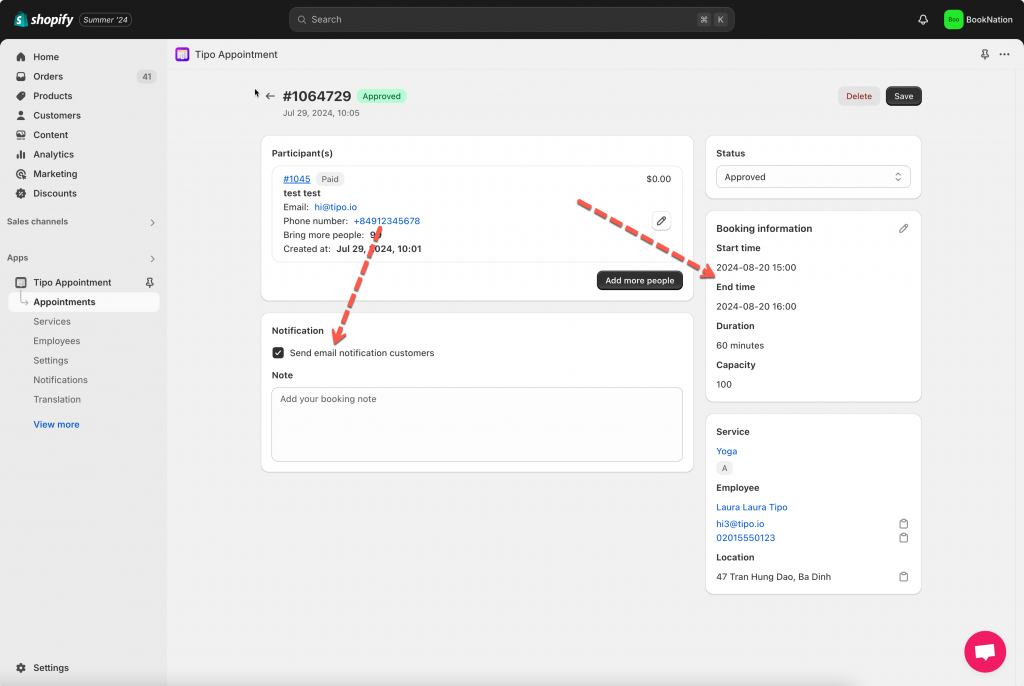
5. Click Save
After the appointment is edited, it is moved to the correct datetime on the Tipo calendar in the app.
Reject an appointment
. Open the app > click Appointment > click on the appointment you want
2. In the appointment details, click edit icon 
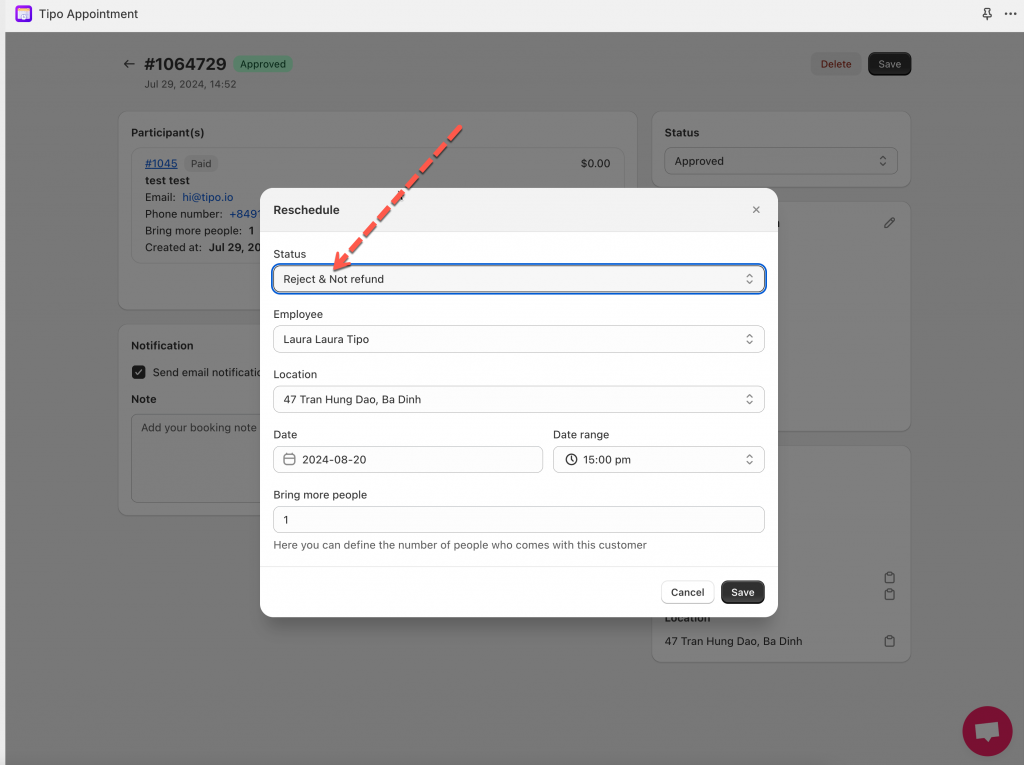
3. Select Reject& Not refund on Status dropdown > click Save to close the popup
4. Click Save again to update the changes
Delete a appointment
- Open the app > click Appointments > click on the appointment you want
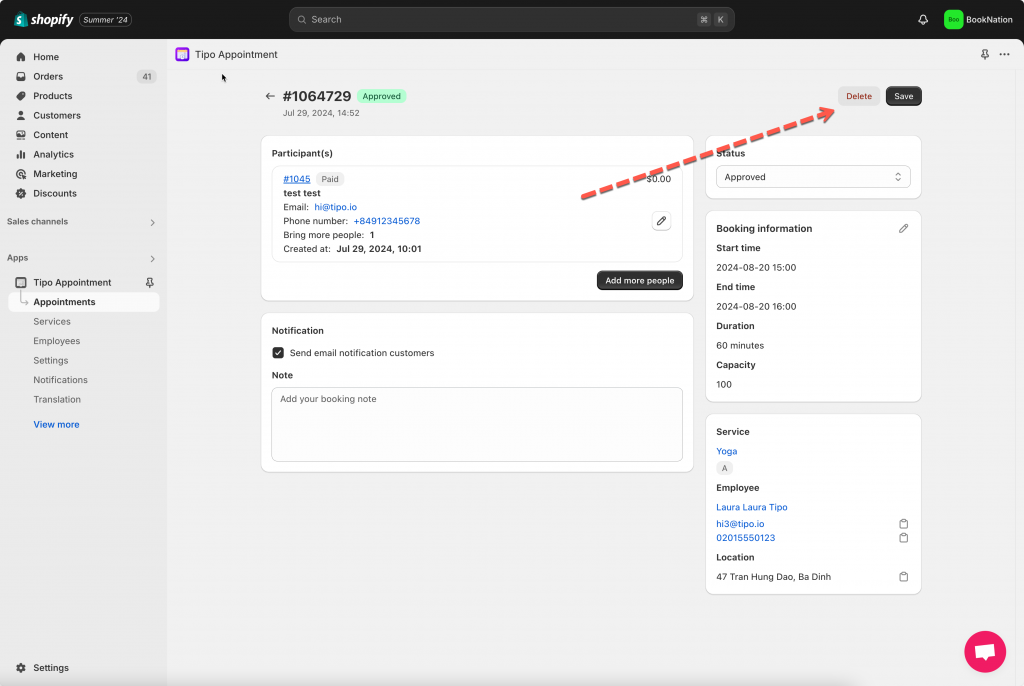
- In appointment detail > click Delete icon at top right
- Confirm to delete it
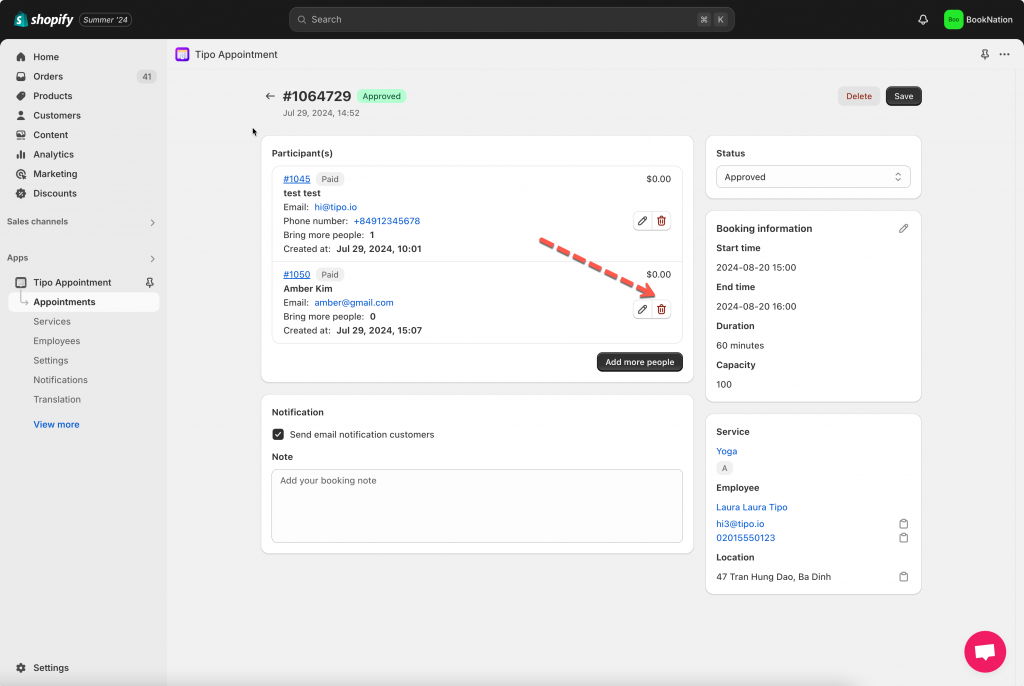
in case there are multiple customers in the appointment, you can delete one of the customer here
Export Appointments to CSV
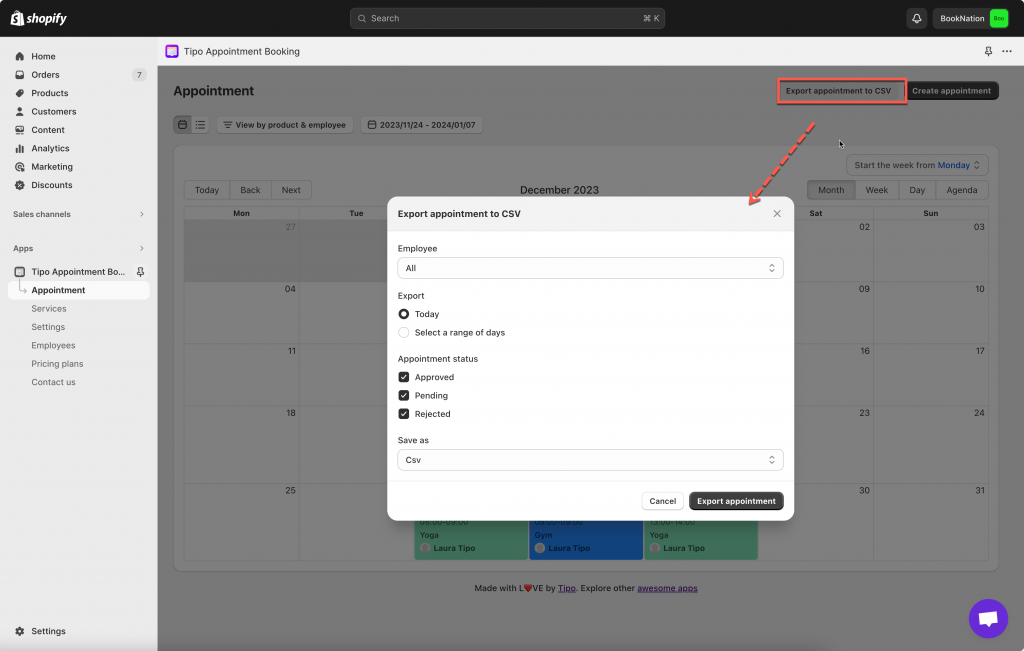
1. From the app admin page > click Appointment > click Export Appointment to CSV
2. A dialog will show up, here you can:
- Filter appointments to export by employee
- Select the date range of the appointments you want to export
- Select the appointment status you want to export
3. Choose Save as CSV or Excel
4. Click Export
Need support?
Don’t hesitate to contact us if you have any questions or suggestions. Please contact us at: [email protected]

