
- From the app admin page, go to Navigation
- Click Email template > enable Use custom email config option
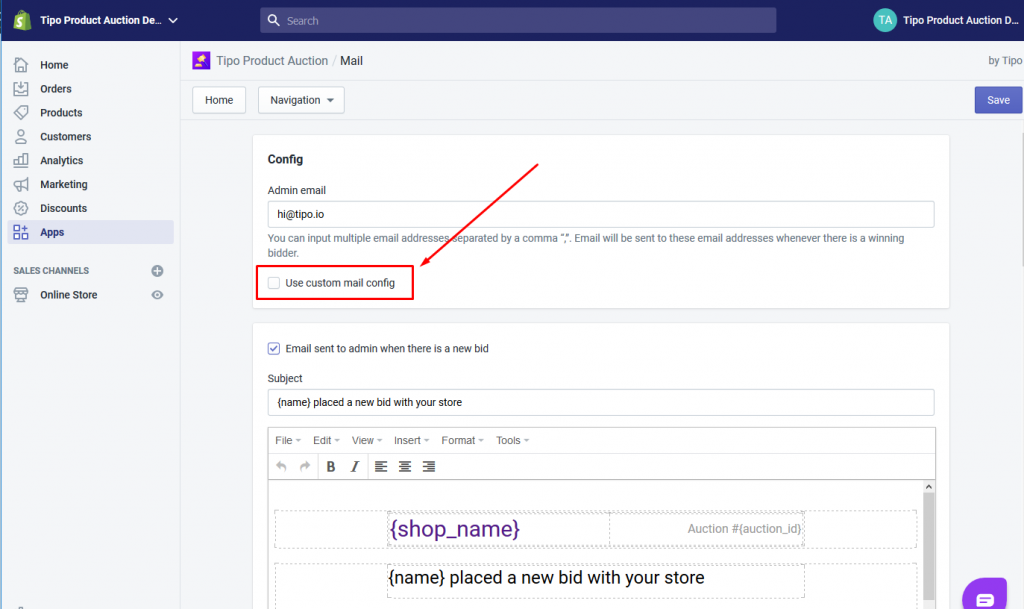
It is an optional feature.
If you do not configure this option, email notifications will be sent from the our email server by default.
If you want email notifications to be sent from your email address, you should configure “Use custom email config”. Please follow our guide below to configure it.
Step 1: Allow Access to Google Account
Before using Gmail SMTP, you need to authorize your server to access your Google account.
Click here, log into your Gmail account, then click Continue.
Note: You should use your main Google account for achieving this purpose. If you have merged accounts from google you will receive an authentication error.
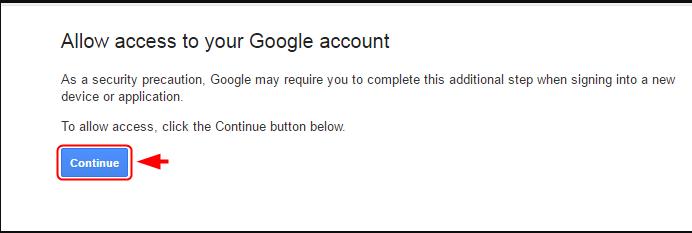
This will enable your account access for your new device (web server).
Step 2: Generate App Password if 2-Step Verification is Enabled
If you have enabled 2-step verification on your Google account, you would need to generate application specific password. If you are not using 2-step verification, you may skip this step and move to Step 3.
Select Other/Custom name from Select App, give it a name such as “DO – Production Server” and then click Generate.
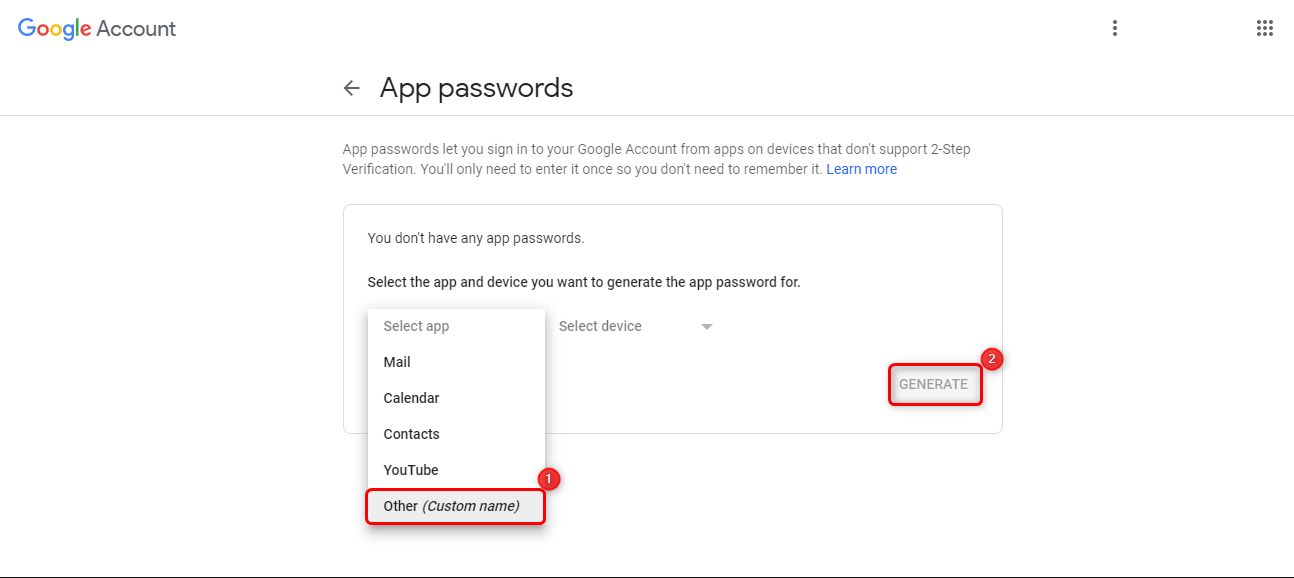
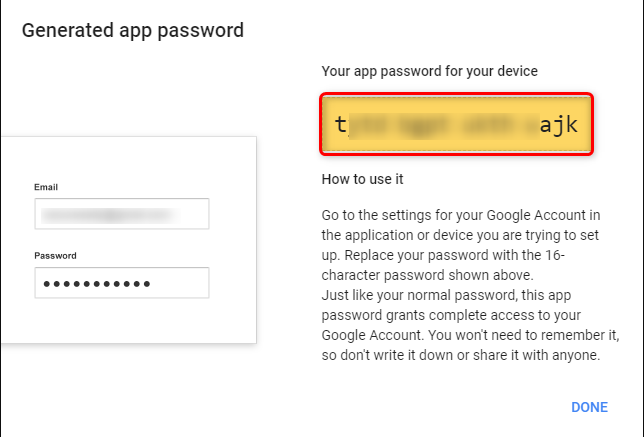
Note down the application password as it will be required in the next step.
Step 3: Configure Gmail on the SMTP Add-on
Enter the Gmail details inside SMTP app (to activate SMTP app).
- Enable Use custom mail config
- Enter smtp.gmail.com as your host
- Use port 465
- Enter your Gmail login username [email protected]
- Enter your App password (if 2-Step Verification is enabled)
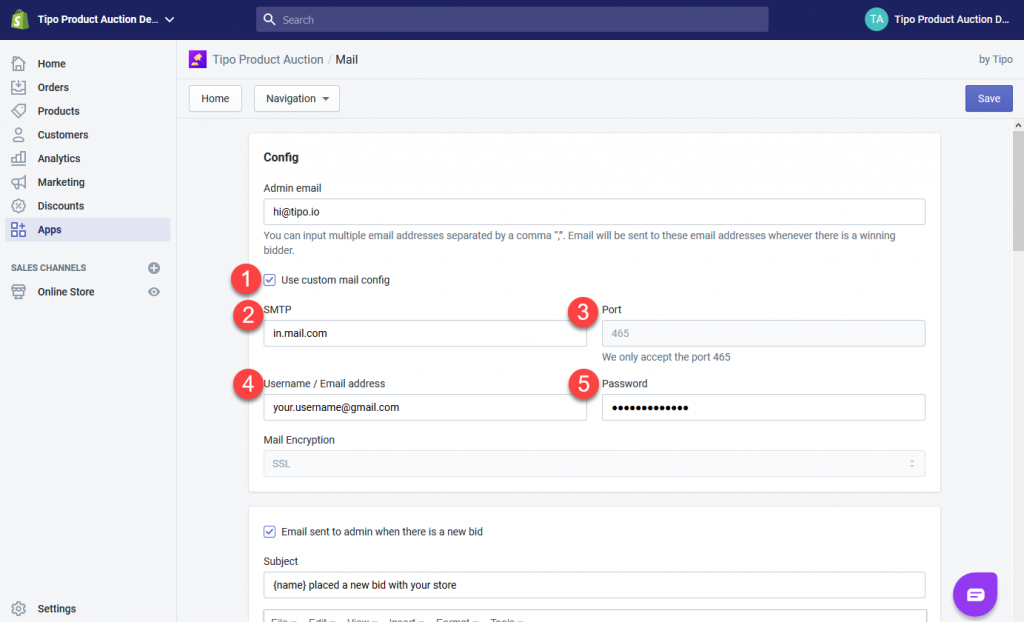
Click Save to finalize the settings on the server.
That’s it. Your Gmail email service has been configured on your server for outgoing transactional emails.